


面對在不斷變化的數字需求中維護強大的PostgreSQL數據庫的挑戰?如果“Patroni”一詞符合您的技術志向,那麼您即將找到一個提升PostgreSQL高可用性的解決方案。
當然,挑戰將會出現,但請勿擔心-您即將踏上一個改造旅程,打造一個堅不可摧的PostgreSQL集群。想像一下未來,數據庫中斷只是一個小插曲,而您的PostgreSQL設置將成為可靠性的典範。
準備好將您的PostgreSQL環境堅固成一個不可動搖的堡壘吧!
前提條件
在實施PostgreSQL高可用性之前,請確保您已經具備以下條件:
- 五個(或更多)Linux服務器-本教程使用Debian 12服務器,每個服務器都具有非root用戶並擁有sudo/管理員權限,如下所示:
| Hostname | IP Address | Used as |
|---|---|---|
| postgres01 | 192.168.5.20 | PostgreSQL Server |
| postgres02 | 192.168.5.21 | PostgreSQL Server |
| postgres03 | 192.168.5.22 | PostgreSQL Server |
| etcd | 192.168.5.15 | Cluster Data Store |
| haproxy | 192.168.5.16 | Load Balancer |
- A client machine (Linux, Windows, or MacOS) with a PostgreSQL client installed.
安裝PostgreSQL服務器和Patroni
滿足所有前提條件後,將此時刻視為為堅固、失效安全的數據庫環境奠定基礎的時刻。目標是通過PostgreSQL 15創建一個高可用性的PostgreSQL部署。但首先,您必須在所有PostgreSQL服務器上安裝所需的軟件包(PostgreSQL服務器和Patroni)。
Patroni 是一個基於 Python 的應用程式,用於在您的數據中心中創建高可用性的 PostgreSQL 部署,從裸機到 Kubernetes。 Patroni 可在官方的 PostgreSQL 存儲庫中找到,並支持 PostgreSQL 伺服器 9.5 到 16 版。
要安裝 PostgreSQL 伺服器和 Patroni,請執行以下操作:
? 注意:在 PostgreSQL 伺服器上完成以下操作。 在本例中,
postgres01、postgres02和postgres03。
1. 開啟終端機並執行下面的 curl 命令,該命令不會輸出任何信息,但會將 PostgreSQL 存儲庫的 GPG 金鑰添加到 /usr/share/keyrings/pgdg.gpg 中。
? 本教程使用 root 帳戶執行命令以確保演示兼容性。 但請記住,使用具有 sudo 權限的非 root 帳戶是極為建議的。 使用非 root 帳戶時,必須在命令前加上
sudo以增強安全性和最佳實踐。
2. 接下來,執行以下命令,該命令不會提供輸出,但會將 PostgreSQL 存儲庫添加到 /etc/apt/sources.list.d/pgdg.list 文件中的套件來源列表中。
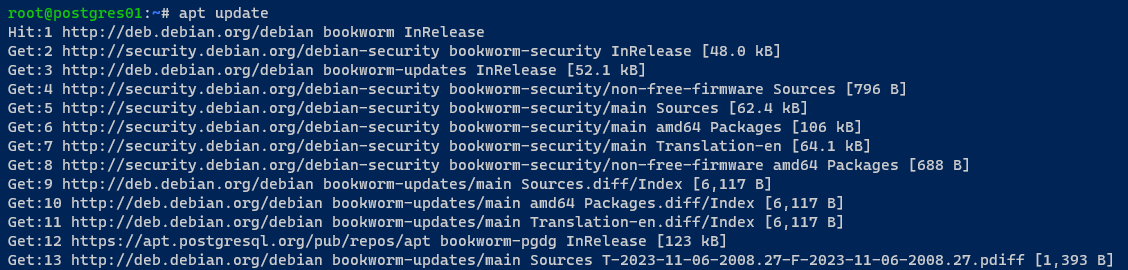
3. 添加後,執行以下apt update命令來刷新您的軟件包索引並檢索更新的軟件包信息。
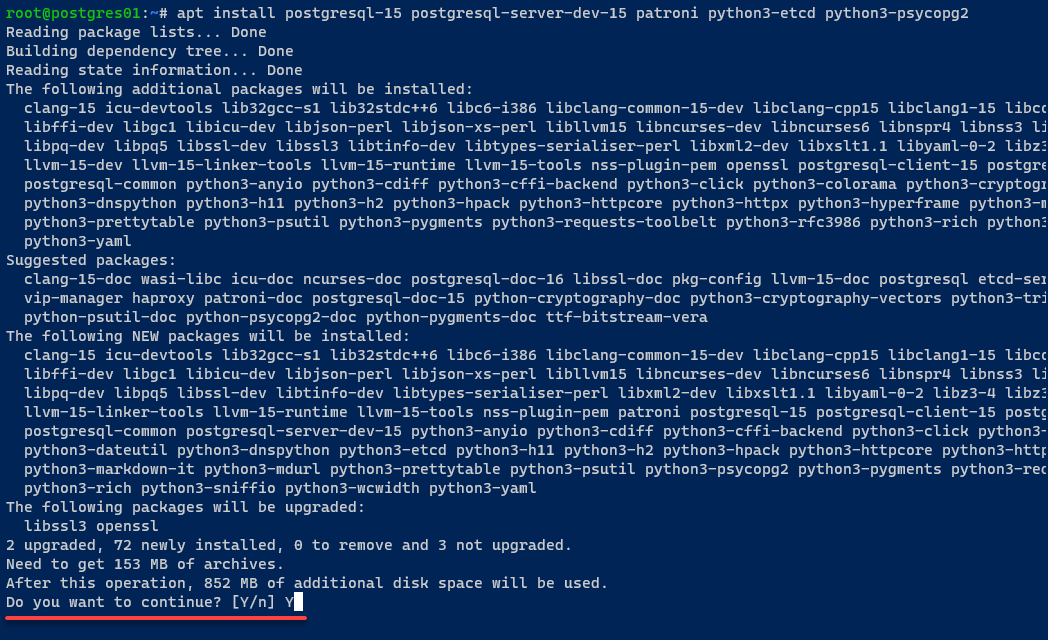
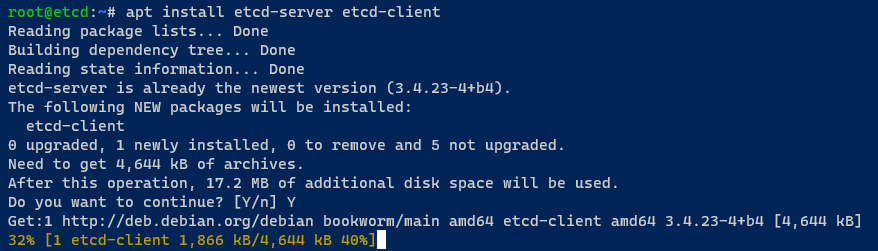
4. 更新後,執行以下命令來安裝以下軟件包:
postgresql-15– PostgreSQL 數據庫管理系統 15 版。patroni– 一個用於 PostgreSQL 高可用性的開源解決方案,是使用 Python 和 etcd 構建 PostgreSQL HA 集群的模板。python3-etcd– 用於與 etcd 交互的 Python 客戶端庫,etcd 是一個分佈式鍵值存儲。該庫允許 Python 應用程序與 etcd 集群通信和管理。python3-psycopg2– Python 3 的 PostgreSQL 适配器,連接 Python 應用程序和 PostgreSQL 數據庫。
在提示時輸入Y以繼續安裝。
5. 安裝完軟件包後,運行以下每個命令,它們不會在終端顯示任何輸出,但執行以下操作:
- 停止
postgresql和patroni服務。在 Debian/Ubuntu 上,postgresql和patroni服務在安裝後會自動啟動。 - 在
/usr/sbin目錄為PostgreSQL二進制文件創建一個symlink。這樣做可以確保patroni能夠執行PostgreSQL二進制文件以創建和管理PostgreSQL。
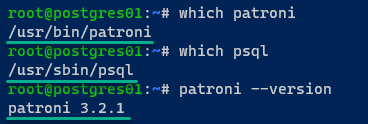
6. 最後,執行以下命令驗證patroni和psql的二進制文件路徑,以及patroni的安裝版本的--version。
以下是patroni (/usr/bin/patroni) 和psql (/usr/sbin/psql) 二進制文件的路徑;已安裝的Patroni版本為3.2.1。
設置和配置etcd伺服器
現在您已經安裝了PostgreSQL Server和Patroni,您需要一個加固在您的PostgreSQL伺服器之間協調的主幹,以實現無縫的高可用性。您將設置和配置etcd,一個鍵值數據存儲庫。
這個鍵值數據存儲庫是幕後的潛在架構,確保與您的PostgreSQL集群部署相關的數據被安全地存儲和高效地管理。
? 注意:請確保在一個獨立的伺服器上安裝etcd。在本例中,etcd被安裝在etcd伺服器上。
要安裝和配置etcd,請按照以下步驟進行:
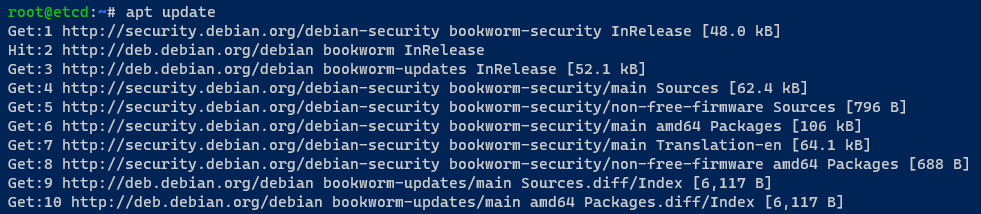
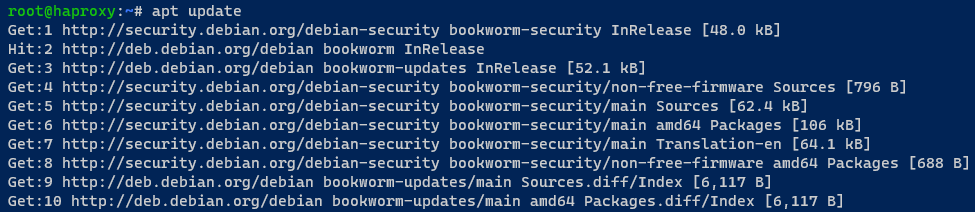
1. 在您的etcd伺服器上,執行下面的命令來update存儲庫索引並獲取最新的包信息。
2. 接下來,執行以下命令在您的伺服器上安裝 etcd。
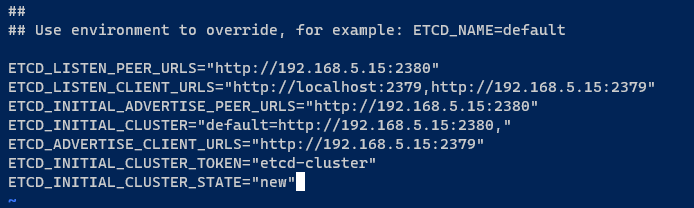
3. 安裝完 etcd 後,使用您喜歡的編輯器打開默認配置 /etc/default/etcd,並插入以下配置。
此配置設置了單個 etcd 集群,請確保將 IP 地址 192.168.5.15 更改為您的內部 IP 地址。
ETCD_LISTEN_PEER_URLS="<http://192.168.5.15:2380>"
ETCD_LISTEN_CLIENT_URLS="<http://localhost:2379>,<http://192.168.5.15:2379>"
ETCD_INITIAL_ADVERTISE_PEER_URLS="<http://192.168.5.15:2380>"
ETCD_INITIAL_CLUSTER="default=http://192.168.5.15:2380,"
ETCD_ADVERTISE_CLIENT_URLS="<http://192.168.5.15:2379>"
ETCD_INITIAL_CLUSTER_TOKEN="etcd-cluster"
ETCD_INITIAL_CLUSTER_STATE="new"
保存更改,然後退出編輯器。
4. 現在,執行以下 systemctl 命令來重新啟動 etcd 並應用您的修改。
此命令沒有輸出,但您將在以下步驟中驗證更改。
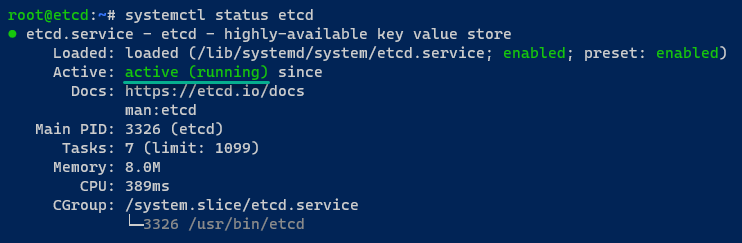
5. 一旦 etcd 重新啟動,請驗證 etcd 服務是否正在運行並已啟用。
如果 etcd 服務正在運行,您應該會看到輸出 active (running)。啟用時,您將看到輸出 enabled,這也意味著 etcd 將在啟動時自動啟動。
6. 最後,執行以下 etcdctl 命令來驗證 etcd 集群中可用伺服器的列表。
在這種情況下,etcd 作為單節點集群在本地 IP 地址 http://192.168.5.15:2379/ 上運行。

透過 Patroni 引導 PostgreSQL 集群
隨著 etcd 伺服器的穩定運行,您正站在下一個關鍵階段的門檻上。通過使用 Patroni 啟動引導程序,您可以將 PostgreSQL 配置提升為強大且容錯的叢集。
? 如果您在現有的 PostgreSQL 伺服器上部署 PostgreSQL 叢集,請務必先備份您的數據庫。
為了通過 Patroni 引導程序啟動您的 PostgreSQL 叢集,請在每個 PostgreSQL 伺服器上執行以下操作:
1. 打開 Patroni 的默認配置文件 (/etc/patroni/config.yml),在您的文本編輯器中添加以下配置。
請確保將 name 選項的值替換為您的 PostgreSQL 伺服器的主機名(即 postgres01),但請不要關閉編輯器。
此配置設置了名為 postgres 的 PostgreSQL 叢集。
2. 接下來,添加以下配置以設置 Patroni REST API 在 192.168.5.20:8008 上運行。
您必須確保叢集中的每個 PostgreSQL 伺服器都可以通過 API 進行連接。因此,請將 IP 地址 192.168.5.20 替換為每個 PostgreSQL 伺服器的相應 IP 地址。
3. 將以下配置添加以啟用與 etcd 整合。在此情況下,etcd 伺服器正在 IP 位址 192.168.5.15 上運行。
4. 現在,添加以下配置以透過 initdb bootstrap PostgreSQL 伺服器。
此配置設置客戶端驗證的默認規則和設定(pg_hba.conf),以及使用密碼 admin 創建新用戶。
請確保將 PostgreSQL 叢集的 IP 位址輸入到 pg_hba 部分,並在 users 部分更改默認的 admin 密碼。
5. 在配置了 PostgreSQL 啟動方式之後,插入以下配置以設置 PostgreSQL 在每個服務器上運行的方式。
至於 postgres01 服務器,PostgreSQL 將運行在 IP 地址 192.168.5.20,數據目錄為 /var/lib/patroni。
此外,此配置創建了一個名為 replicator 的新用戶用於複製操作,以及一個具有密碼(secretpassword)的 postgres 用戶作為超級用戶/管理員。
請確保更改 IP 地址和默認密碼(secretpassword)。
6. 將以下配置插入以設置標籤,決定 PostgreSQL 伺服器在叢集上的行為,保存更改,並關閉文件。
7. 使用保存的配置运行以下命令,集体准备Patroni数据目录,确保它适当地属于并受到了为PostgreSQL使用而保护。
这些命令不提供输出,但这一步在使用Patroni设置高可用性的PostgreSQL数据库集群中非常关键。
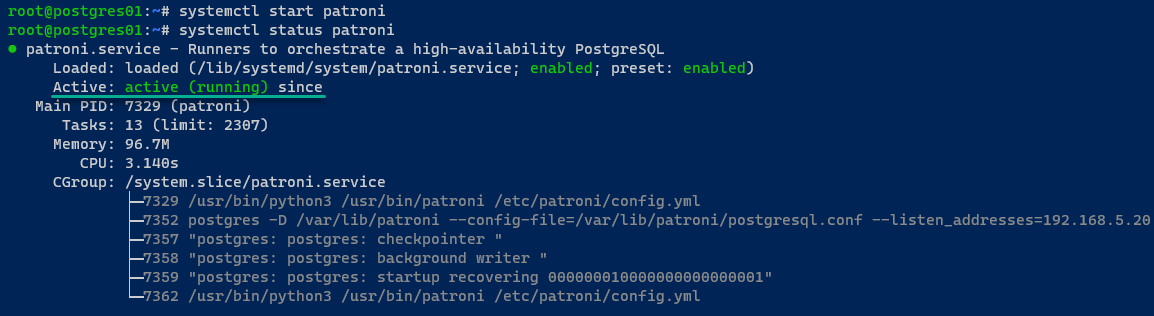
8. 接下来,执行以下systemctl命令以启动和验证patroni服务。
在postgres01服务器上,PostgreSQL服务器运行,并且集群初始化。此外,postgres01服务器被选为集群领导者。
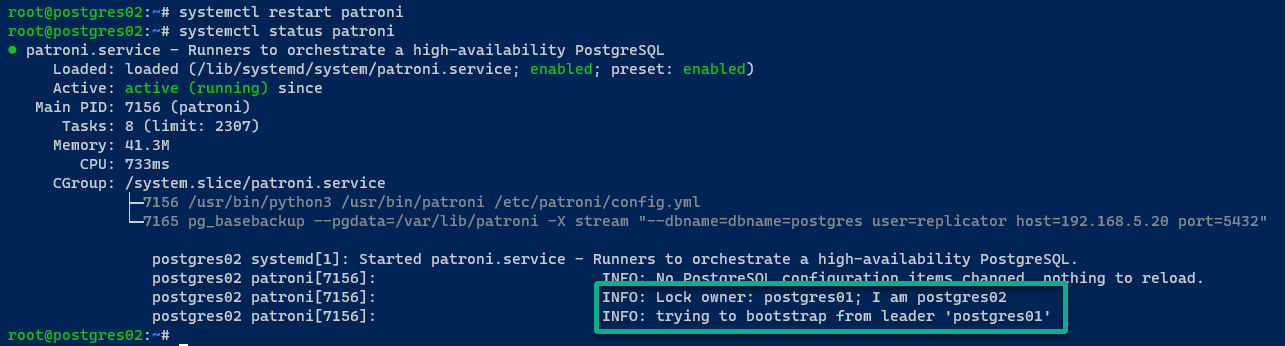
在postgres02服务器上,PostgreSQL服务器通过Patroni启动,并通过REST API加入PostgreSQL集群。
如果一切顺利,您将看到以下消息:
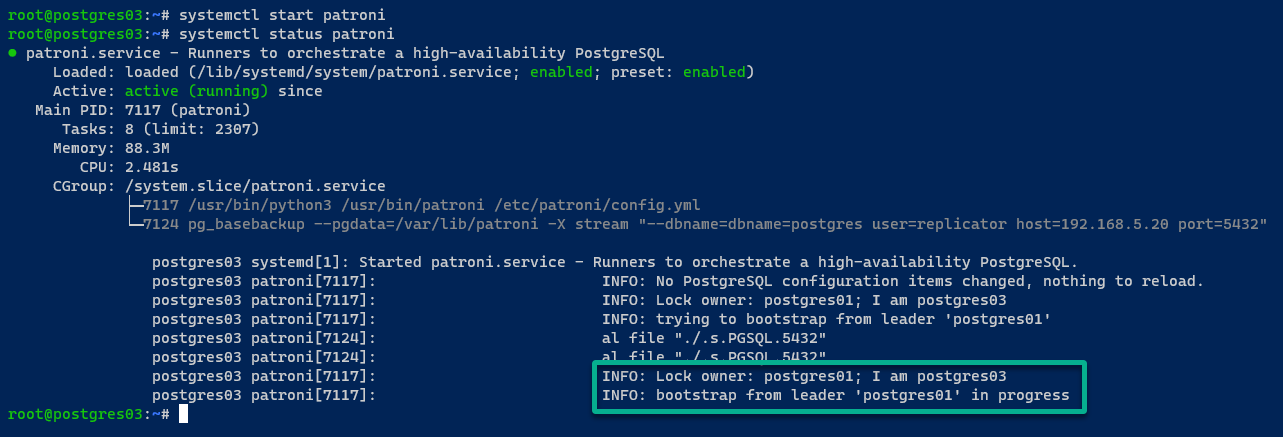
在postgres03服务器上,输出与postgres02服务器类似。
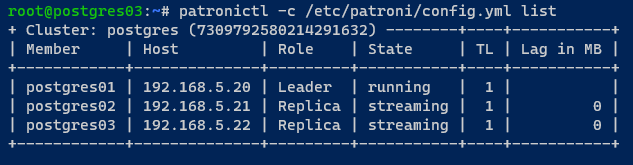
9. 使用初始化的 PostgreSQL 集群,執行以下 patronictl 指令來顯示由 Patroni 管理的 PostgreSQL 實例的 列表。
在以下輸出中,您可以看到您的 PostgreSQL 集群 (postgres) 正在運行。
請注意,您的集群運行三個成員:postgres01 為集群 Leader, postgres02,以及 postgres03 為 Replica,模式/狀態為 streaming。
10. 最後,執行以下 systemctl 指令來在系統啟動時禁用 postgresql 服務的自動啟動。
如果成功,此指令不會有任何輸出,但由於 Patroni 控制新的 PostgreSQL 服務器,這一步是至關重要的。
安裝和配置 HAProxy 作為負載均衡器
在部署了 PostgreSQL 集群後,當出現問題時如何使其可從客戶端訪問並實現故障切換?解決方案是在您的 PostgreSQL 集群之前將 HAProxy 作為負載均衡器。
HAProxy 是您的關鍵,它使您的 PostgreSQL 集群能夠處理不同的工作負載、智能地分發請求並保持高可用性。
? 注意:在獨立的服務器上安裝 HAProxy。在本例中,HAProxy 服務器安裝在 IP 地址為 192.168.5.16 的 haproxy 服務器上。
要為 PostgreSQL 集群安裝和配置 HAProxy 負載均衡器,請按照以下步驟進行:
1. 使用您喜好的文本编辑器打开/etc/hosts文件,插入您的PostgreSQL服务器IP地址和主机名,保存更改,然后关闭文件。
192.168.5.20    postgres01
192.168.5.21    postgres02
192.168.5.22    postgres03
2. 接下来,运行下面的命令来更新您的软件包索引。
3. 一旦更新,执行以下命令来安装 haproxy 软件包到您的系统。
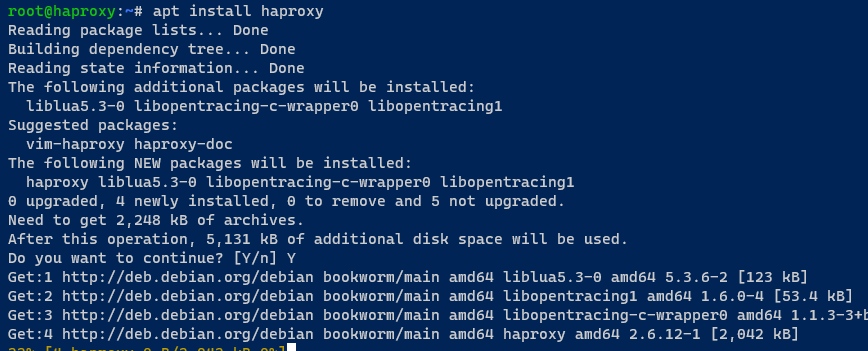
4. 现在,运行以下命令将默认的HARPOXY配置备份到/etc/haproxy/haproxy.cfg.orig。
此命令不产生输出,仅是在进行任何修改之前的预防措施。
5. 接下来,使用您喜好的编辑器创建一个名为/etc/haproxy/haproxy.cfg的新文件,并插入以下配置。确保用您自己的PostgreSQL服务器IP地址替换每个地址,保存文件并关闭编辑器。
此HAProxy配置将HAProxy设置为PostgreSQL群集的负载均衡器,有两个代理:
stats– 此块在端口8080上运行,监视HAProxy服务器性能和后端。postgres– 此块是PostgreSQL群集的负载均衡器配置。
# 全球配置設置
global
# 全球最大連接數
maxconn 100
# 日誌設置
log 127.0.0.1 local2
# 預設設置
defaults
# 全球日誌配置
log global
# 設置模式為TCP
mode tcp
# 重試次數
retries 2
# 客戶端超時
timeout client 30m
# 連接超時
timeout connect 4s
# 服務器超時
timeout server 30m
# 檢查超時
timeout check 5s
# 統計配置
listen stats
# 設置模式為HTTP
mode http
# 綁定到8080端口
bind *:8080
# 啟用統計
stats enable
# 統計URI
stats uri /
# PostgreSQL配置
listen postgres
# 綁定到5432端口
bind *:5432
# 啟用HTTP檢查
option httpchk
# 預期狀態200
http-check expect status 200
# 服務器設置
default-server inter 3s fall 3 rise 2 on-marked-down shutdown-sessions
# 定義PostgreSQL服務器
server postgres01 192.168.5.20:5432 maxconn 100 check port 8008
server postgres02 192.168.5.21:5432 maxconn 100 check port 8008
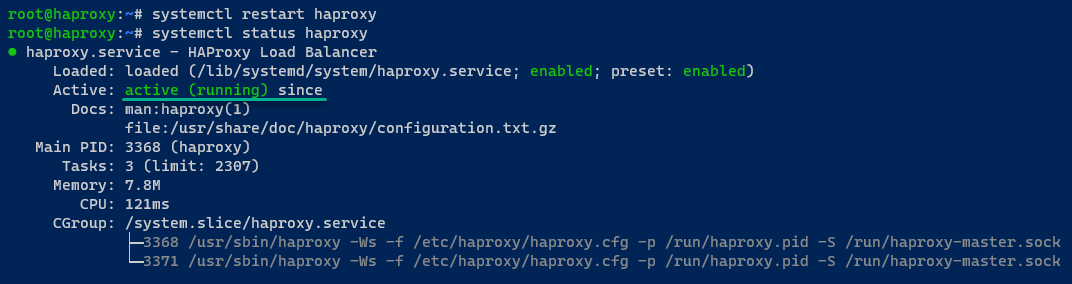
server postgres03 192.168.5.22:5432 maxconn 100 check port 80086. 配置好HAProxy後,運行以下的`systemctl`命令來`重啟`並驗證(`狀態`)HAProxy服務。
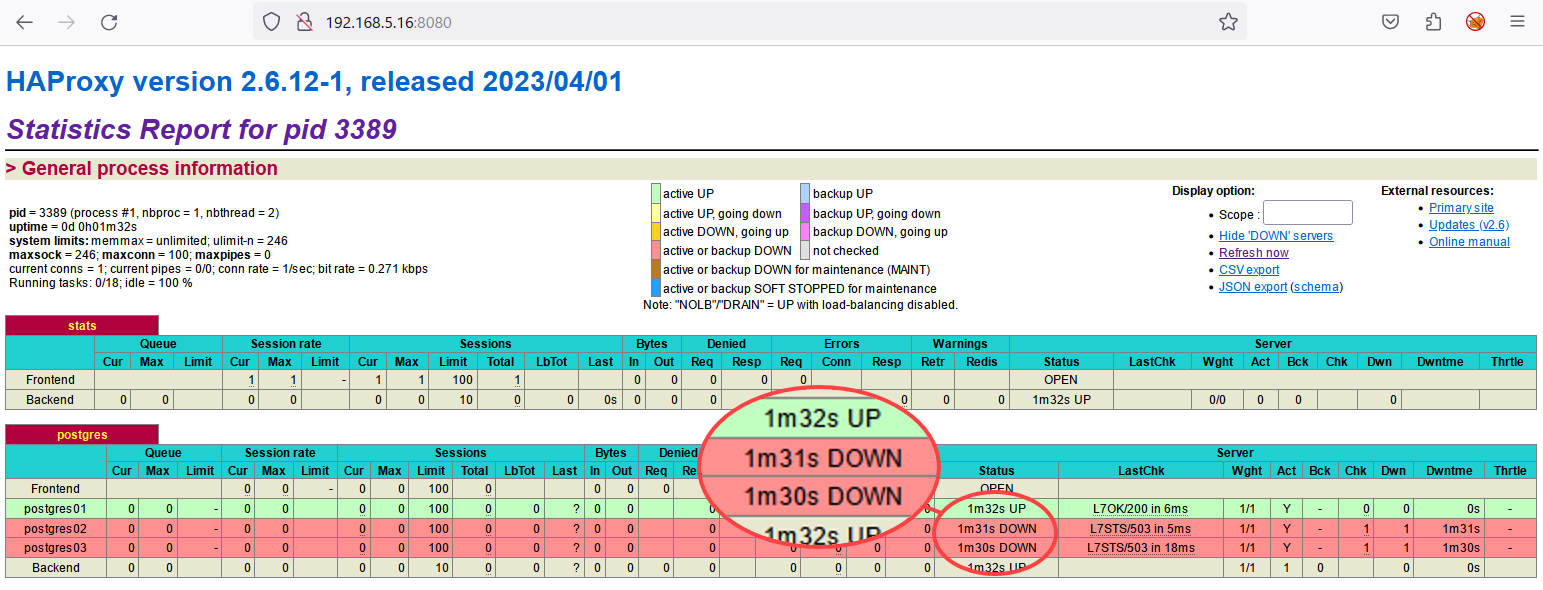
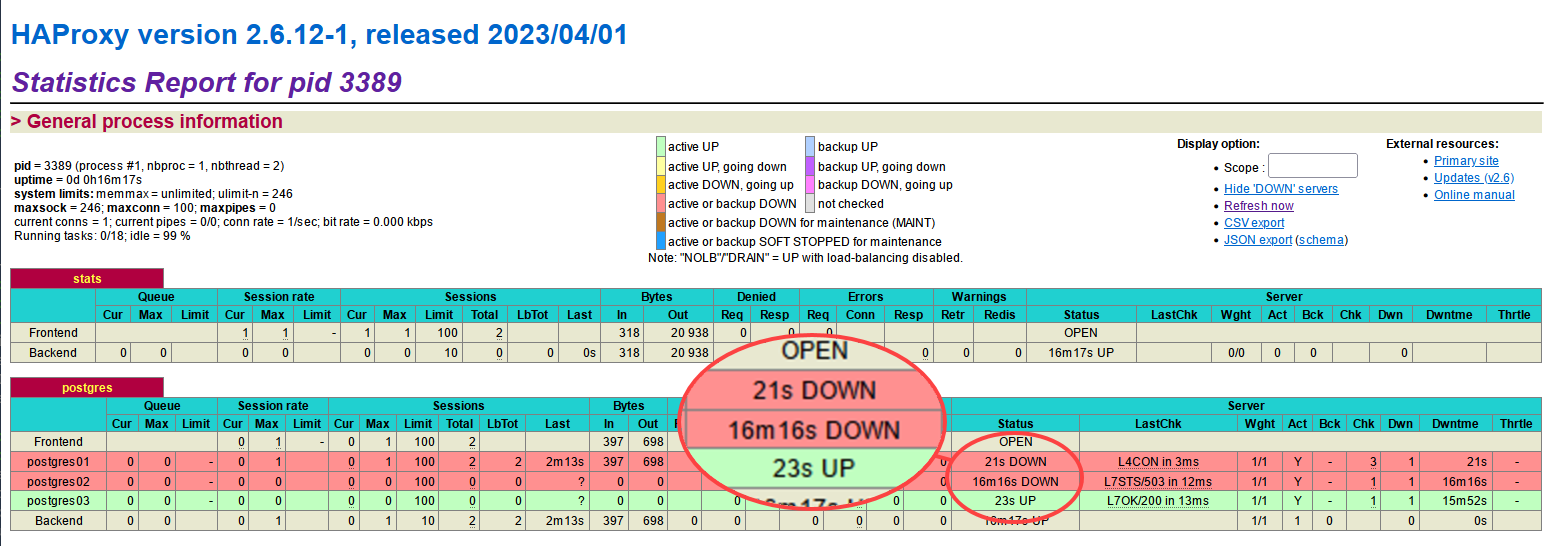
7. 最後,打開您偏好的網頁瀏覽器,訪問HAProxy IP地址加上8080端口(即,http://192.168.5.16:8080/)。在以下輸出中,您可以看到:
在以下輸出中,您可以看到:
- 用於監控HAProxy狀態的統計代理。
- 作為PostgreSQL集群的負載平衡器的postgres代理。
注意postgres02和postgres03服務器標記為下線,因為它們都在流式模式下運行。
測試 PostgreSQL 集群的故障轉移
從設置 HAProxy 作為可靠的負載均衡器開始,現在是時候測試您的 PostgreSQL 集群了。這一關鍵步驟將顯示您的高可用性設置的彈性。您必須確保即使面臨潛在故障,您的 PostgreSQL 集群仍然堅固且反應靈敏。
為了測試 PostgreSQL 集群的故障轉移,您將從客戶端機器連接到集群,並通過以下步驟驗證故障轉移操作:
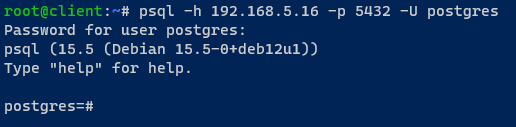
1. 登錄到您的客戶端機器,打開終端並運行以下psql命令,通過 HAProxy 負載均衡器連接到 PostgreSQL。
在提示時輸入您的 PostgreSQL 密碼。您可以在/etc/patroni/config.yml文件中找到必要的密碼信息。
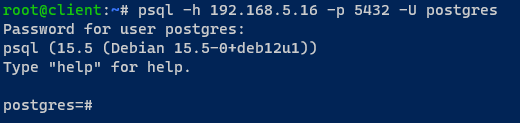
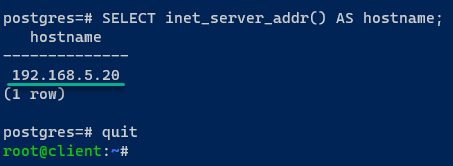
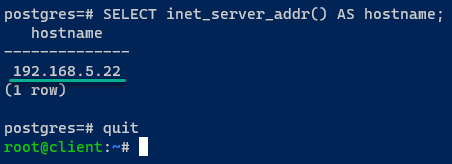
2. 一旦連接,運行以下查詢查找您所連接的 PostgreSQL 服務器,然後quit當前的 PostgreSQL 會話。
如果您的 PostgreSQL 安裝成功,您將連接到postgres01服務器。
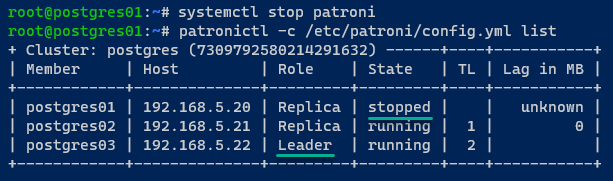
3. 現在,切換到 postgres01 服務器,運行以下命令停止patroni服務,並list PostgreSQL 集群的狀態。
此步驟允許您測試 PostgreSQL 故障轉移。
您可以看到postgres01服務器的狀態已更改為stopped,新的集群領導者委派給postgres03服務器。
4. 返回到HAProxy監控統計資料,您將看到postgres01服務器已經宕機,而postgres03現在是UP狀態。
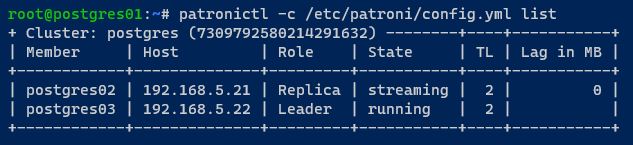
或者,執行以下patronictl命令來驗證PostgreSQL集群的狀態。
如下所示,postgres01服務器不再在集群中。
5. 切換回客戶端機器,運行以下psql命令來通過HAProxy連接到PostgreSQL服務器。
6. 一旦連接,運行以下查詢來驗證您當前所連接的PostgreSQL服務器。
如果故障切換成功,您將連接到其中一個正在運行的服務器,本例中是postgres03。
結論
踏上這個旅程,您將自己沉浸在確保PostgreSQL數據庫高可用性的複雜性中,利用了Patroni和HAProxy的強大組合。通過無縫地導航過程中的PostgreSQL和Patroni設置階段,您熟練地處理了配置etcd服務器的細微之處。
隨著您構建了一個具有彈性的PostgreSQL集群並且精心調整了使用HAProxy的負載平衡的藝術,您的管弦樂技能成為了突出表現。這個高風險冒險的頂點是對您的PostgreSQL集群故障切換能力進行全面測試。
考慮擴展您的專業知識,反思在建立強大且容錯的PostgreSQL環境方面的成就。為何不探索實施使用Kubernetes的Patroni以獲得更具動態性的環境?或者深入研究在多個數據中心設置PostgreSQL高可用性的細節?