


保護數據是任何組織的首要任務,而加密是保護數據的最有效方法之一。但究竟如何實現呢?Google Cloud Platform(GCP)提供了一個名為Google Key Management Service(KMS)的金鑰管理服務,讓您可以快速創建和管理加密金鑰。
在這個教程中,您將學習如何在GCP KMS中創建和使用金鑰。您還將深入了解與金鑰管理相關的一些重要概念,如金鑰、金鑰環和金鑰版本。
準備好了嗎?繼續閱讀,提升您的數據安全級別!
先決條件
本教程將進行實際演示。要跟隨操作,請確保您擁有一個啟用計費的GCP帳戶,不過,免費試用也足夠使用。
A Google Cloud Project is a collection of resources you create and manage in GCP. Note that you should create separate projects for each of your applications. Doing so lets you efficiently manage the resources for each application. In the end, you can delete all the resources associated with a project, which is helpful for clean-up.
要創建一個新的Google Cloud項目:
1. 打開您喜歡的Web瀏覽器,並登錄到GCP控制台。類似AWS控制台,GCP控制台是用於在Google Cloud中管理資源的基於Web的界面。
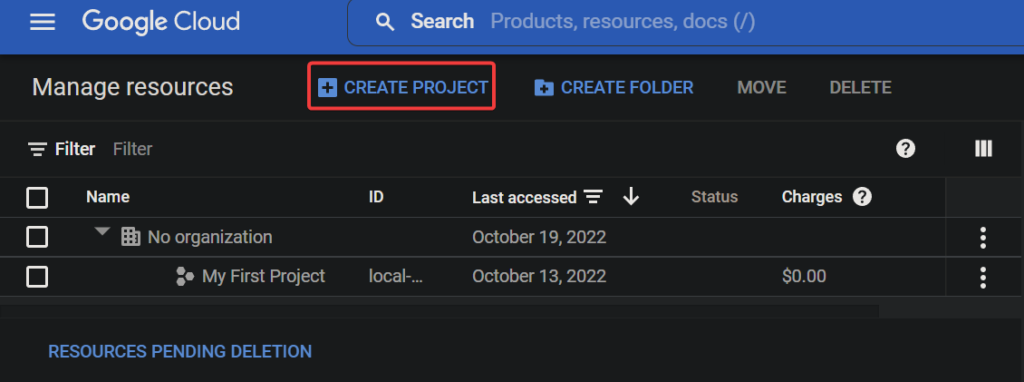
2. 在GCP控制台上,導航到管理資源頁面,您可以在那裡看到並管理所有現有的項目。
3. 接下來,單擊“創建項目”按鈕以創建新項目。
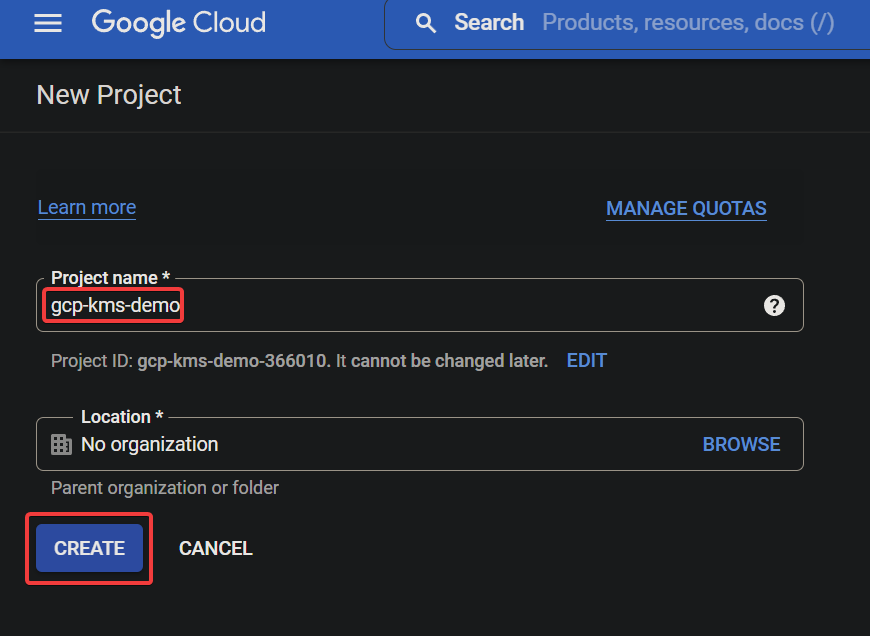
最後,配置新項目的以下設置,然後單擊創建以創建您的項目。
- 項目名稱 – 輸入您的項目名稱,它不需要是唯一的,稍後可以更改。本教程中選擇的項目名稱是gcp-kms-demo。
- 位置 – 選擇要創建此項目的父組織或文件夾。您新建的項目將成為頂層父級。但如果您沒有組織,則可以跳過此字段。
如果您使用試用帳戶,位置字段可能不會出現。
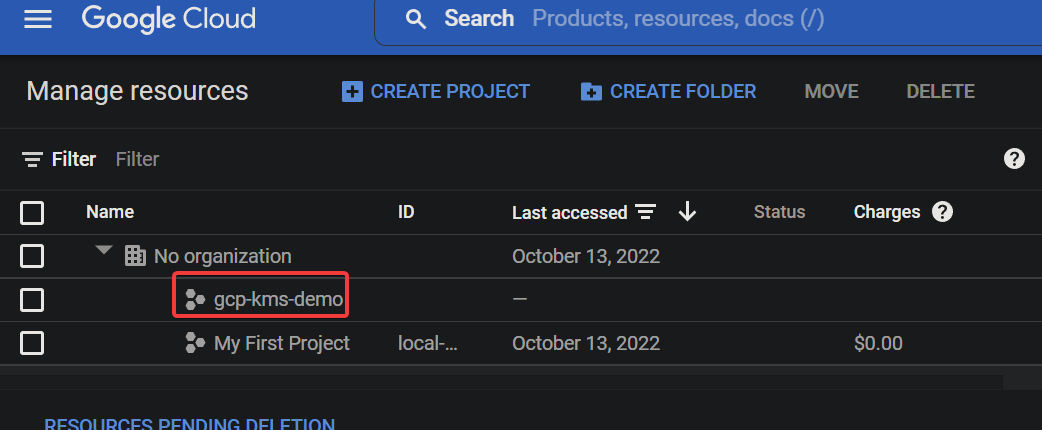
如果成功,您將看到您新建的 Google Cloud 項目列在下面顯示的列表中。
為 Google Cloud 項目啟用 Cloud KMS API
您剛創建了您的第一個 Google Cloud 項目,通常您不能讓它無保護。不用擔心!Cloud KMS API 是一組由 Google 提供的加密 API,您可以使用它來保護您的數據。
要使用 Cloud KMS API,您需要為您的項目啟用它:
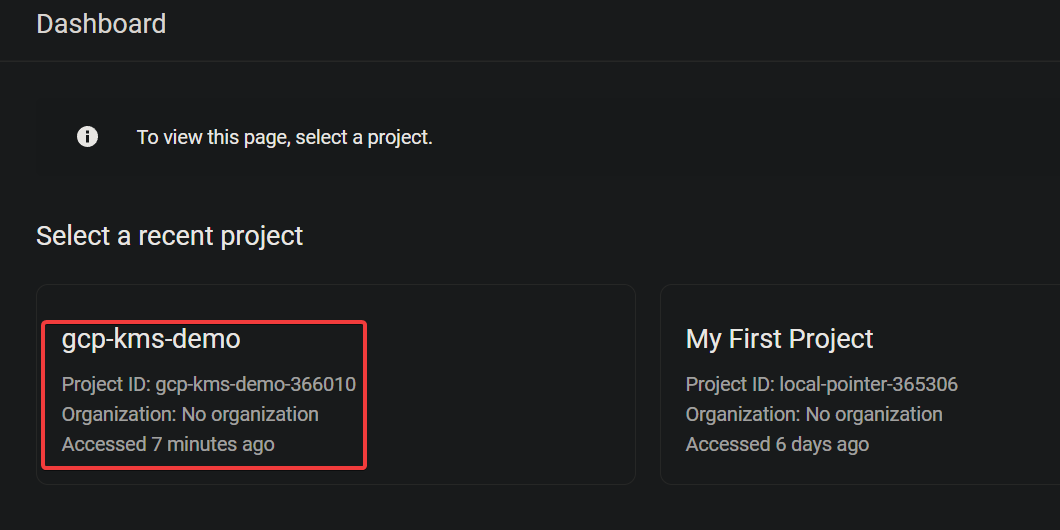
1. 轉到Google 項目選擇器頁面,選擇您的 Google Cloud 項目(gcp-kms-demo)。
2. 接下來,轉到啟用對 API 的訪問權限頁面,並點擊「下一步」以確認為所選項目啟用 API。
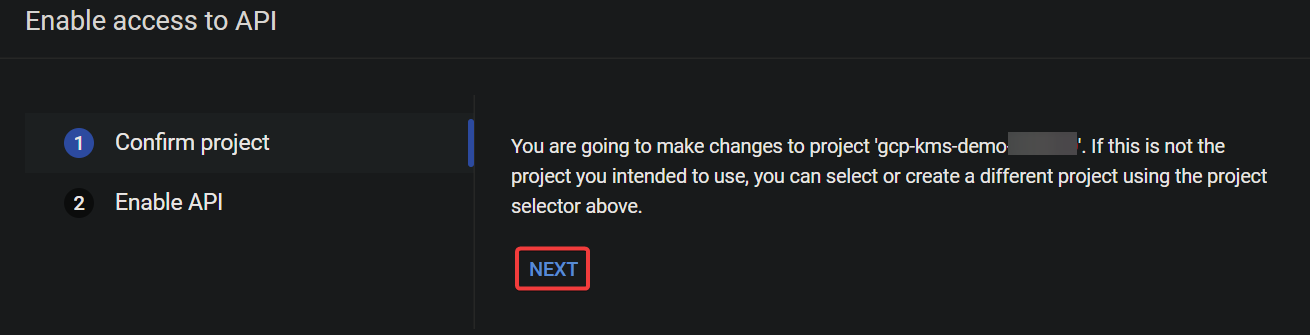
3. 現在,點擊「啟用」以啟用 Cloud KMS API。

此時,Cloud KMS API 已為您的專案啟用。 您現在可以開始使用 Cloud KSM API 來建立和管理加密金鑰。

啟動 Cloud Shell 以建立金鑰和金鑰圈
啟用 Cloud KMS API 使您準備好建立金鑰和金鑰圈以加密和解密您的資料。 金鑰和金鑰圈是 Cloud KMS 中的基本概念。
| Key | A key is an encryption key stored in a keyring that you can use to encrypt and decrypt your data. Each key has a name, and the name must be unique within the keyring. You can use IAM ( Identity and Access Management) policies to control who has access to keys. |
| Keyring | A keyring is a container in Cloud KMS that holds a set of keys. You can think of the keyring as a folder on your computer that contains many files. But in essence, a keyring holds a set of keys in a specific Cloud KMS location. |
但在建立金鑰和金鑰圈之前,您必須先啟動 Cloud Shell。 Cloud Shell 是一個免費的互動式 shell,您可以使用它在 Google Cloud 平台上運行命令,而無需在您的機器上安裝任何工具。
1. 在 GCP 控制台中,按一下「啟用 Cloud Shell」按鈕(右上方),如下所示,以啟動 Cloud Shell。

A Cloud Shell session initializes, as shown below (at the bottom of the page), where you can run commands.

2. 接下來,在 Cloud Shell 中執行以下 gcloud 指令,這是您第一次在 Cloud Shell 中執行 gcloud 指令時會出現的提示,要求您授權 gcloud 工具訪問 KSM API。 以在全域位置創建一個名為 kms-demo-keyring 的新金鑰圈。
–location “global”
當提示時,點擊“授權”按鈕以繼續執行命令。
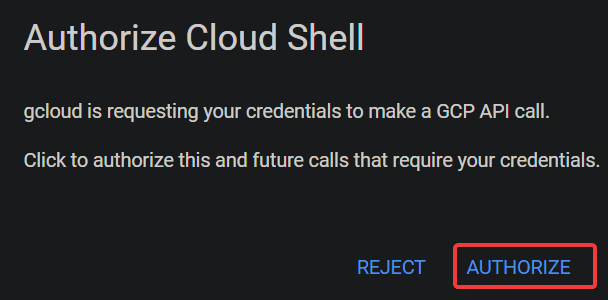
首次在Cloud Shell中運行gcloud命令時會出現此提示,詢問您是否授權gcloud工具訪問KSM API。

如下所示,在成功創建金鑰圈後不會顯示任何輸出消息。
請注意,位置(global)必須與您為金鑰圈設置的位置相同。
–location “global” \
–keyring “kms-demo-keyring” \

–purpose “encryption”
每次創建或輪換金鑰時,Cloud KMS都會創建金鑰的新版本。該功能可讓您在必要時輕鬆恢復到先前的版本。
| PURPOSE | ENCRYPT_DECRYPT | Indicates the purpose of the key (encryption and decryption). |
| ALGORITHM | GOOGLE_SYMMETRIC_ENCRYPTION | Indicates the key uses Google Symmetric Encryption, the default algorithm for Cloud KMS keys. |
| PROTECTION_LEVEL | SOFTWARE | Indicates the key is software-protected. |
| LABELS | You can add labels to keys to categorize them or to add additional information. | |
| PRIMARY ID | 1 | Indicates the key is the primary key for the keyring, which is what Cloud KMS uses by default when you do not specify a key.
Note that you can have only one primary key per keyring. |
| PRIMARY STATE | ENABLED | Shows the current status of the key. The ENABLED state indicates the key can be used for its specified purpose. |

與創建金鑰圈一樣,在成功創建金鑰時不會顯示任何輸出消息。
但是,此時您已經擁有了可用於加密和解密數據的金鑰圈和金鑰。
4. 現在,運行以下命令來列出位於金鑰圈(kms-demo-keyring)中的金鑰。
你將看到類似下面截圖的輸出,其中包含以下信息:
使用GCP KMS加密和解密數據

1. 執行下面的命令,該命令不提供輸出,但會創建一個文本文件(gcp-kms-demo.txt),其中包含一些要加密的文本。
2. 接下來,依次運行以下每個命令以列出(ls)文本文件(gcp-kms-demo.txt)並查看(cat)其內容以驗證數據。
# 列出文本文件
# 查看文本文件的內容
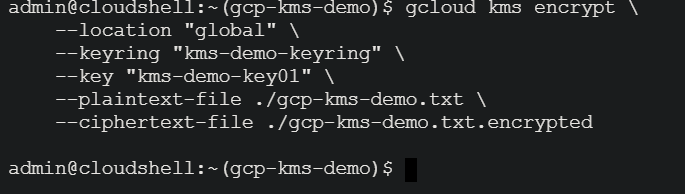
3. 驗證後,運行下面的命令,使用您的密鑰(kms-demo-key01)加密文件(gcp-kms-demo.txt)中的數據。加密後的數據將存儲在一個名為gcp-kms-demo.txt.encrypted的新文件中。

–location “全球” \
–keyring “kms-demo-keyring” \
–key “kms-demo-key01” \
–plaintext-file ./gcp-kms-demo.txt \

–ciphertext-file ./gcp-kms-demo.txt.encrypted
4. 現在,運行以下命令嘗試查看加密文件的數據(gcp-kms-demo.txt.encrypted)。
你將看到破碎、奇怪和無法讀取的符號,如下所示。這個輸出表示文件已成功加密。
您需要將這個加密文件存儲在安全的位置。例如,您可以在AWS S3、GCP Cloud Storage或Azure Blob Storage中存儲多個副本。Google Cloud不保存您的數據的明文版本。因此,如果您丟失了加密文件,解密文件以獲取原始數據將是不可能的。

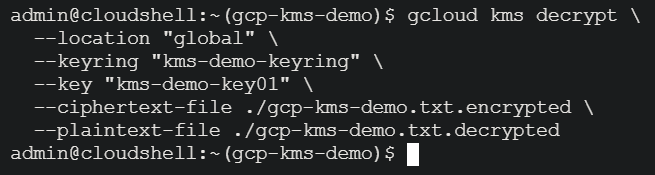
5. 加密後,運行以下命令使用相同的金鑰(kms-demo-key01)解密數據(gcp-kms-demo.txt.encrypted),但這次將解密的數據存儲在一個名為gcp-kms-demo.txt.decrypted的新文件中。
與加密一樣,此命令不會提供輸出,但您將在下一步驗證解密結果。
–location “global” \
–keyring “kms-demo-keyring” \

–key “kms-demo-key01” \
–ciphertext-file ./gcp-kms-demo.txt.encrypted \
–plaintext-file ./gcp-kms-demo.txt.decrypted
6. 最後,執行以下命令以查看(cat)解密文件(gcp-kms-demo.txt.decrypted)並驗證數據是否成功解密。
在下面,您可以看到您保存在文本文件中的原始數據。恭喜!您已成功使用Google Cloud KMS進行數據加密和解密。
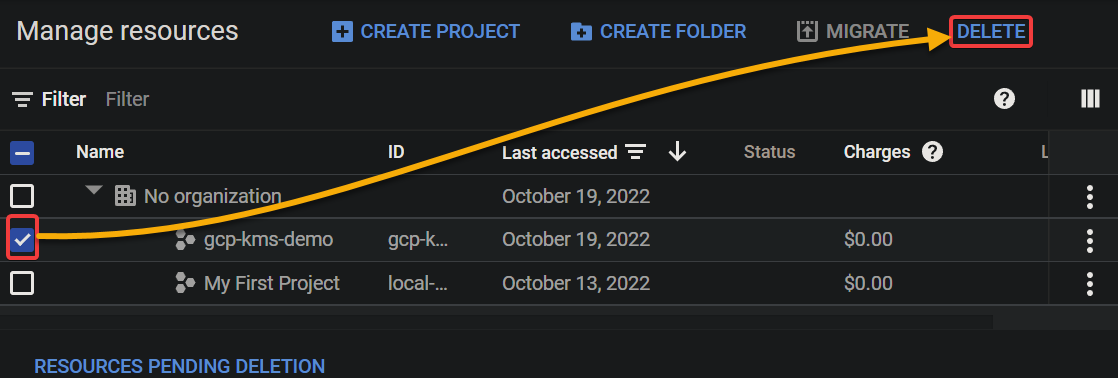
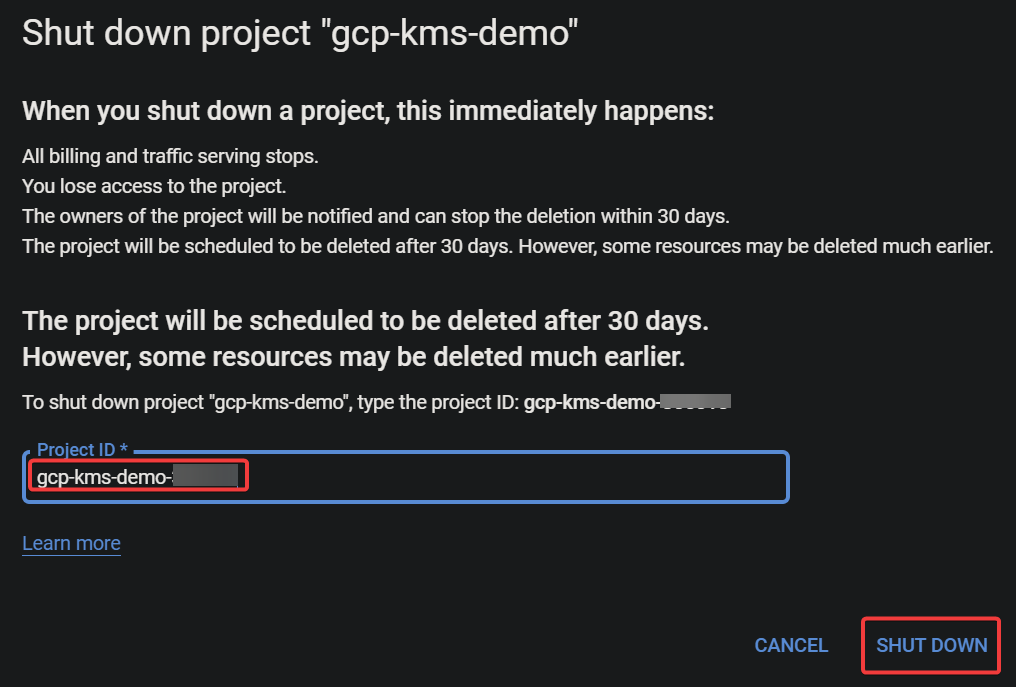
清理Google Cloud資源