


データの保護は、どの組織にとっても最優先事項であり、暗号化はデータを保護するための最も効果的な方法の1つです。では、具体的にはどのように保護されるのでしょうか?Google Cloud Platform(GCP)は、Google Key Management Service(KMS)と呼ばれるキーマネジメントサービスを提供しており、これにより暗号化キーを迅速に作成および管理できます。
このチュートリアルでは、GCP KMSでキーを作成および使用する方法を学びます。また、キーマネジメントに関連するキー、キーリング、キーバージョンなどの重要な概念も理解します。
準備はできましたか?引き続き読んで、データセキュリティをさらに向上させましょう!
前提条件
このチュートリアルでは、実際のデモを行います。一緒に進めるためには、アクティブな請求情報を持つGCPアカウントが必要ですが、無料トライアルでも問題ありません。
A Google Cloud Project is a collection of resources you create and manage in GCP. Note that you should create separate projects for each of your applications. Doing so lets you efficiently manage the resources for each application. In the end, you can delete all the resources associated with a project, which is helpful for clean-up.
新しいGoogle Cloudプロジェクトを作成するには:
1. 好きなウェブブラウザを開き、GCPコンソールにログインします。AWSコンソールと同様、GCPコンソールはGoogle Cloudのリソースを管理するためのウェブベースのインターフェースです。
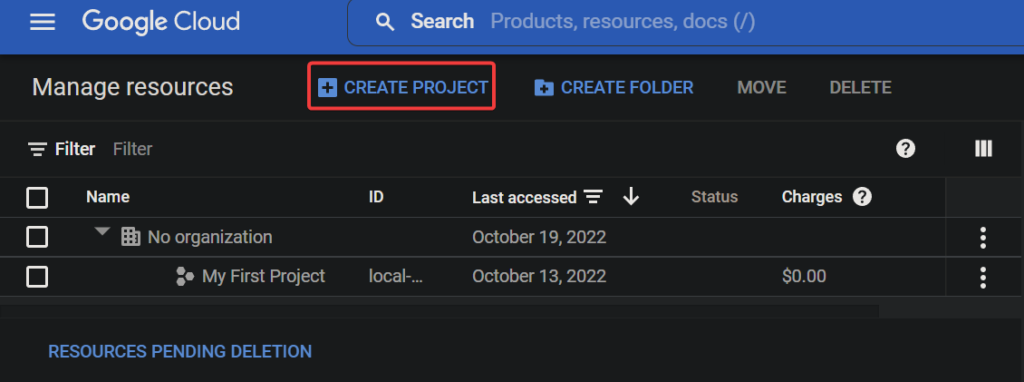
2. GCPコンソールで、既存のすべてのプロジェクトを表示および管理できるリソースの管理ページに移動します。
3. 次に、新しいプロジェクトを作成するためにCREATE PROJECTボタンをクリックします。
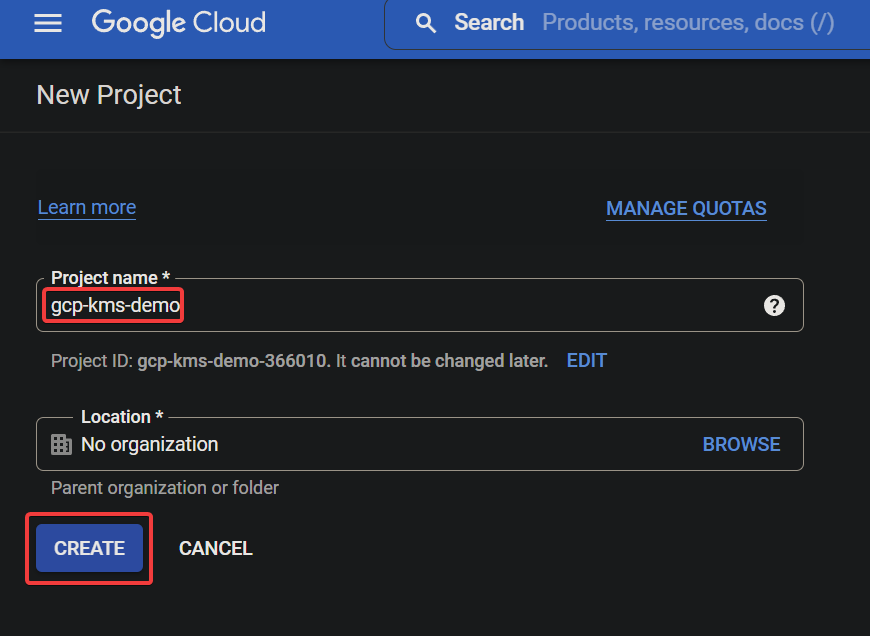
最後に、新しいプロジェクトの以下の設定を構成し、CREATEをクリックしてプロジェクトを作成します。
- プロジェクト名 – プロジェクト名を入力してください。これは一意である必要はありませんし、後で変更することもできます。このチュートリアルでは、プロジェクト名にgcp-kms-demoを選択しました。
- 場所 – このプロジェクトを作成する親組織またはフォルダを選択します。新しく作成したプロジェクトはトップ親になります。ただし、組織がない場合はこのフィールドをスキップできます。
試用アカウントを使用している場合、場所フィールドが表示されないことがあります。
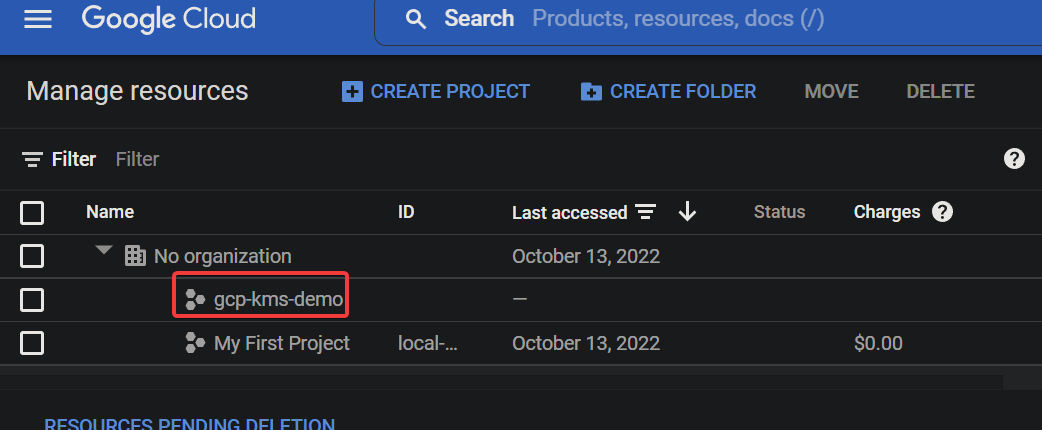
成功した場合、以下に示すように新しく作成されたGoogle Cloudプロジェクトがリストされます。
Google CloudプロジェクトのCloud KMS APIを有効にする
あなたはまさに最初のCloudプロジェクトを作成しました。通常、これを保護せずに残すことはできません。心配しないでください! Cloud KMS APIは、データを保護するために使用できるGoogle提供の暗号化APIのセットです。
Cloud KMS APIを使用するには、プロジェクトで有効にする必要があります。
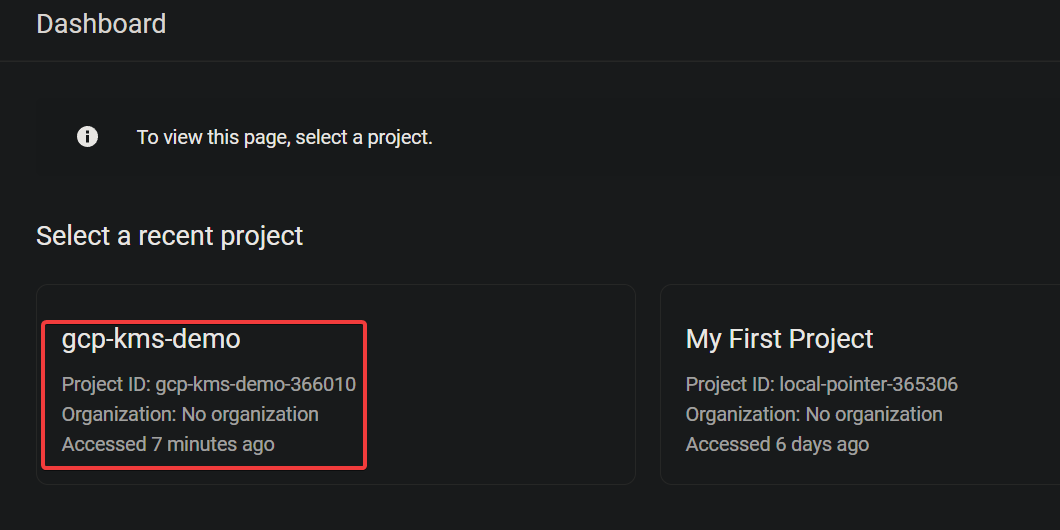
1. Googleプロジェクトセレクターページに移動し、Google Cloudプロジェクト(gcp-kms-demo)を選択します。
2. 次に、APIへのアクセスを有効にするページに移動し、選択したプロジェクトのAPIを有効にすることを確認するために次へをクリックします。
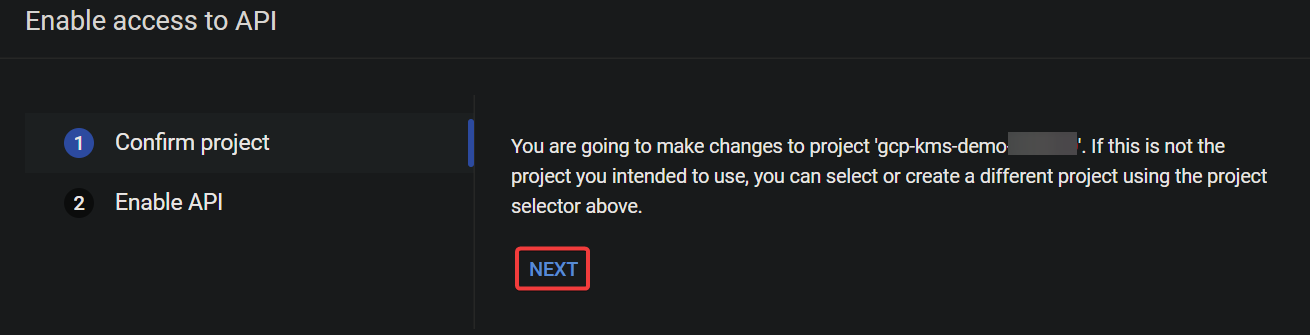
3. 今、Cloud KMS APIを有効にするためにENABLEをクリックします。

この時点で、プロジェクトにはCloud KMS APIが有効になっています。これで、Cloud KMS APIを使用して暗号化キーを作成および管理することができます。

キーとキーリングを作成するためにCloud Shellを起動する
Cloud KMS APIを有効にすると、データを暗号化および復号化するためのキーとキーリングの作成の準備が整います。キーとキーリングは、Cloud KMSの基本的な概念です。
| Key | A key is an encryption key stored in a keyring that you can use to encrypt and decrypt your data. Each key has a name, and the name must be unique within the keyring. You can use IAM ( Identity and Access Management) policies to control who has access to keys. |
| Keyring | A keyring is a container in Cloud KMS that holds a set of keys. You can think of the keyring as a folder on your computer that contains many files. But in essence, a keyring holds a set of keys in a specific Cloud KMS location. |
ただし、キーとキーリングを作成する前に、まずCloud Shellを起動する必要があります。Cloud Shellは、マシンにツールをインストールせずにGoogle Cloud Platformでコマンドを実行できる無料の対話型シェルです。
1. GCPコンソールで、Cloud Shellを起動するための「Cloud Shellを有効にする」ボタン(右上)をクリックします。以下に示すように、Cloud Shellを起動します。

A Cloud Shell session initializes, as shown below (at the bottom of the page), where you can run commands.

2. 次に、以下のgcloudコマンドをCloud Shellで実行して、グローバルロケーションにkms-demo-keyringという新しいキーリング(キーリング)を作成します。
–location “global”
以下の操作を求められた場合は、[AUTHORIZE] をクリックしてコマンドを続行してください。
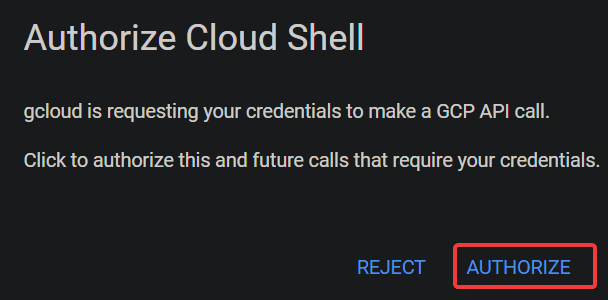
このプロンプトは、Cloud Shell で gcloud コマンドを初めて実行すると表示され、gcloud ツールに KSM API へのアクセスを許可するよう求めます。

以下のように、キーリングが正常に作成されると出力メッセージは表示されません。
AWS Key Management を使ってプロフェッショナルな暗号化キーの使い方
場所 (global) はキーリングの設定と同じである必要があることに注意してください。
–location “global” \
–keyring “kms-demo-keyring” \

–purpose “encryption”
キーを作成または回転させるたびに、Cloud KMS はキーの新しいバージョンを作成します。この機能により、必要に応じて前のバージョンに簡単に戻すことができます。
| PURPOSE | ENCRYPT_DECRYPT | Indicates the purpose of the key (encryption and decryption). |
| ALGORITHM | GOOGLE_SYMMETRIC_ENCRYPTION | Indicates the key uses Google Symmetric Encryption, the default algorithm for Cloud KMS keys. |
| PROTECTION_LEVEL | SOFTWARE | Indicates the key is software-protected. |
| LABELS | You can add labels to keys to categorize them or to add additional information. | |
| PRIMARY ID | 1 | Indicates the key is the primary key for the keyring, which is what Cloud KMS uses by default when you do not specify a key.
Note that you can have only one primary key per keyring. |
| PRIMARY STATE | ENABLED | Shows the current status of the key. The ENABLED state indicates the key can be used for its specified purpose. |

キーリングを作成するときと同様に、キーが正常に作成されると出力メッセージは表示されません。
ただし、この時点でデータを暗号化および復号化するために使用できるキーリングとキーがあります。
4. 今、次のコマンドを実行して、キーリング (kms-demo-keyring) 内のキーを一覧表示します。
以下の情報が含まれたスクリーンショットのような出力が表示されます:
GCP KMSを使用したデータの暗号化と復号化

1. 出力を提供しない以下のコマンドを実行し、いくつかのテキストを含むテキストファイル(gcp-kms-demo.txt)を作成します。
2. 次に、テキストファイル(gcp-kms-demo.txt)をリスト(ls)してその内容(cat)を表示し、データを確認します。
# テキストファイルをリストする
# テキストファイルの内容を表示する
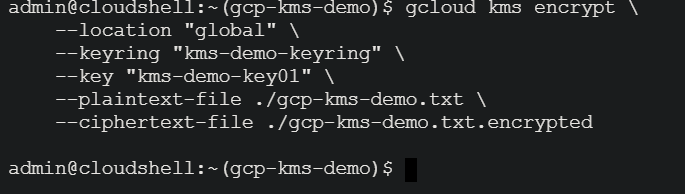
3. 確認が完了したら、以下のコマンドを実行して、ファイル(gcp-kms-demo.txt)のデータをキー(kms-demo-key01)を使用して暗号化します。暗号化されたデータは、その後、gcp-kms-demo.txt.encryptedという名前の新しいファイルに保存されます。

–location “global” \
–keyring “kms-demo-keyring” \
–key “kms-demo-key01” \
–plaintext-file ./gcp-kms-demo.txt \

–ciphertext-file ./gcp-kms-demo.txt.encrypted
4. 以下のコマンドを実行して、暗号化されたファイルのデータを表示しよう。
下記に示すように、壊れた、奇妙な、読めない記号が表示されます。この出力はファイルが正常に暗号化されたことを示します。
この暗号化されたファイルを安全な場所に保存する必要があります。例えば、AWS S3、GCP Cloud Storage、またはAzure Blob Storageに複数のコピーを保存できます。Google Cloudはデータの平文バージョンを保存しません。そのため、暗号化されたファイルを紛失した場合、元のデータを取得するための復号化は不可能です。

AWS CLIを使用してファイルをS3にアップロードする方法
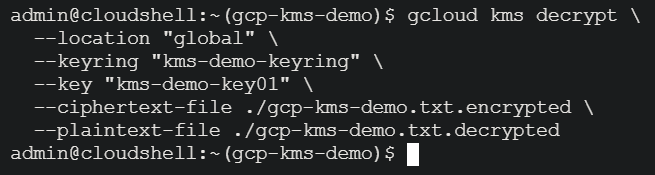
5. 暗号化したら、次のコマンドを実行して同じキー(kms-demo-key01)を使用してデータを復号化しましょう。ただし、今回は復号化されたデータがgcp-kms-demo.txt.decryptedという新しいファイルに保存されます。
暗号化と同様に、このコマンドには出力が提供されませんが、次のステップで復号化を検証します。
–location “global” \
–keyring “kms-demo-keyring” \

–key “kms-demo-key01” \
–ciphertext-file ./gcp-kms-demo.txt.encrypted \
–plaintext-file ./gcp-kms-demo.txt.decrypted
6. 最後に、次のコマンドを実行して、復号化されたファイル(gcp-kms-demo.txt.decrypted)を表示(cat)し、データが正常に復号化されたことを確認します。
以下に、テキストファイルに保存したオリジナルデータが表示されます。おめでとうございます!Google Cloud KMSを使用してデータを正常に暗号化および復号化しました。
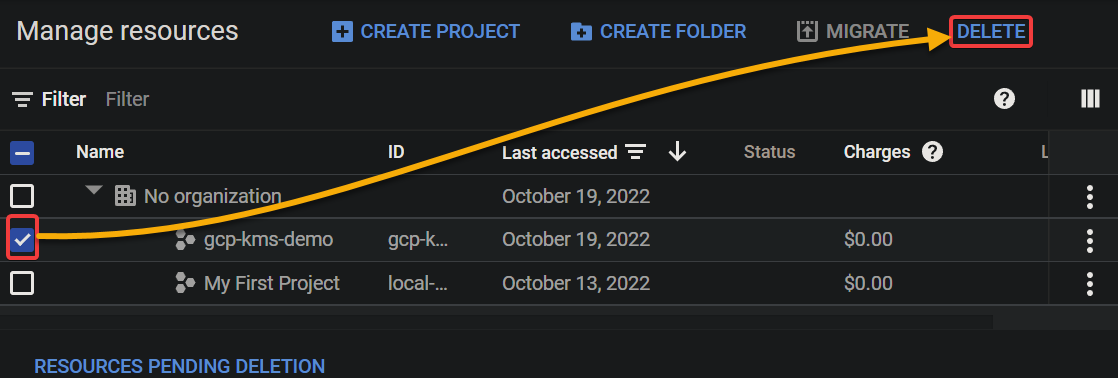
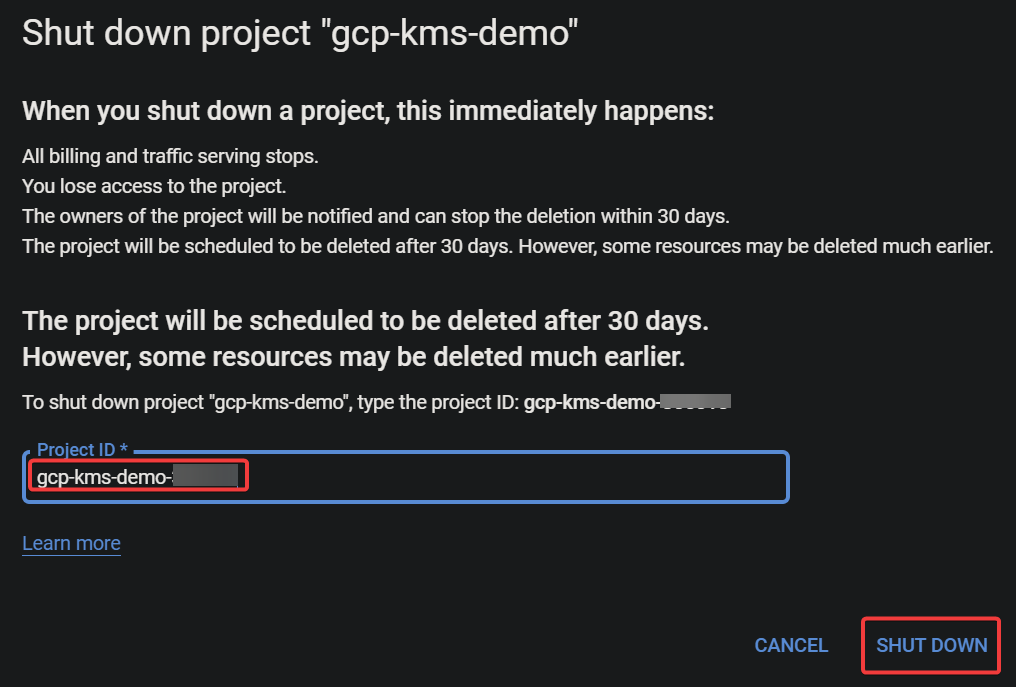
Google Cloudリソースのクリーンアップ