


数据安全和隐私已成为互联网时代个人、企业和政府的首要关注事项。虽然有许多保护数据的方法,但其中一种最有效的方法是使用虚拟专用网络(VPN),如Pritunl客户端和服务器VPN。
Pritunl客户端和服务器VPN是一个功能强大的VPN解决方案,适用于个人和企业。在本教程中,您将学习如何设置和使用Pritunl客户端和服务器VPN来保护您的连接并保护您的数据。
继续阅读,永远不再担心数据安全和隐私!
先决条件
本教程将进行实际演示。如果您想跟着做,请确保您具备以下条件。
- A Linux server (as your Pritunl server) – This tutorial uses Ubuntu 20.04, but you can use any Linux server, including a Raspberry Pi.
- 已安装并正在运行在您的Linux服务器上(Pritunl服务器使用MongoDB作为其数据库)的MongoDB。
- A computer that acts as your Pritunl client – This tutorial uses Windows 10 20H2.
安装Pritunl服务器
Pritunl是一个免费开源的VPN服务器,具有许多功能,包括在多个服务器上运行、跨服务器负载平衡以及如果一个服务器宕机则故障转移。
Pritunl分为两个部分:
- Pritunl服务器负责建立和管理VPN连接。
- Pritunl客户端用于连接到Pritunl服务器并访问VPN。
在本教程中,您将首先在Linux服务器上安装Pritunl服务器:
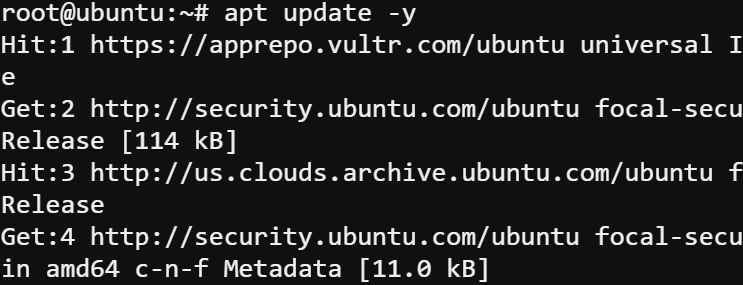
1. SSH登录到您的服务器并运行以下apt update命令以更新软件包索引。
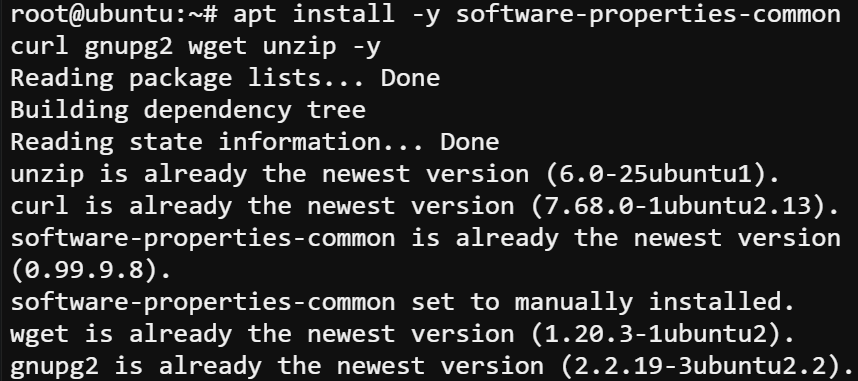
2. 接下来,运行以下apt install命令以安装Pritunl所需的依赖项,这些依赖项如下:
| Dependency | Use |
| software-properties-common | To add the Pritunl repositories to your system. |
| curl | For downloading files. |
| gnupg2 | For verifying the Pritunl signing key. |
| wget | For retrieving files. |
| unzip | For extracting ZIP archives. |
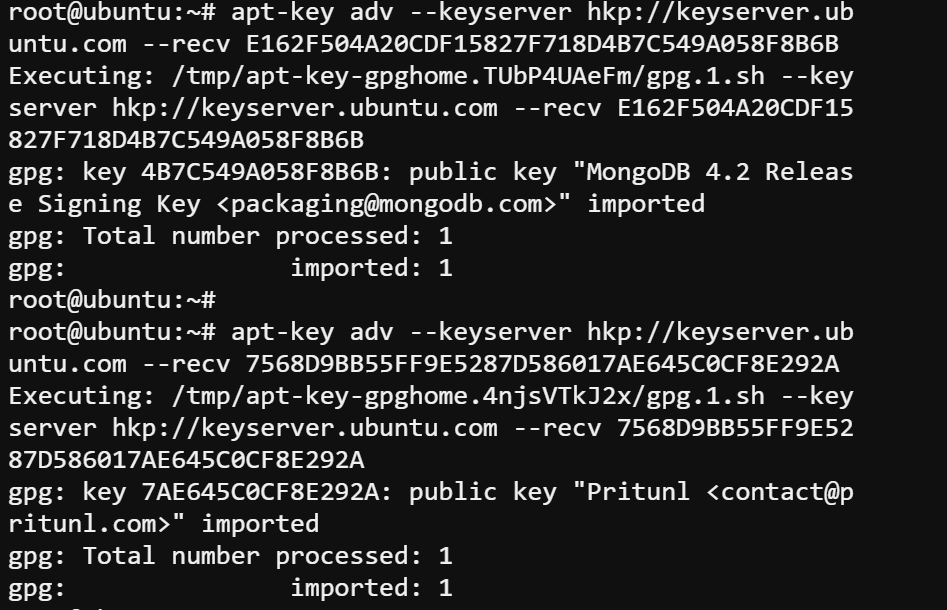
3. 安装依赖项后,运行以下apt-key命令将Pritunl密钥添加到您的apt密钥环。这样做可以确保您从Pritunl存储库安装的软件包是有效且受信任的。
默认情况下,默认情况下Ubuntu存储库中不提供Pritunl。因此,您必须将Pritunl存储库添加到系统中才能安装它。
4. 现在,运行以下命令将Pritunl存储库(稳定版本)添加到您的源列表中。

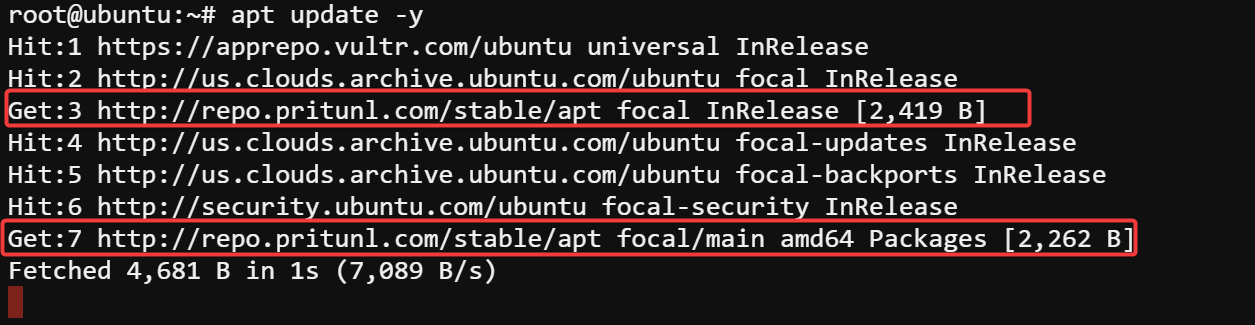
5. 重新运行apt update命令以更新软件包索引,并确保新的仓库已包含在软件包索引中。
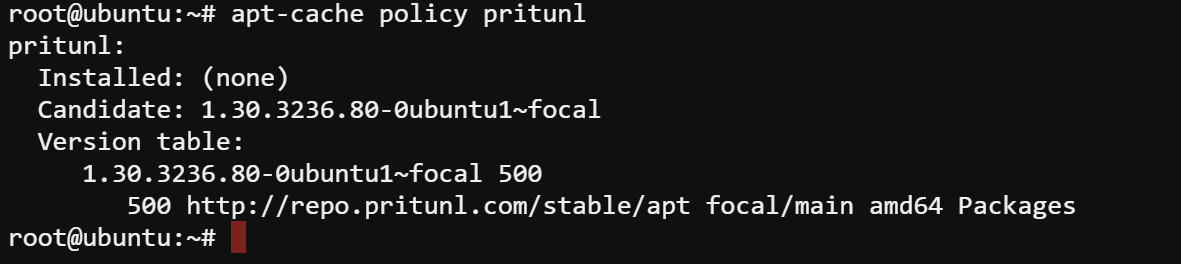
6. 接下来,运行以下apt-cache命令来检查Pritunl仓库是否在系统上正确配置。
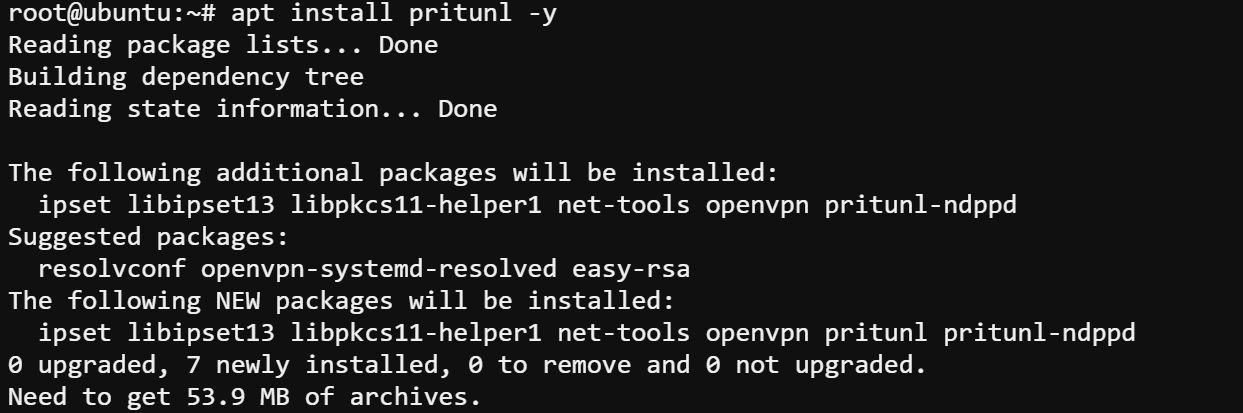
7. 运行以下apt install命令来安装Pritunl服务器,并自动接受所有提示(-y)。
8. 安装完成后,依次运行下面的每个systemctl命令来启动和启用Pritunl服务。这样做会在服务器启动时自动运行Pritunl服务。

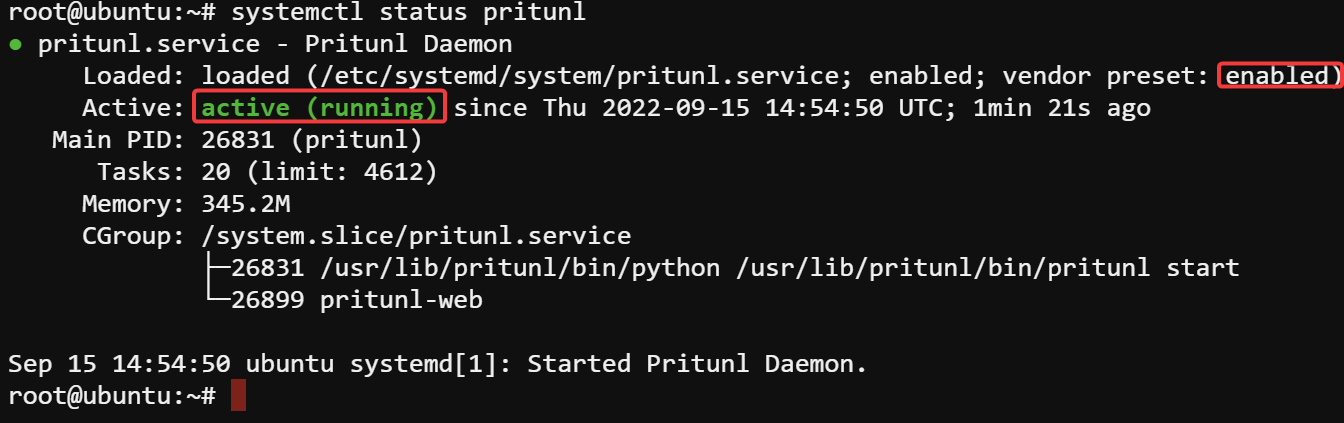
9. 最后,运行以下命令来检查Pritunl服务的状态。
下面的输出验证了Pritunl服务正常运行。
访问Pritunl服务器Web界面
现在您已经安装并验证了Pritunl服务正在运行,如何确保连接安全并保护数据?您需要访问Pritunl Web界面来配置您的服务器。
要访问Pritunl Web界面:
1. 运行以下curl命令以查找您服务器的公共IP地址。

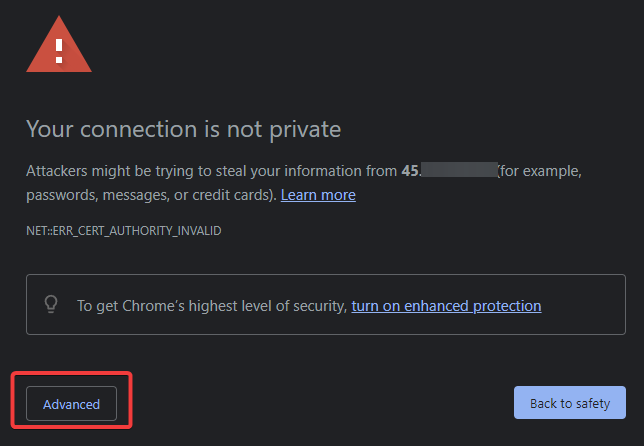
2. 接下来,打开您喜欢的Web浏览器,并访问您服务器的IP地址(即,https://SERVER_IP),将SERVER_IP替换为您服务器的实际IP地址。
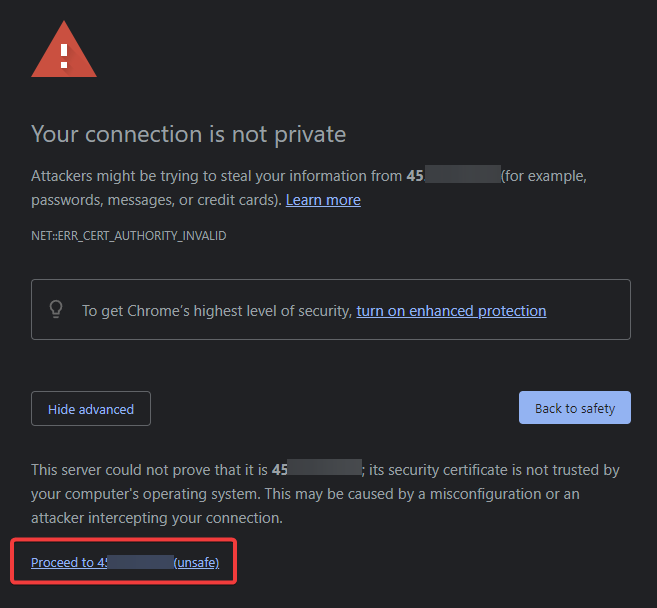
点击“高级”按钮以访问高级选项,当出现“您的连接不是私密的”错误时,如下所示。
此错误出现是因为 Pritunl Web 界面默认使用 SSL 证书。
3. 点击“继续前往 <ServerIP>(不安全)”超链接以访问 Pritunl 的 Web UI。
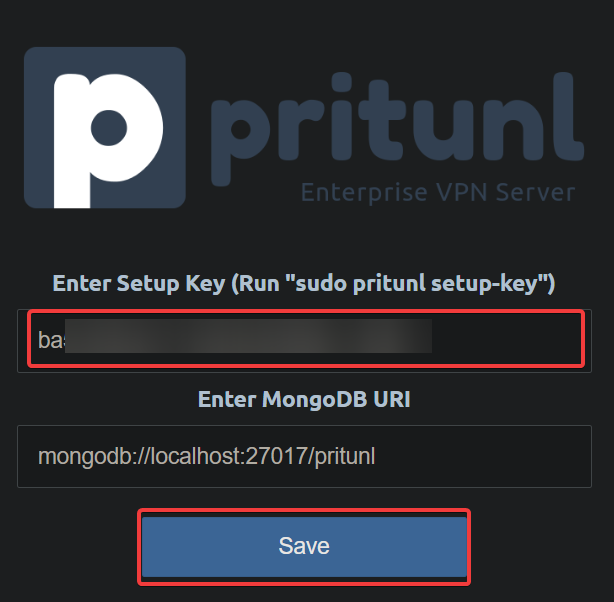
您的浏览器将重定向到设置密钥页面(第四步),如下所示。设置密钥是您将用于连接 Pritunl 服务器的随机字符串。开发人员实现了此默认行为,以使登录 Web 界面更加安全。

4. 现在,运行以下 Pritunl 命令以生成设置密钥。
请注意生成的设置密钥,因为您将在下一步中需要它。

5. 在 Pritunl 的 Web UI 上的“输入设置密钥”字段中提供生成的设置密钥,并单击“保存”以验证您与 Pritunl 服务器的连接。
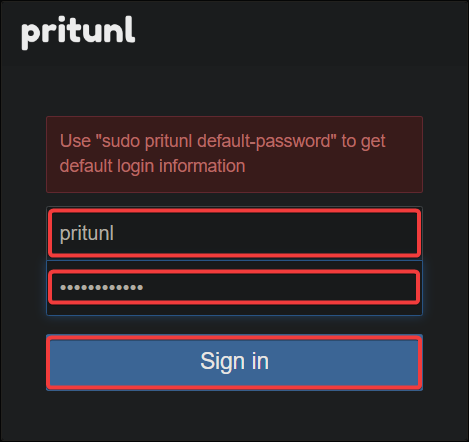
验证通过后,您的浏览器将重定向到管理员登录页面,如下所示。

6. 接下来,运行以下命令以生成管理员用户名和密码。
将生成的管理员用户名和密码复制到安全的位置。

7. 在管理员登录页面的各自字段中提供生成的用户名和密码,并单击“登录”以继续。
8. 最后,在“初始设置”弹出窗口中输入强密码到“新密码”字段,保持其他默认设置,然后单击“保存”以继续。
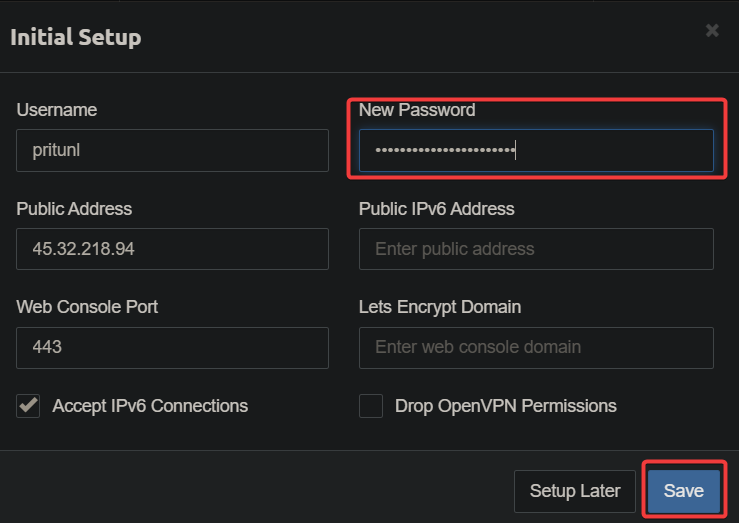
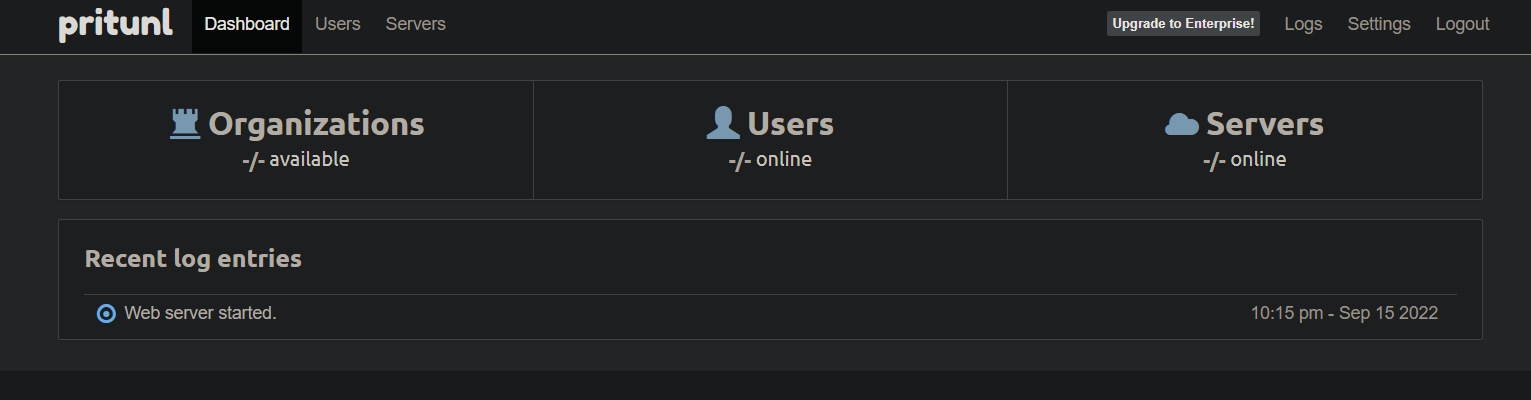
在这一点上,您将看到主要的Pritunl仪表板,如下所示。请不要关闭仪表板,因为您将在以下部分配置服务器设置。
配置Pritunl服务器
在这一点上,您已经拥有一个可用的Pritunl服务器。但在使用Pritunl服务器之前,您首先需要进行额外的配置。您将添加一个新的组织、用户和服务器,并将该服务器连接到组织。
组织用于将用户和服务器分组,这对于给不同用户访问不同服务器或简单地保持组织有序是有用的。
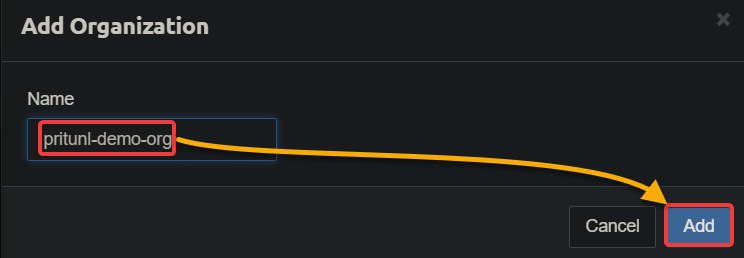
1. 在Pritunl的仪表板上,单击“用户”选项卡 → 添加组织以启动添加新组织的过程。

2. 接下来,提供组织名称,然后单击“添加”按钮以添加新组织。
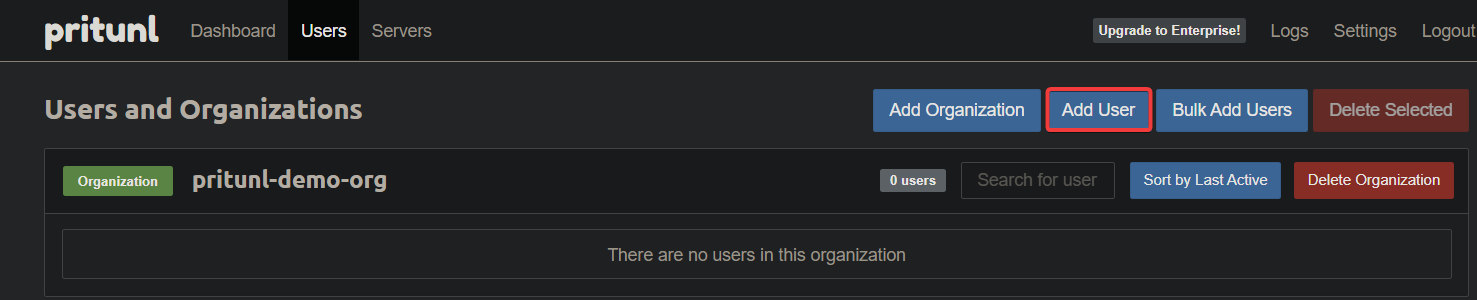
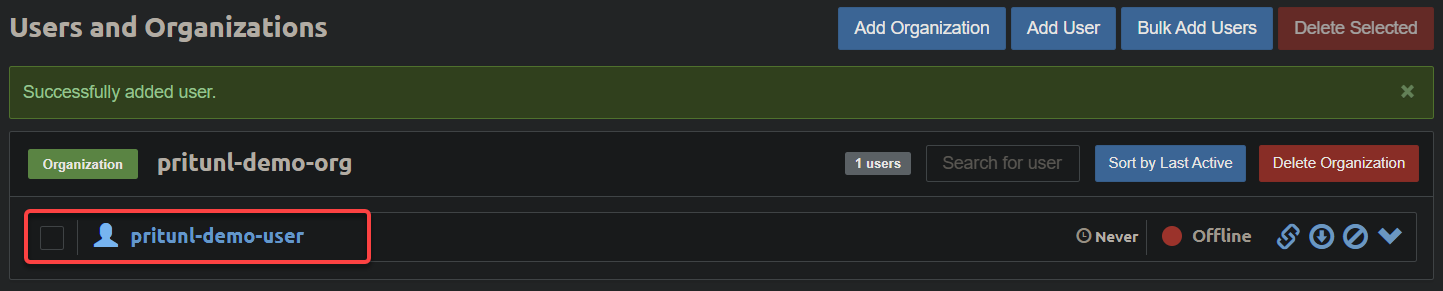
创建组织后,您可以添加用户,以便他们可以连接到附加到该组织的任何服务器。
3. 添加后,单击“添加用户”以启动将用户添加到新添加的组织的过程。这样做将允许用户访问附加到该组织的任何服务器。
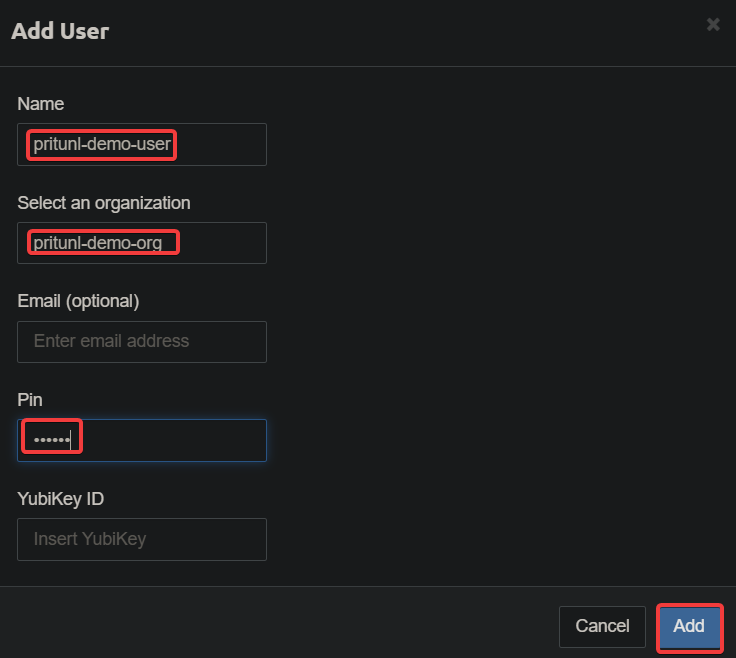
4. 现在,使用以下方法配置新用户的信息,然后单击“添加”以将新用户添加到所选组织(pritunl-demo-org)中。
| Field | Value |
| Name | Provide a user name, which can be anything, but this tutorial’s choice is pritunl-demo-user. |
| Select an organization | Select the organization (pritunl-demo-org) where to add the user. |
| Set the user’s email address (optional). | |
| Pin | Set a pin for security measures (optional), which requires the user to provide a PIN when connecting to the VPN. |
| YubiKey ID | Provide a YubiKey ID as an optional security measure, which requires a user to provide a YubiKey when connecting to the VPN. |
如果成功,您将在组织中列出新添加的用户(pritunl-demo-user)。
现在您拥有一个组织和一个用户,您可以添加服务器。服务器用于托管VPN连接。您可以添加任意数量的服务器,并将它们附加到不同的组织。
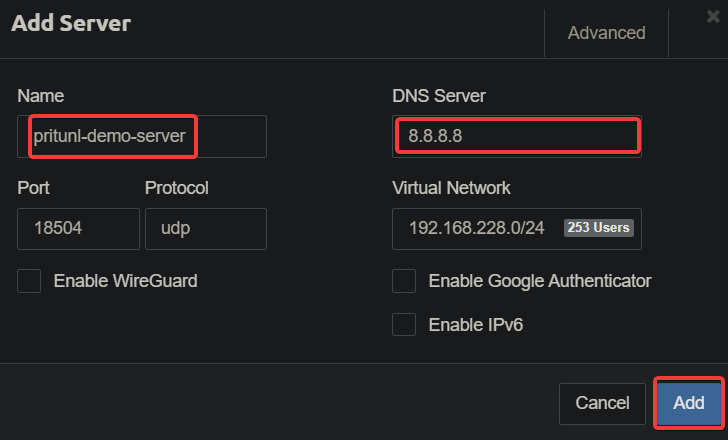
5. 添加用户后,单击“服务器”选项卡 → 添加服务器以启动添加服务器流程。

6. 在“添加服务器”页面上,按以下方式配置新服务器:
| Field | Value |
| Name | Provide a server name, which can be anything, but this tutorial uses the server name pritunl-demo-server. |
| DNS Server | Input a DNS server you prefer to be used by clients to resolve hostnames. But this tutorial uses 8.8.8.8, Google’s fast and reliable DNS server. |
保持其他设置不变,并单击“添加”以添加新服务器。
7. 接下来,单击附加组织以将服务器附加到您的组织。
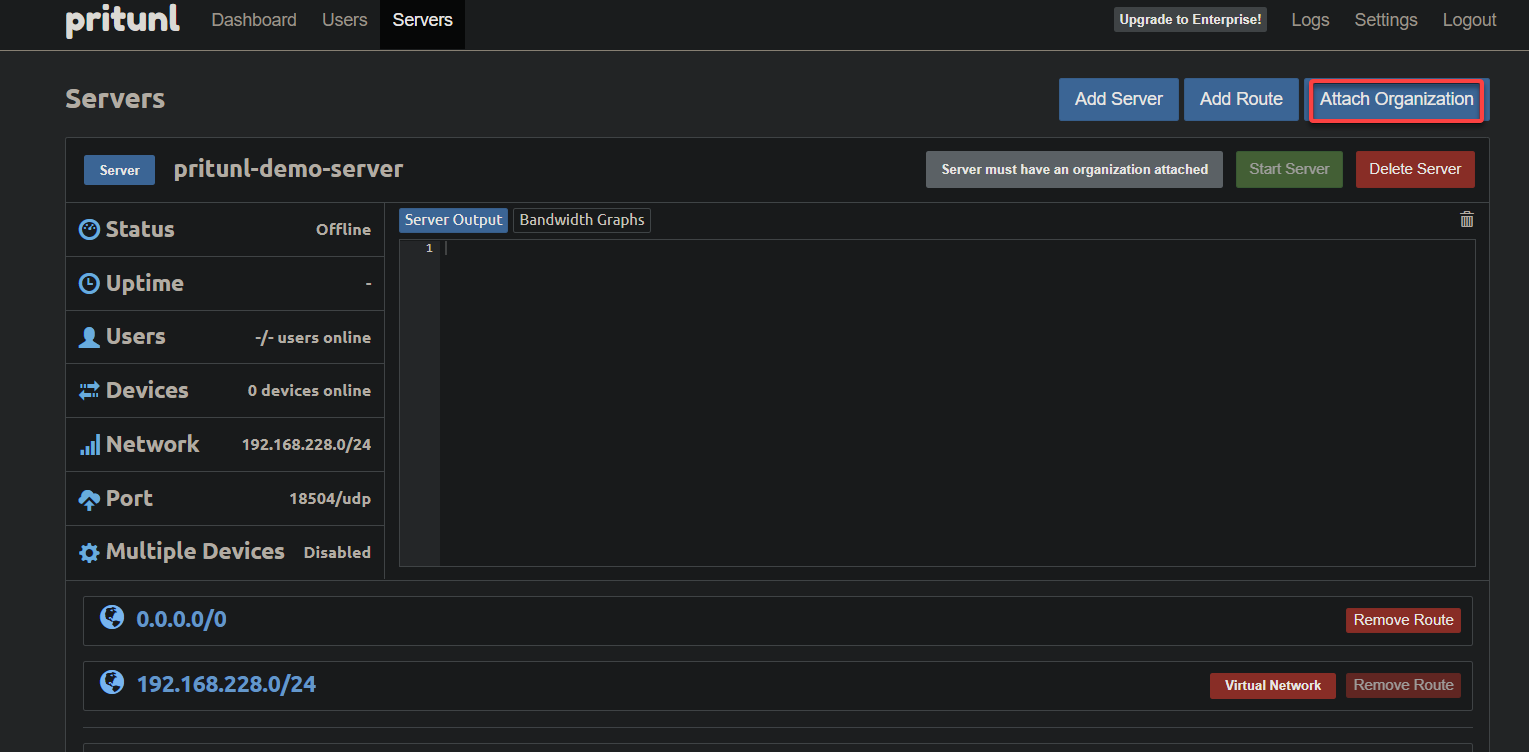
8. 最后,选择要附加的组织和服务器,然后单击“附加”按钮以继续附加操作。
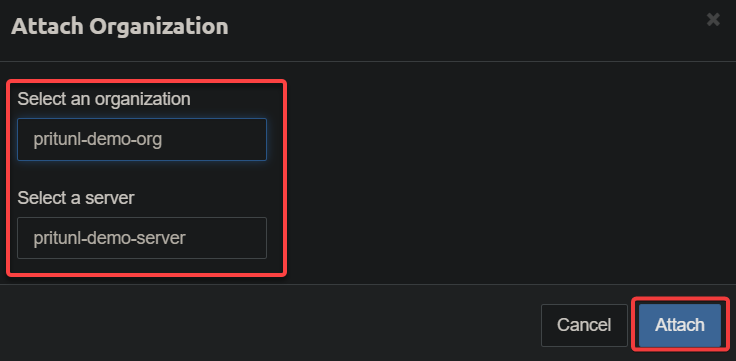
如果成功,您将收到一条确认附件完成的通知。

在 Windows 10 上安装 Pritunl 客户端
现在您已经拥有一个运行中的 Pritunl 服务器,是时候在您的 Windows 10 计算机上安装 Pritunl 客户端,以便稍后测试连接到 VPN 服务器。
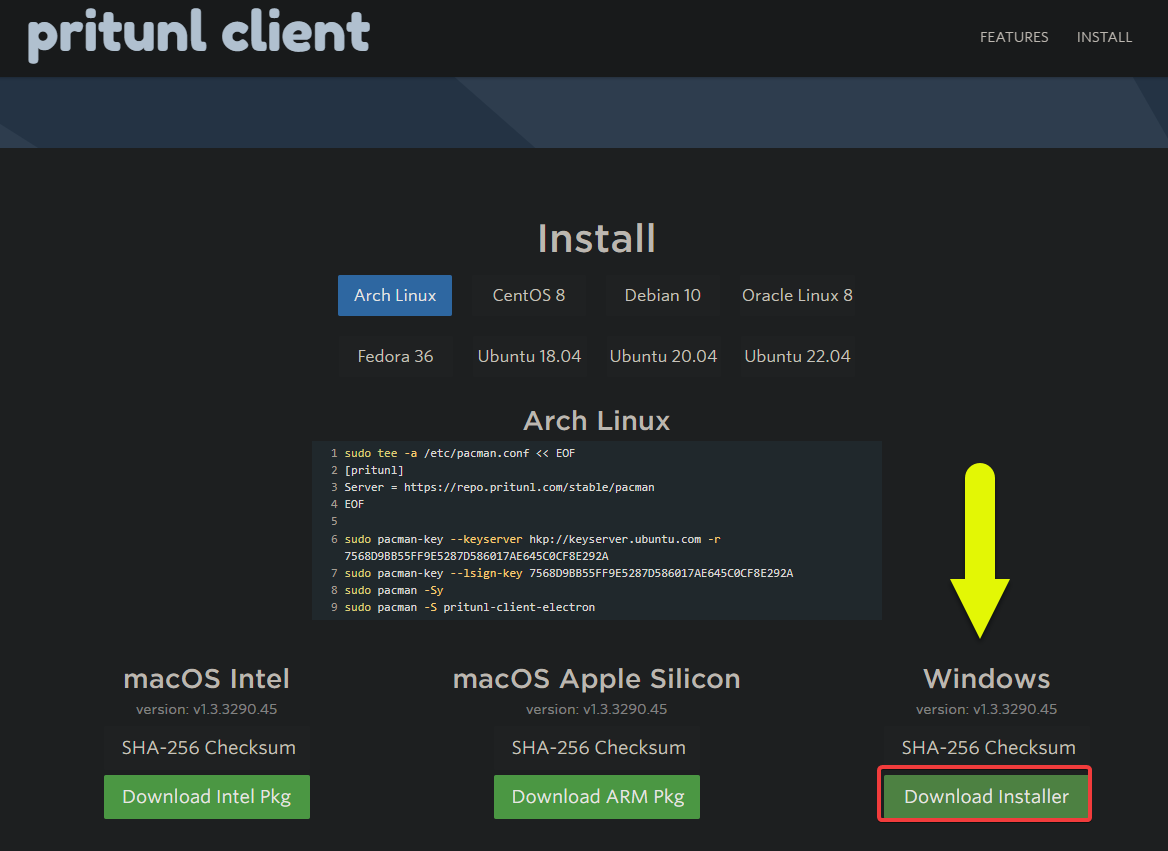
1. 在您的网络浏览器中导航至https://client.pritunl.com,并单击“下载安装程序”以下载 Windows 版本的 Pritunl 客户端的最新版本。
2. 下载完成后,双击已下载的文件以运行安装程序。
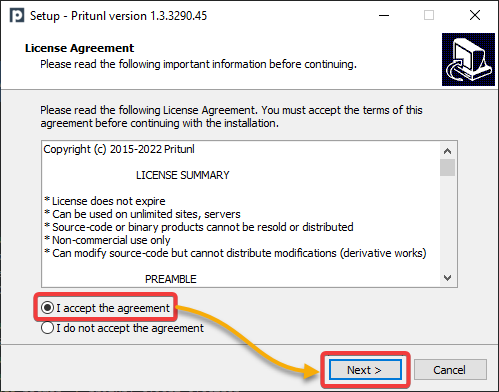
3. 在安装向导中,选择“我接受协议”选项以接受许可协议,然后单击“下一步”继续。
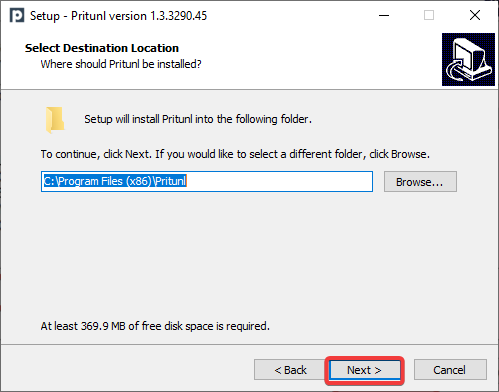
4. 现在,选择安装 Pritunl 客户端的位置,然后单击“下一步”继续。
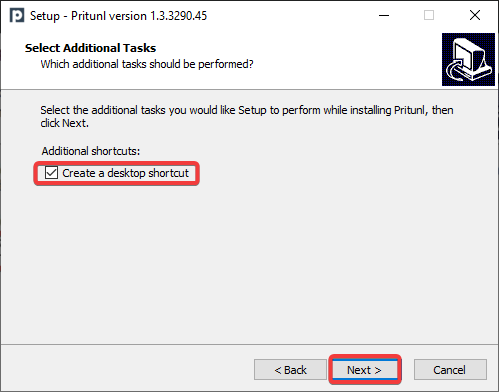
5. 选择是否为 Pritunl 客户端创建桌面快捷方式,然后单击“下一步”。
6. 接下来,检查安装设置,然后单击“安装”以安装 Pritunl 客户端。
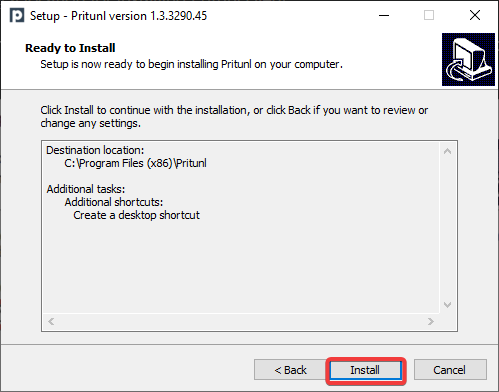
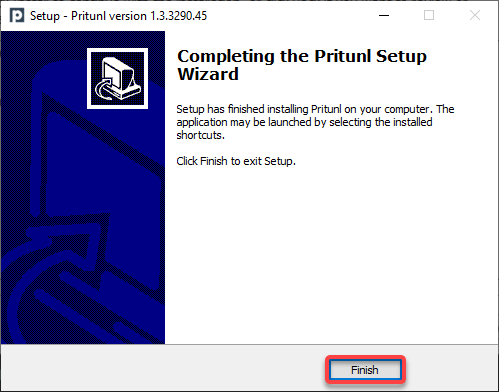
最后,在安装完成后点击“完成”以关闭设置向导。
连接到VPN服务器
由于您已经安装了Pritunl服务器和客户端,现在是时候通过连接到VPN服务器来测试它们是否正常工作。但首先,您必须下载用户配置文件。此配置文件包含Pritunl客户端连接到服务器所需的所有必要信息。
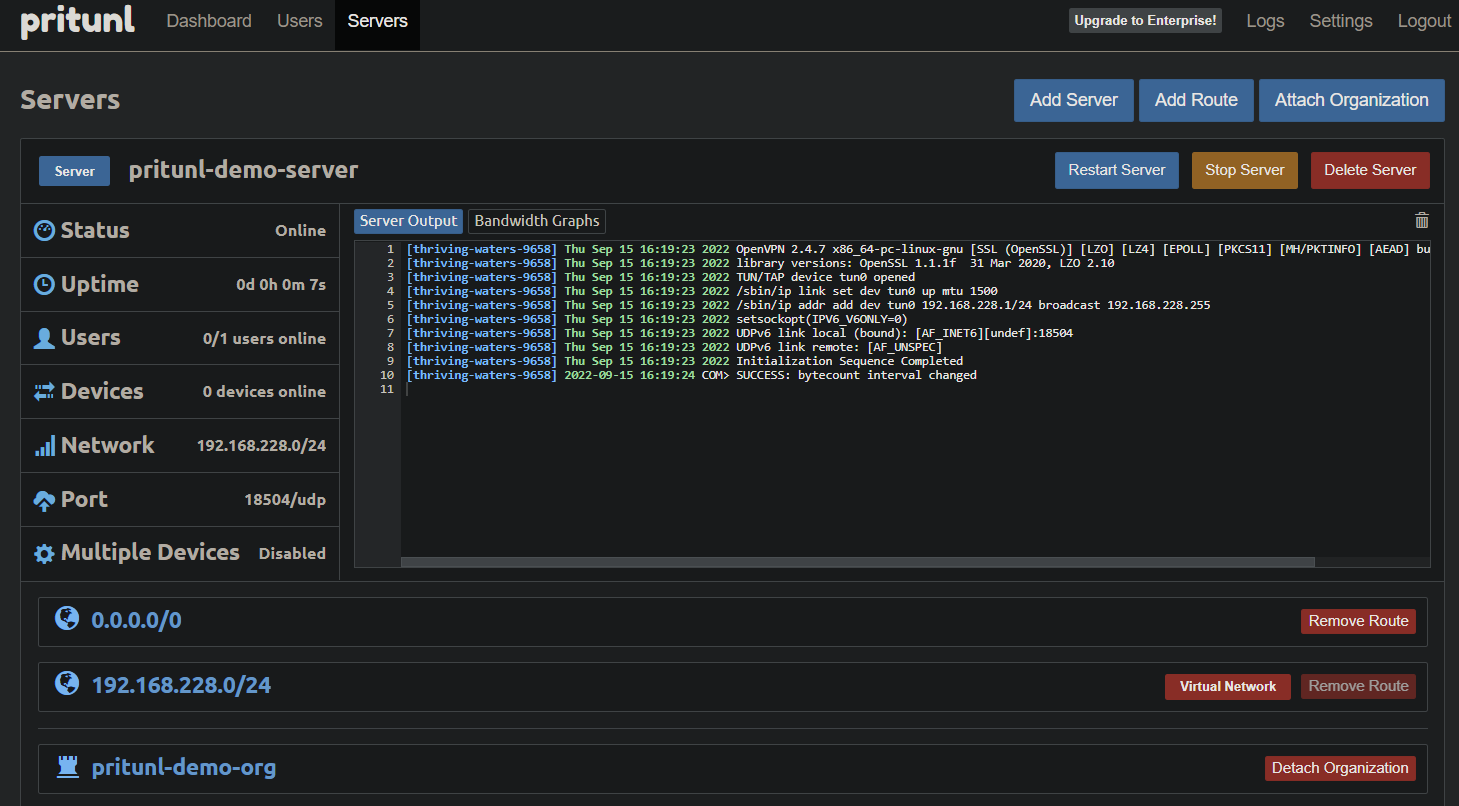
1.导航到Pritunl仪表板,单击服务器→启动服务器以启动VPN服务器。
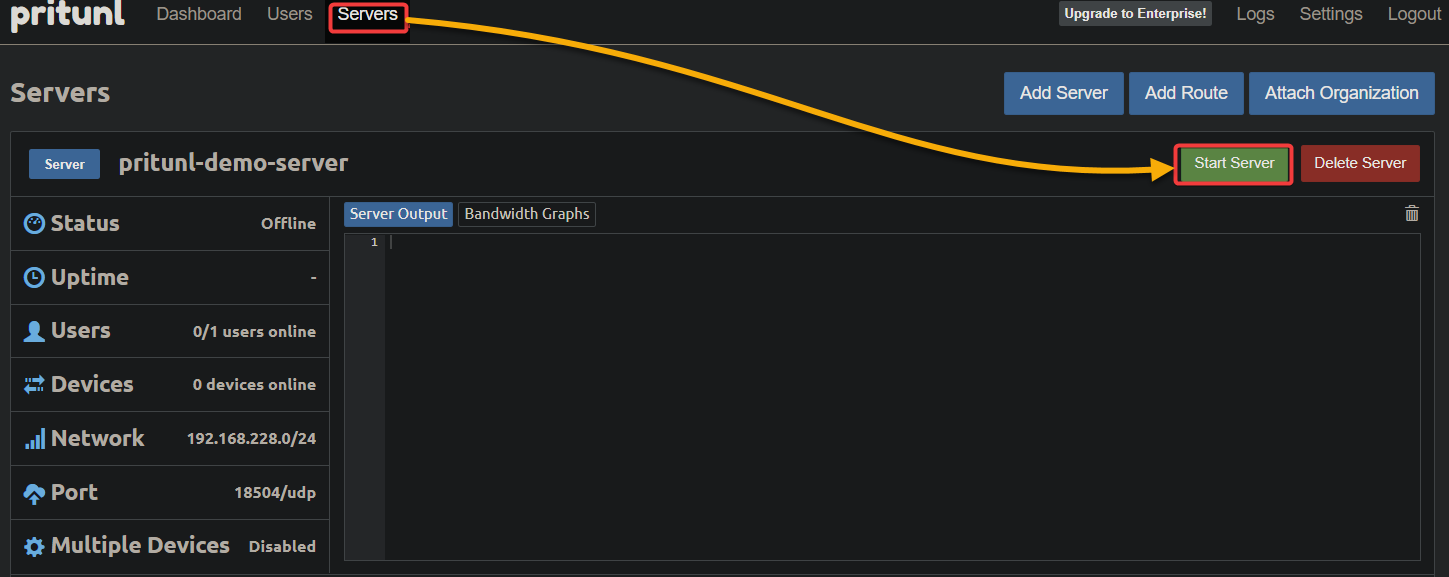
在下面,您可以看到VPN服务器正在启动。
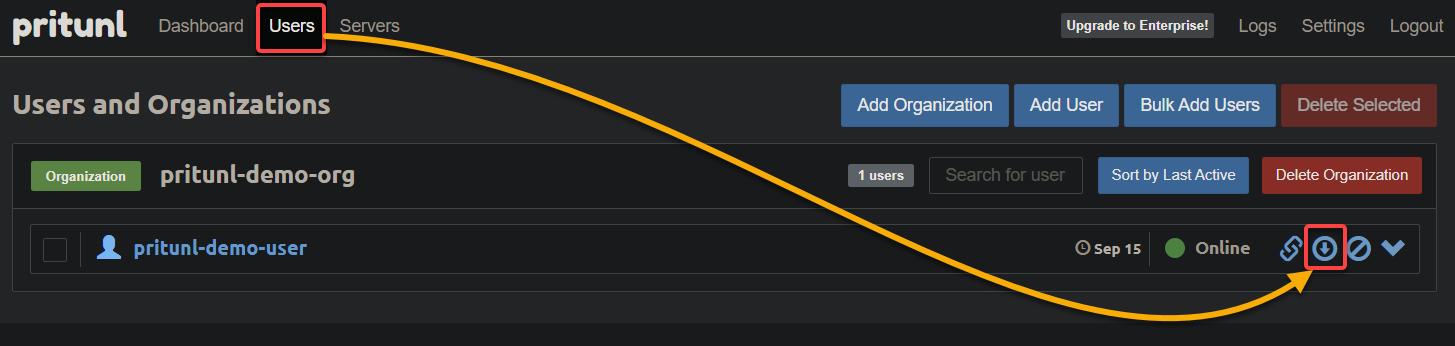
2.一旦服务器启动,单击“用户”选项卡,然后单击用户旁边的下载图标以下载用户配置文件(ZIP文件格式)。
3.在Windows 10上解压下载的ZIP文件,然后您将获得一个 .ovpn格式的文件,如下所示。 .ovpn格式是由OpenVPN使用的配置文件格式,但也可以被Pritunl使用。

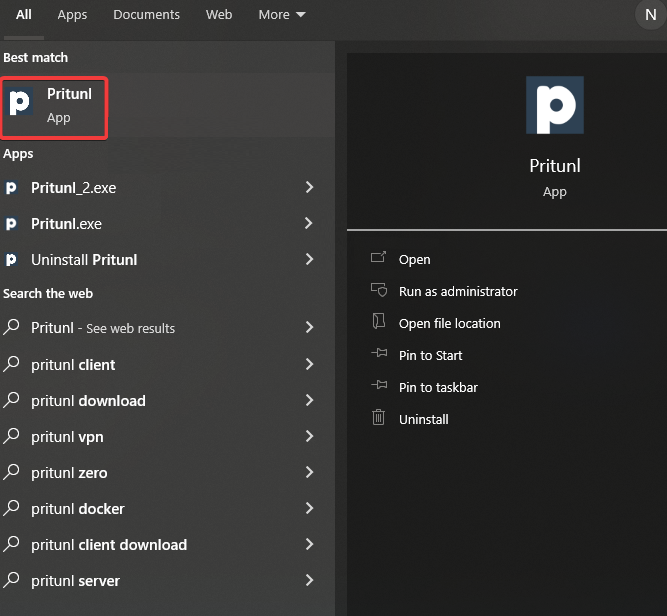
4.现在,在Windows 10的“开始”菜单中启动Pritunl客户端。
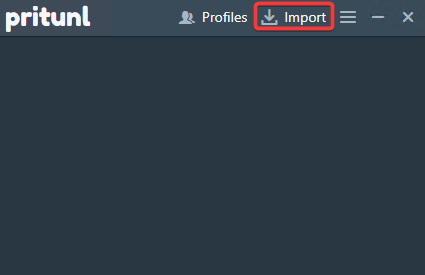
5.在Pritunl上,点击“导入”以开始导入配置文件。
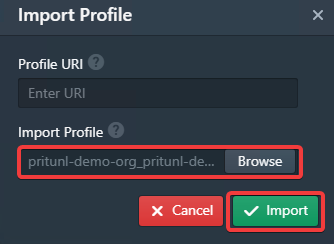
6.点击“浏览”,找到您在第三步中提取的文件,然后点击“导入”以将配置文件导入Pritunl。
7.一旦配置文件导入完成,请点击“连接”按钮以连接到VPN服务器。
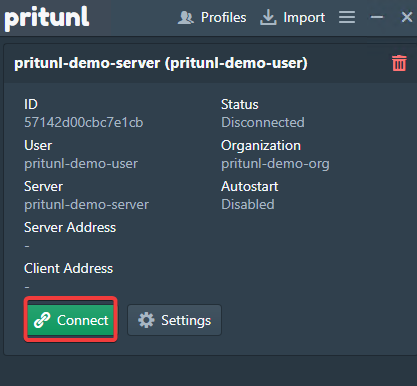
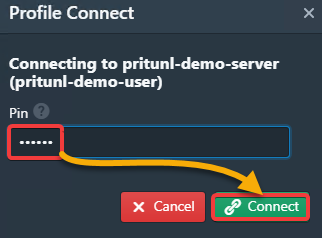
8. 在提示时输入您在“配置Pritunl服务器”部分第四步设置的PIN码,然后单击“连接”以连接到VPN服务器。
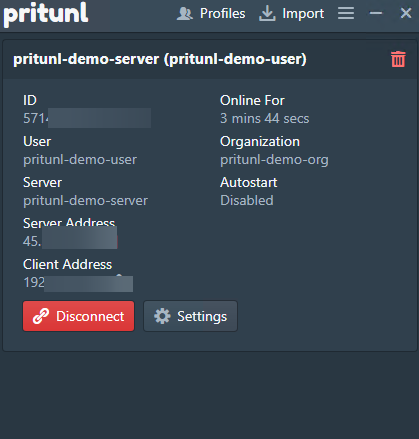
如果连接成功,您将看到以下信息。
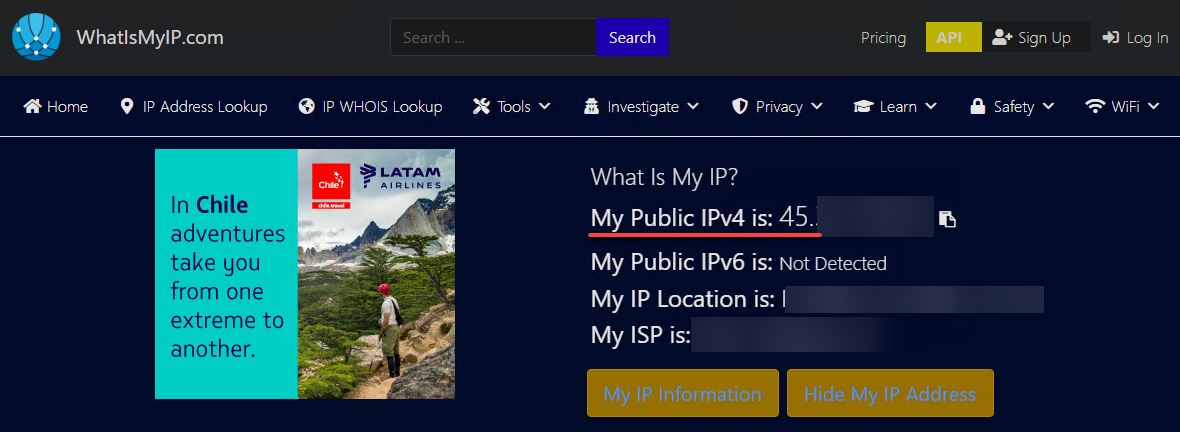
9. 最后,通过在诸如https://www.whatismyip.com之类的网站上检查您的IP地址来验证VPN连接。
您将看到VPN服务器的IP地址(45…),如下所示,这证实了您的流量确实通过VPN服务器进行路由。
结论
安全的互联网访问应始终是首要任务。好消息是您已经学会了如何在本教程中安装和配置Pritunl服务器和客户端。此时,您已经拥有了一个完全可工作的VPN连接,以确保您的家庭连接到世界各地的连接。
有了这些新知识,为什么不创建多个云服务器之间的站点到站点连接,比如AWS或Google Cloud?利用这两个平台的优势。可能性无限!