


你们中的许多人一直在使用Azure Active Directory Connect来管理你们的混合身份以及从Active Directory到Azure Active Directory(最近更名为Microsoft Entra ID)的用户同步。这项现代技术被称为Azure AD Connect云同步。在本文中,我将引导您完成Azure AD Connect云同步的安装和基本配置,并解释如何将其集成到您的Active Directory/Azure AD基础设施中。
什么是Azure Active Directory Connect云同步?
许多IT专业人士都熟悉Azure AD Connect——这是您用来将本地活动目录中的身份同步到Azure活动目录,并提供无缝单点登录的同步软件。下一个演变是将所有内容都迁移到云端。
因此,微软已经从安装在本地域加入服务器上的软件应用转变为简单的配置代理。由于现在所有的“繁重工作”都在Azure中完成,因此占用空间更小。不再需要本地数据库,一切都在云端完成。
轻量级代理最近已经成为主流。如果您最近进行了合并或收购,或者正在计划进行合并或收购,这将是一个福音。
Azure AD Connect云同步旨在通过将用户、联系人、群组、设备等同步到Azure AD来实现并完成您的混合身份目标。重要说明:您可以将Azure AD Connect与云同步配置代理并存使用!
Azure AD Connect同步和Azure AD Connect云同步之间有什么区别?
很好的问题!这里有一张微软提供的表格,展示了这两个产品之间的功能比较。
| Feature | Azure AD Connect sync | Azure AD Connect cloud sync |
|---|---|---|
| Connect to a single on-premises AD forest | ● | ● |
| Connect to multiple on-premises AD forests | ● | ● |
| Connect to multiple disconnected on-premises AD forests | ● | |
| Lightweight agent installation model | ● | |
| Multiple active agents for high availability | ● | |
| Connect to LDAP directories | ● | |
| Support for user objects | ● | ● |
| Support for group objects | ● | ● |
| Support for contact objects | ● | ● |
| Support for device objects | ● | |
| Allow basic customization for attribute flows | ● | ● |
| Synchronize Exchange online attributes | ● | ● |
| Synchronize extension attributes 1-15 | ● | ● |
| Synchronize customer-defined AD attributes (directory extensions) | ● | ● |
| Support for Password Hash Sync | ● | ● |
| Support for Pass-Through Authentication | ● | |
| Support for federation | ● | ● |
| Seamless Single Sign-on | ● | ● |
| Supports installation on a Domain Controller | ● | ● |
| Support for Windows Server 2016 | ● | ● |
| Filter on Domains/OUs/groups | ● | ● |
| Filter on objects’ attribute values | ● | |
| Allow a minimal set of attributes to be synchronized (MinSync) | ● | ● |
| Allow removing attributes from flowing from AD to Azure AD | ● | ● |
| Allow advanced customization for attribute flows | ● | |
| Support for password writeback | ● | ● |
| Support for device writeback | ● | Customers should use Cloud Kerberos trust for this moving forward |
| Support for group writeback | ● | |
| Support for merging user attributes from multiple domains | ● | |
| Azure AD Domain Services support | ● | |
| Exchange hybrid writeback | ● | |
| Unlimited number of objects per AD domain | ● | |
| Support for up to 150,000 objects per AD domain | ● | ● |
| Groups with up to 50,000 members | ● | ● |
| Large groups with up to 250,000 members | ● | |
| Cross-domain references | ● | ● |
| On-demand provisioning | ● | |
| Support for US Government | ● | ● |
目前,Azure AD Connect云同步功能尚不支持一个主要且普遍的场景,即Exchange混合。以下是微软文档中的当前答案:
Exchange混合部署功能允许Exchange邮箱既在本地存在,又在Microsoft 365中存在。Azure AD Connect正在将一组特定属性从Azure AD同步回本地目录。云提供代理目前不会将这些属性同步回本地目录,因此它不支持作为Azure AD Connect的替代品。
安装Azure Active Directory Connect云同步的先决条件
在开始安装之前,微软提到了一些需要注意的先决条件。让我们在这里看一下。
- 在Azure门户中:
- 您需要拥有一个仅限云的全球管理员账户的访问权限。
- 您需要在Azure中设置一个自定义域名,以匹配您Active Directory中的用户主体名称(UPN)域名。如果您是从Azure AD Connect迁移过来的,这应该已经设置好了,但值得一提。
- 在您的本地环境中
- 您需要一台加入域的机器,运行Windows Server 2016或更新版本。您至少需要4 GB的内存和.NET Framework 4.7.1或更高版本。服务器只需要能够访问您本地AD森林中的至少一个域控制器。
- 您的边缘防火墙需要允许从这里的服务器到Azure AD的出站端口80和443。
唯一的其他(可选)步骤是首先卸载Azure AD Connect(如果已安装)。这不是必需的,但为了本文的目的,我将在下面简要介绍步骤。
哦,利用此设置实现高可用性非常容易。只需在网络中的多台服务器上安装配置代理。您将在下面看到步骤。
卸载Azure AD Connect(可选)
- 登录到您的Azure AD Connect服务器并打开控制面板。
- 打开“卸载程序”菜单。
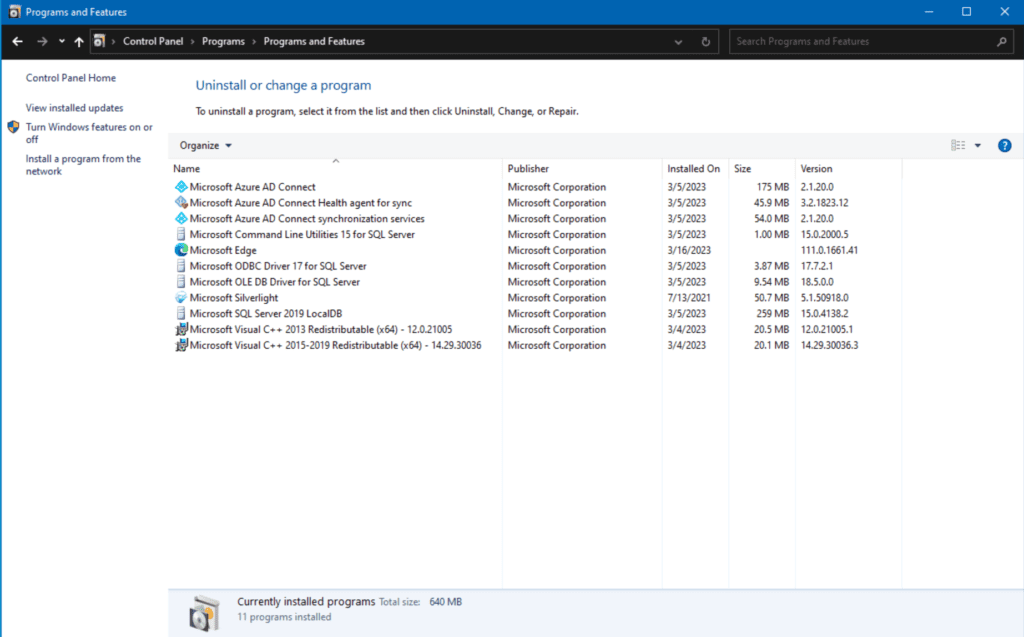
- 单击Microsoft Azure AD Connect条目,然后单击“卸载”工具栏按钮。
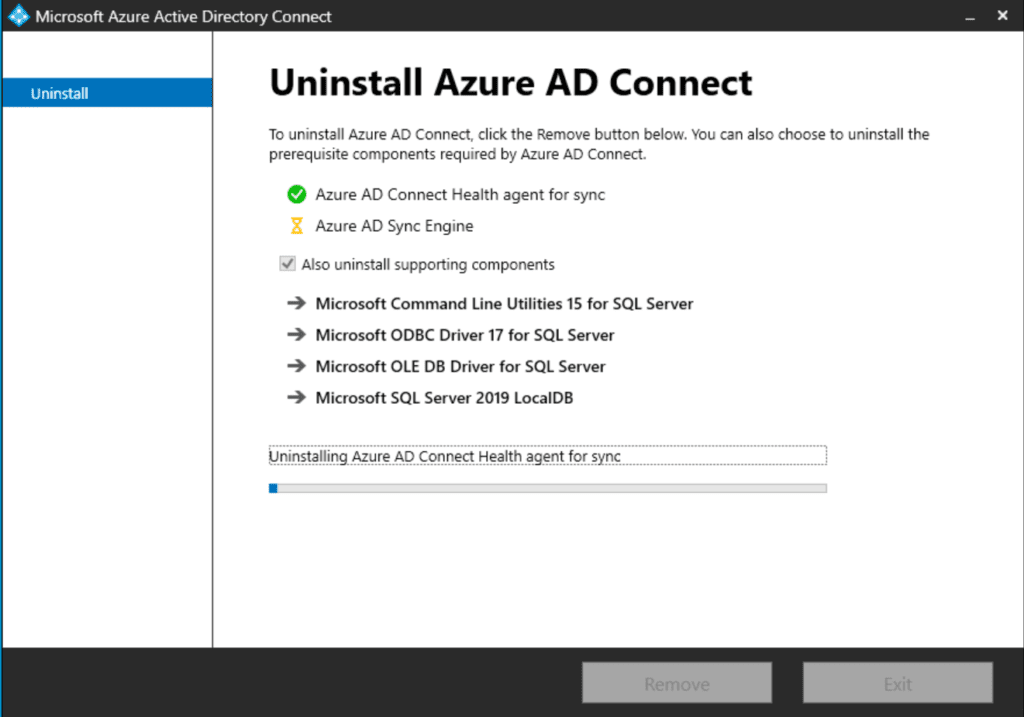
我的建议是确保勾选复选框以删除所有内容。我总是尽可能干净地卸载软件,尽我所能不留下任何残留物。
- 点击移除并让它完成。
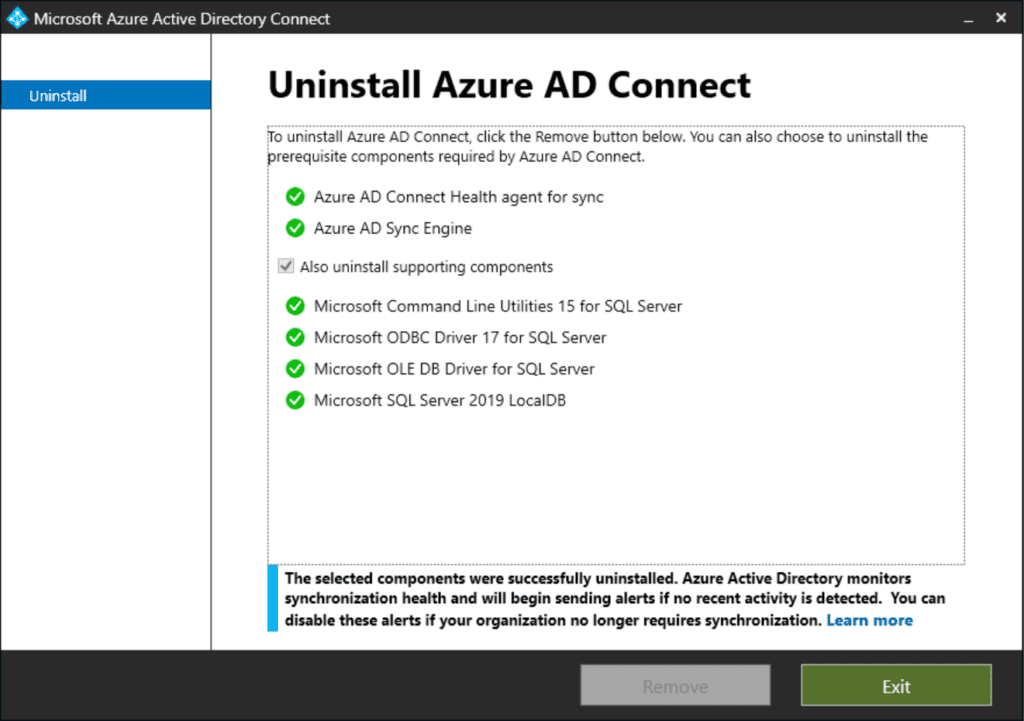
好了,全部消失了。现在,我们可以继续进行新的安装步骤。
如何将Azure AD Connect云同步实施到您的AD / AAD基础架构中
正如我所说,您可以在没有现有Azure AD Connect安装的情况下,在您的环境中安装Azure AD Connect云同步代理。在这种情况下,我刚刚删除了现有的Azure AD Connect软件,所以我们有一个干净的起点。让我们开始吧!
安装
我们将从我的Windows Server 2022域加入服务器WS22-FS02开始。
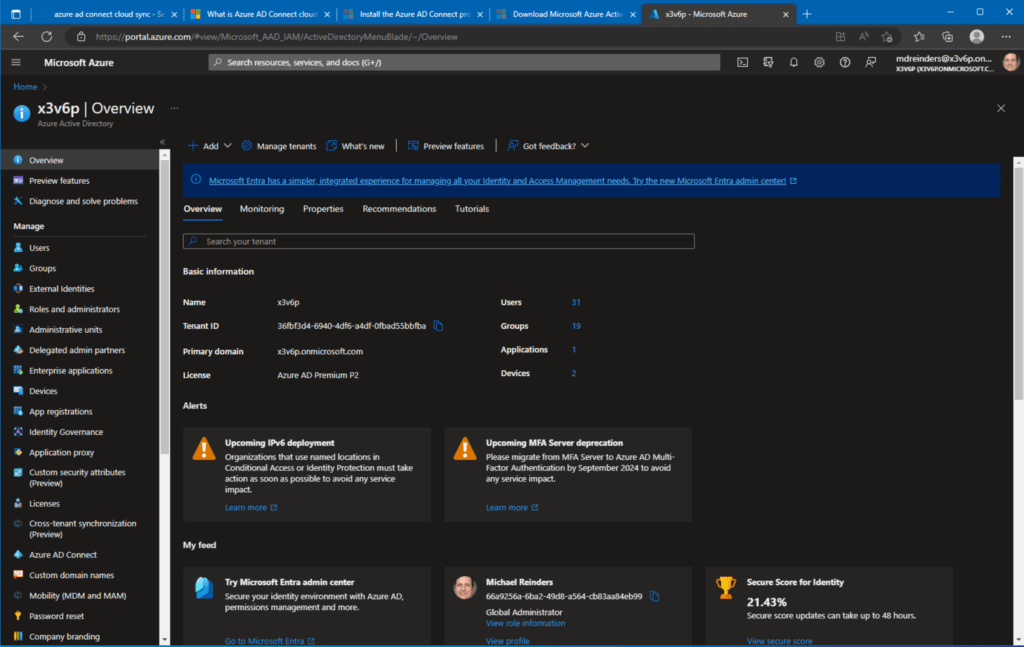
- 首先,登录到Azure门户并访问Azure Active Directory(Azure AD)站点。
- 在左侧的导航菜单中,向下滚动并点击Azure AD Connect。然后,再次在左侧点击云同步。
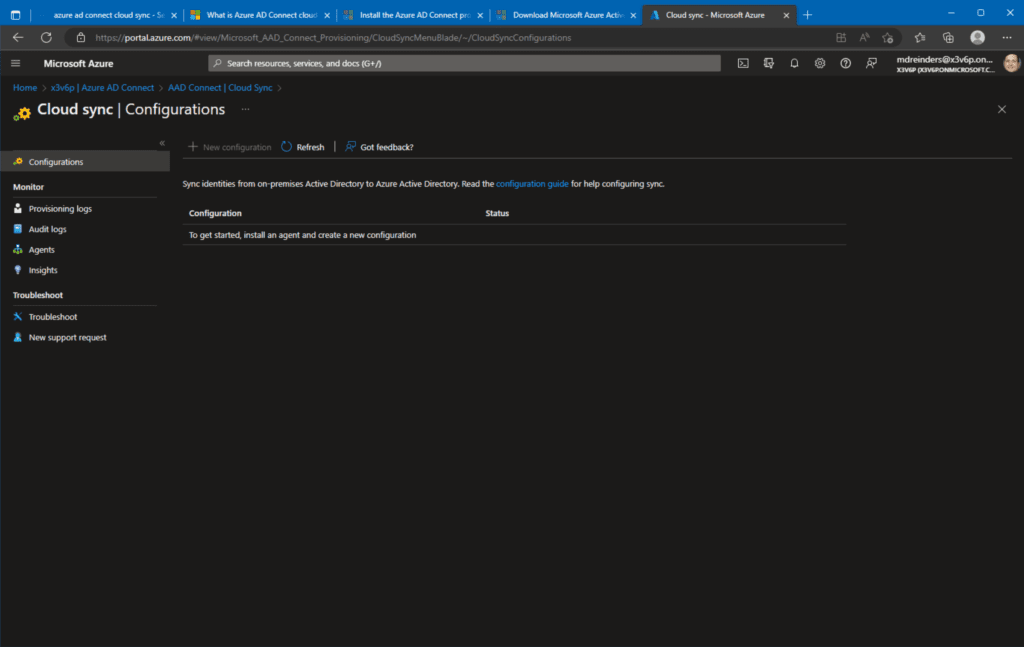
- 我们有一个干净的起点并不奇怪。在左侧点击代理菜单,然后点击下载本地代理。
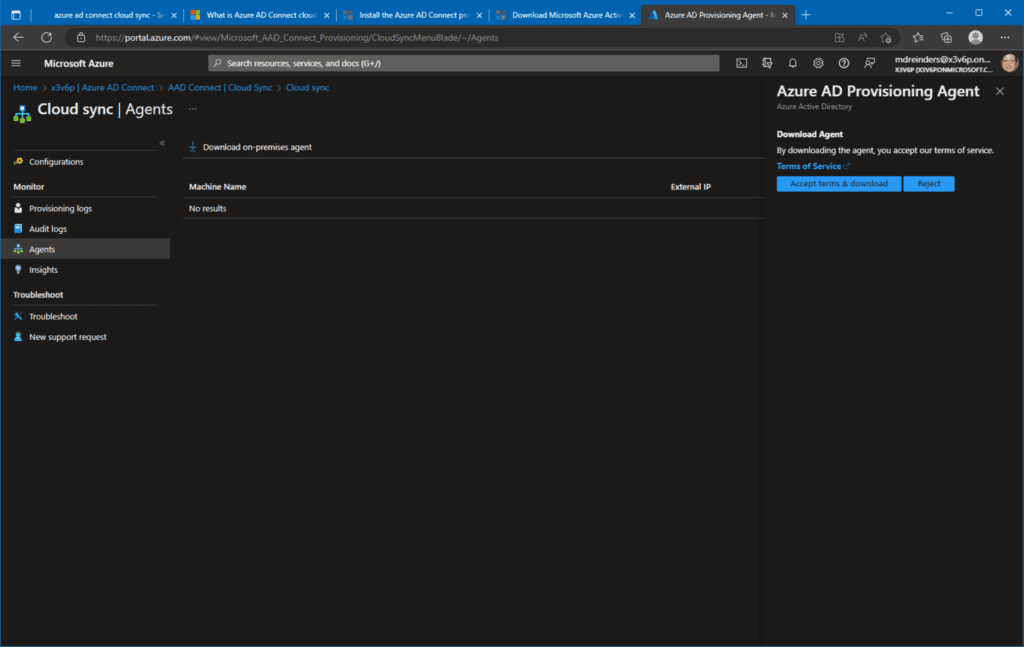
- 下载代理后,请继续双击MSI文件。安装将开始。
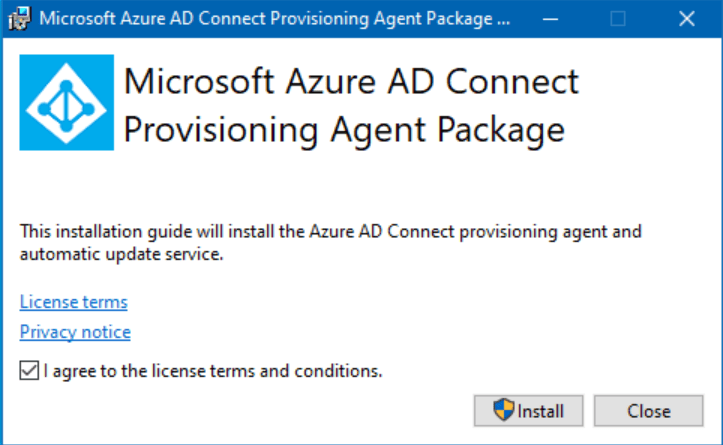
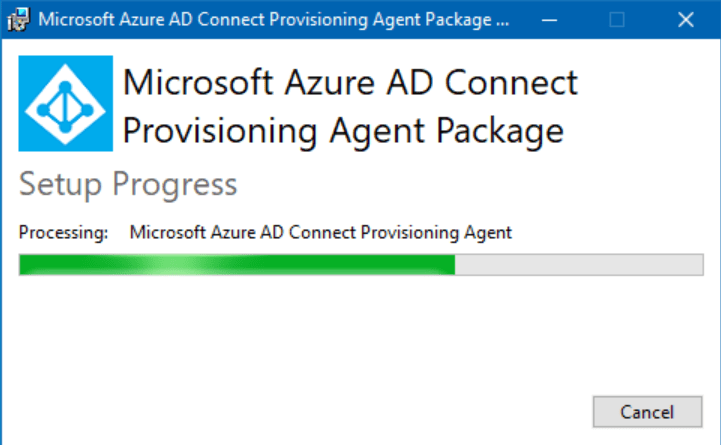
- 勾选框,然后点击安装!
接下来,我们继续进行配置。
Active Directory配置
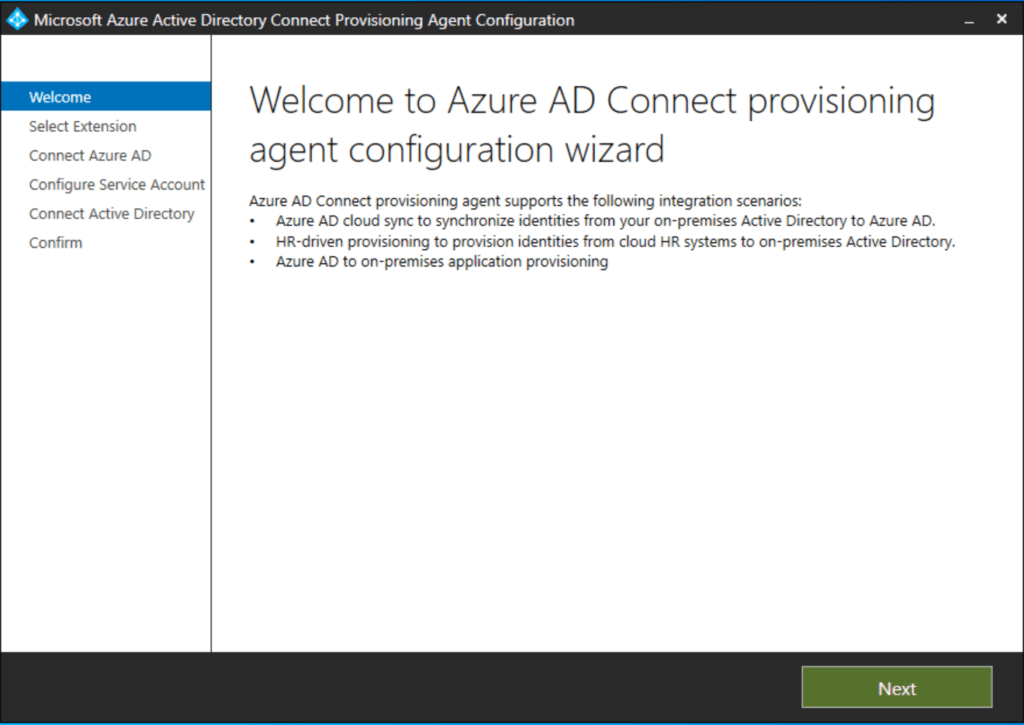
安装初始代理后,Microsoft Azure Active Directory连接配置代理向导将启动。快速说5遍。天啊,微软。总是给产品起这么拗口的名字!
- 在欢迎屏幕上,点击下一步。
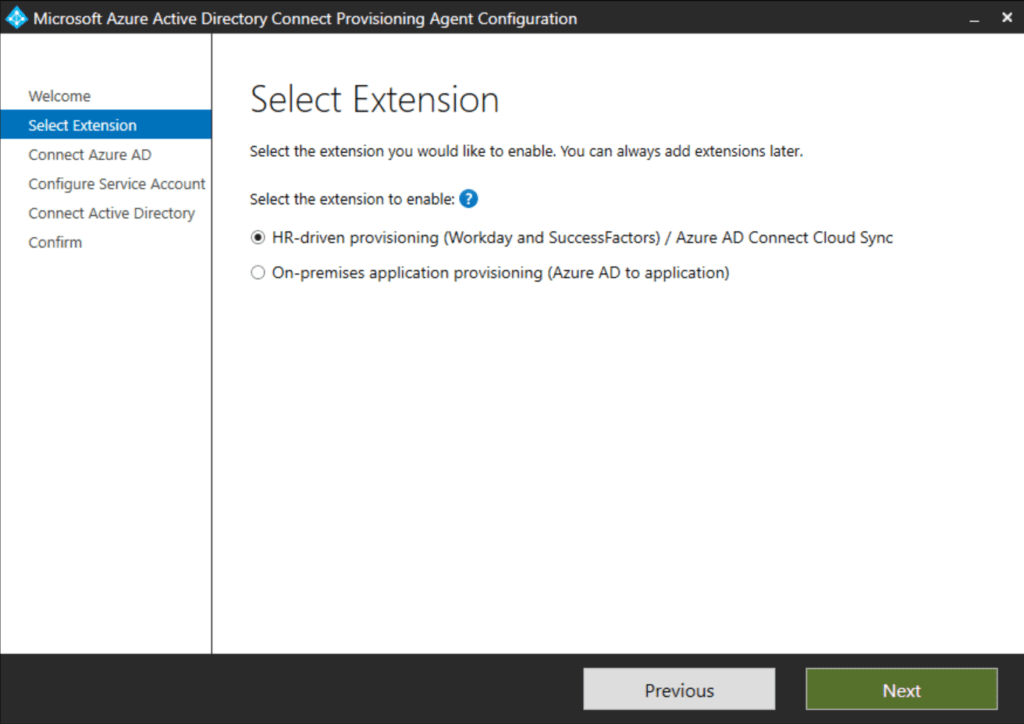
- 在“选择扩展”屏幕上,选择基于HR的配置(Workday和SuccessFactors)/ Azure AD连接云同步。这是最有可能的情况。只有当您计划将本地应用程序配置到Azure时,才会选择第二个选项。
- 点击下一步。
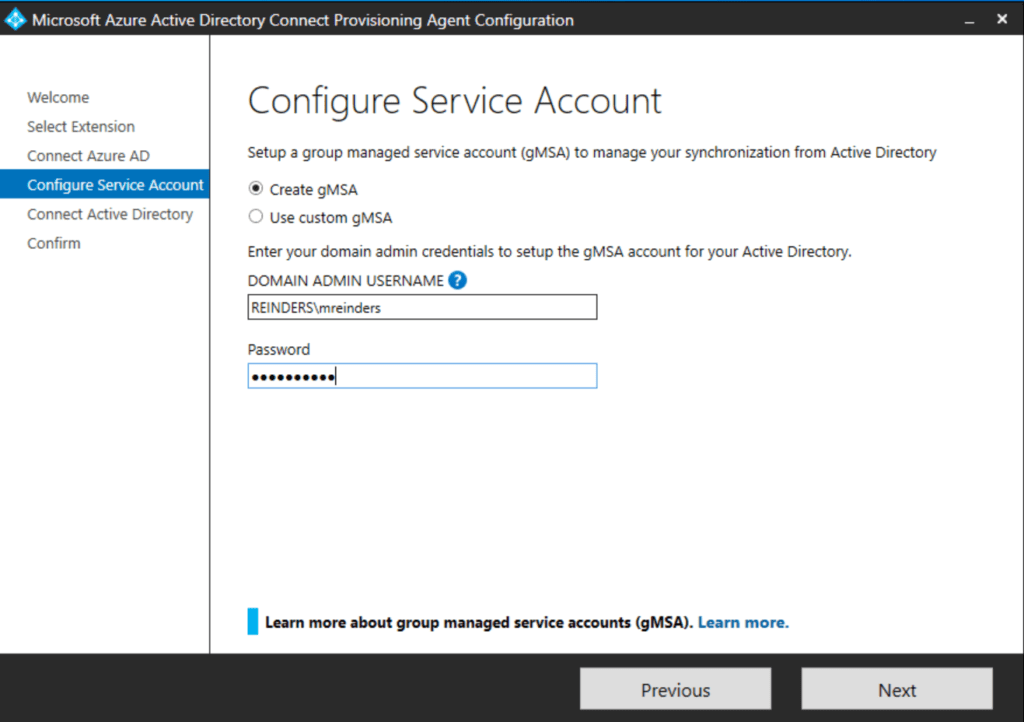
- 接下来,出现连接Azure AD屏幕,要求输入Azure AD全局管理员的凭据。输入这些信息,并准备好进行多重身份验证!
- 接着是配置服务帐户屏幕。在这里,我们将接受默认设置,创建gMSA。因为我们要求它创建一个gMSA帐户来管理从AD到Azure AD的同步,所以我们需要输入一个具有域管理员权限的帐户。输入该帐户并点击下一步。
- 继续,我们来到“连接Active Directory”屏幕。是的,你说得对。这与安装Azure AD连接的安装向导非常相似。
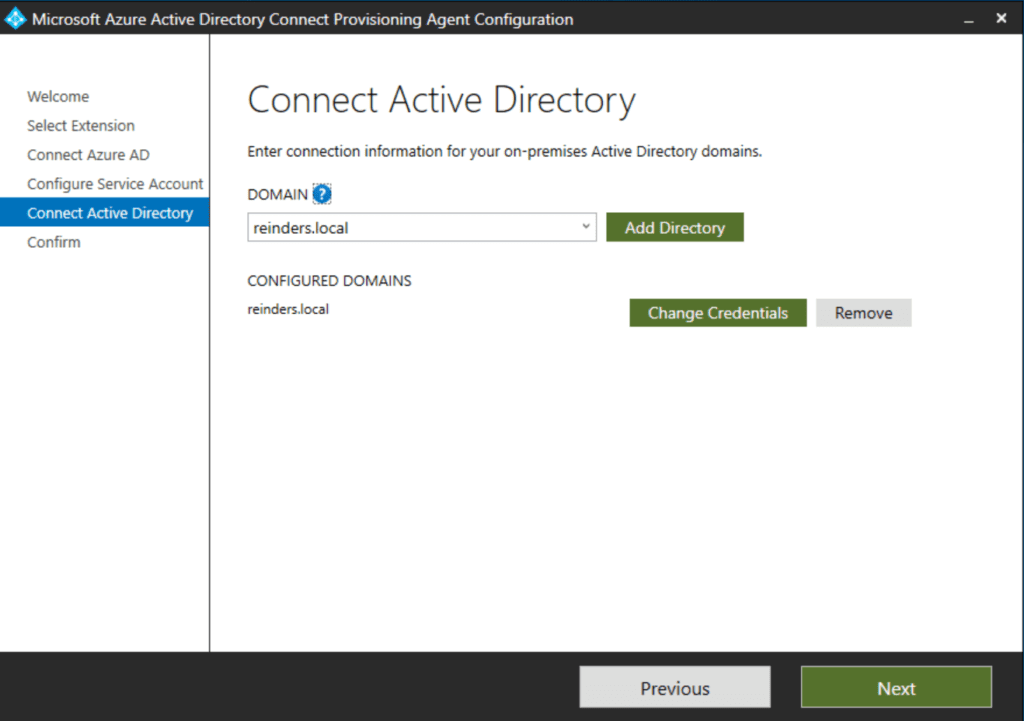
- 无论如何,请验证已设置正确的活动目录域。如果您看到任何错误,可能是您输入凭据时出现了错别字。请纠正必要的部分,然后点击下一步。
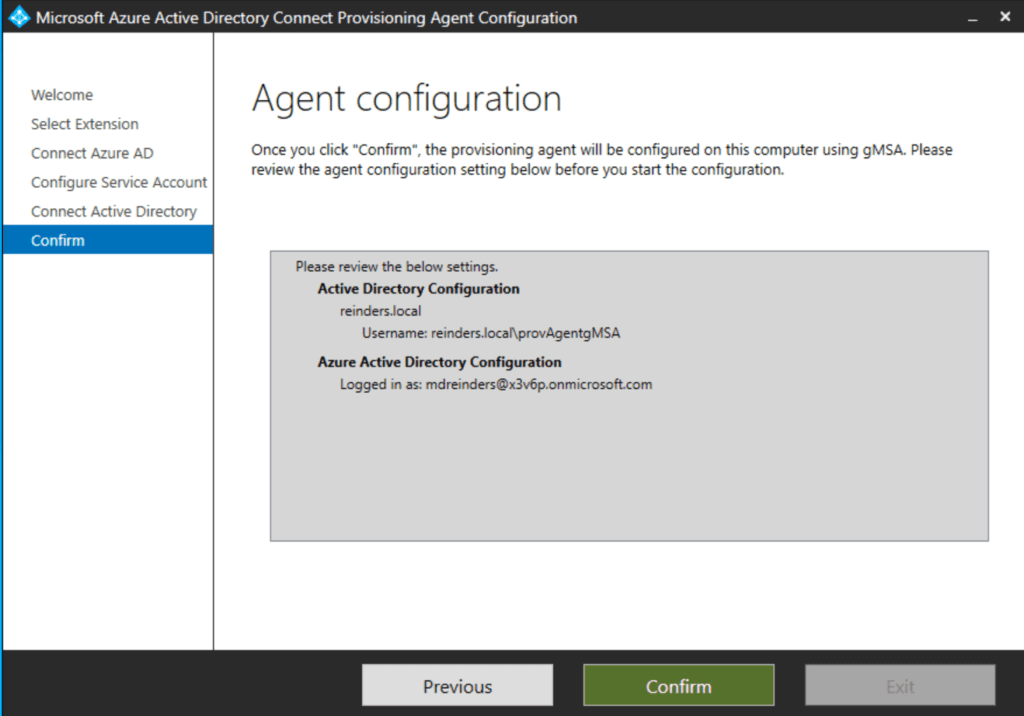
- 我们来到了最后的确认屏幕。确认所有内容都正确,然后点击确认按钮。

Azure AD配置
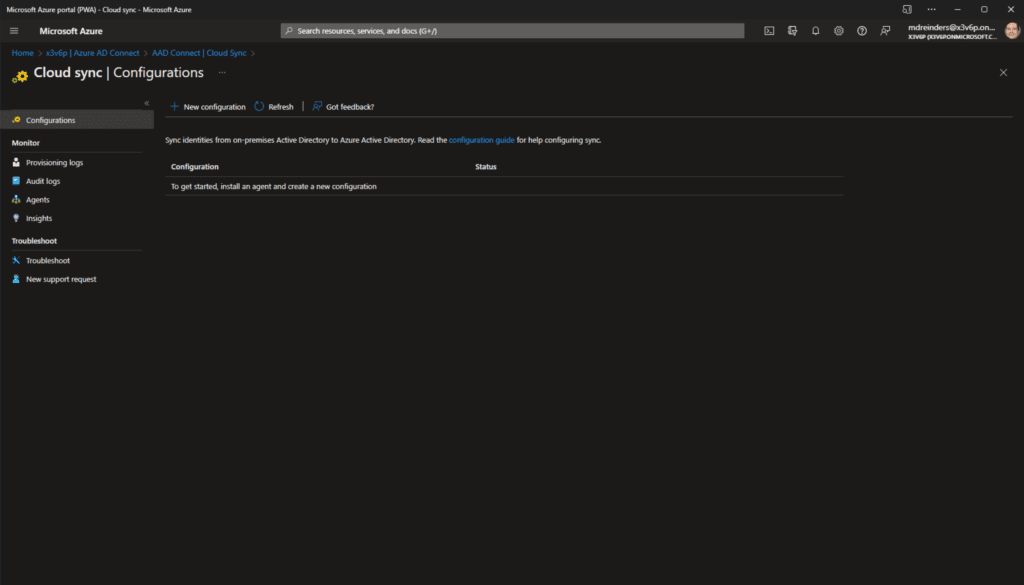
现在我们转到Azure活动目录。要管理Azure AD云同步,再次浏览至Azure门户。
- 点击Azure AD Connect,然后点击云同步。
- 在顶部点击“新配置”按钮开始云端配置过程。
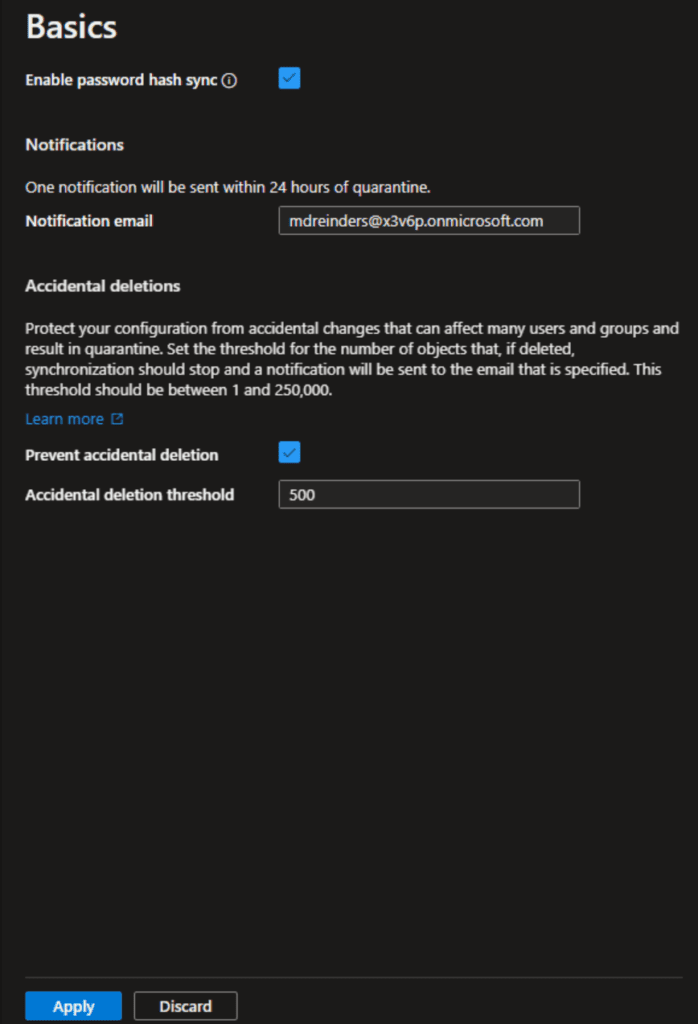
- 这里是新的云同步配置。假设您只同步一个AD域,那么默认设置应该是可以的 – 在我的情况下是 ‘reinders.local’。我们将保持“启用密码哈希同步”的选中状态,以允许自动密码管理。
- 在底部点击创建。
好了,看这个!我们完成了。我不知道您如何看待,但我几乎总是更喜欢基于云的配置而不是传统的 ‘厚’ 客户端软件。这样更清洁。而且他们可以更快地迭代UI并添加功能。而且,因为它是基于云的,您不需要担心软件升级、服务器宕机等问题。它就是这样。云端,100%的时间,对吧?
测试 – 验证
让我们简单地启用配置。稍后我们可以处理作用域过滤器、属性映射等等。
- 点击顶部的审查和启用配置按钮,然后点击启用配置。
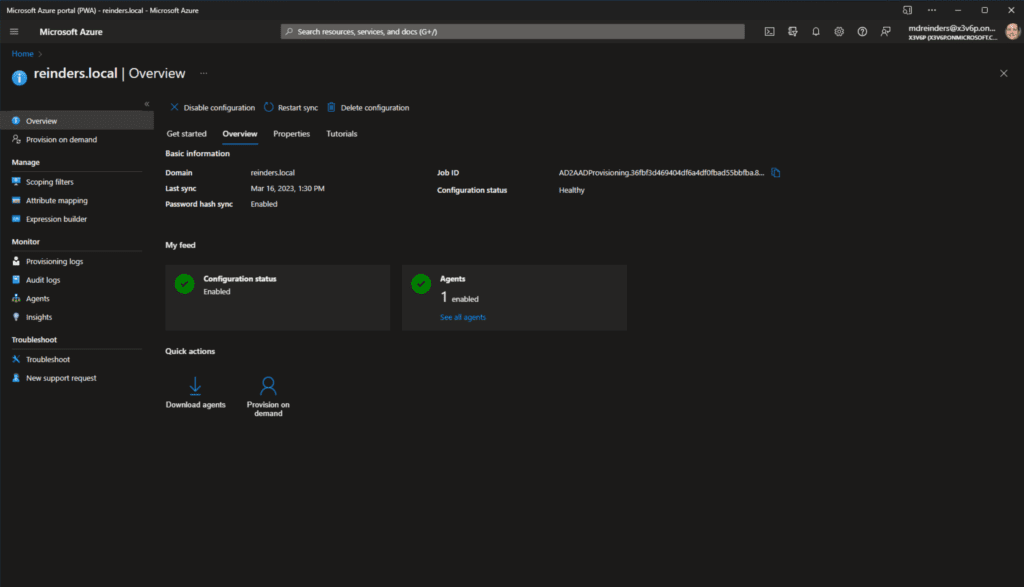
- 完成后,等待大约2分钟,然后刷新浏览器,在顶部点击概览选项卡。
- 首先,您需要输入一个通知电子邮件地址。点击属性选项卡,然后点击基本信息旁边的铅笔(编辑)图标。
- 输入一个管理员电子邮件地址,以便接收有关同步基础设施的警报。点击底部的应用。
现在,关于验证和高级定制,请返回到Azure AD门户中的用户视图,查看所有用户。我注意到用户数量从31增加到32。所以,我知道发生了一些事情。而且,如果您确实在关注,您可能记得我在配置Azure AD连接时过滤了一个特定OU中的用户。因此,由于我还没有进行任何过滤,一个新用户已同步 – John Reinders。
让我为您介绍您将用于维护和调整同步设置的三个核心配置屏幕。第一个是作用域过滤器。
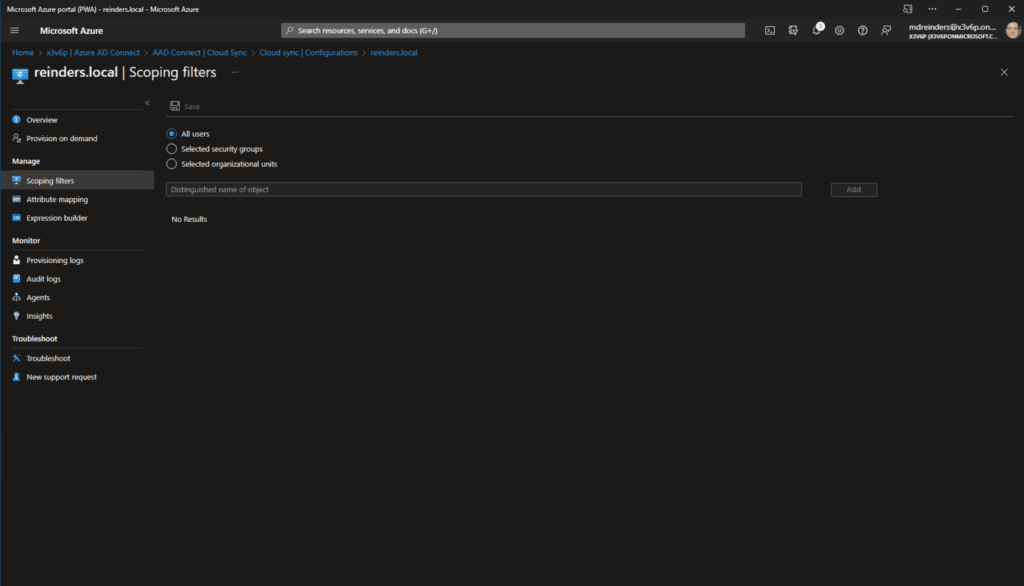
默认情况下,会同步你的Active Directory中的所有用户。你可以选择仅同步选择的安全组或选择组织单位(OUs)。是的,这是云软件目前比本地软件可配置性更低的一个例子。但是,这是不断变化的。最终,他们将把所有功能和选项整合到Azure AD Connect云同步中。
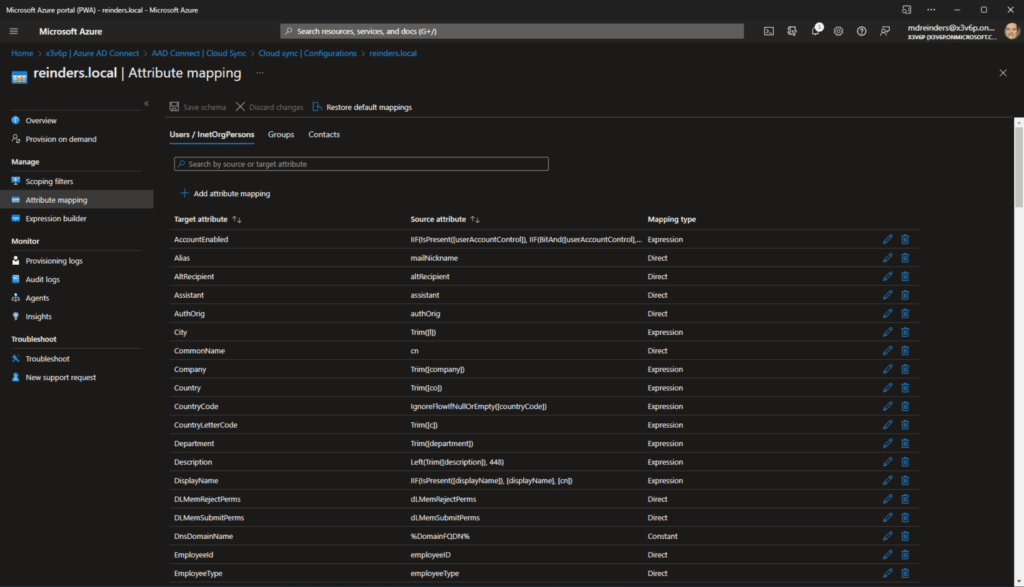
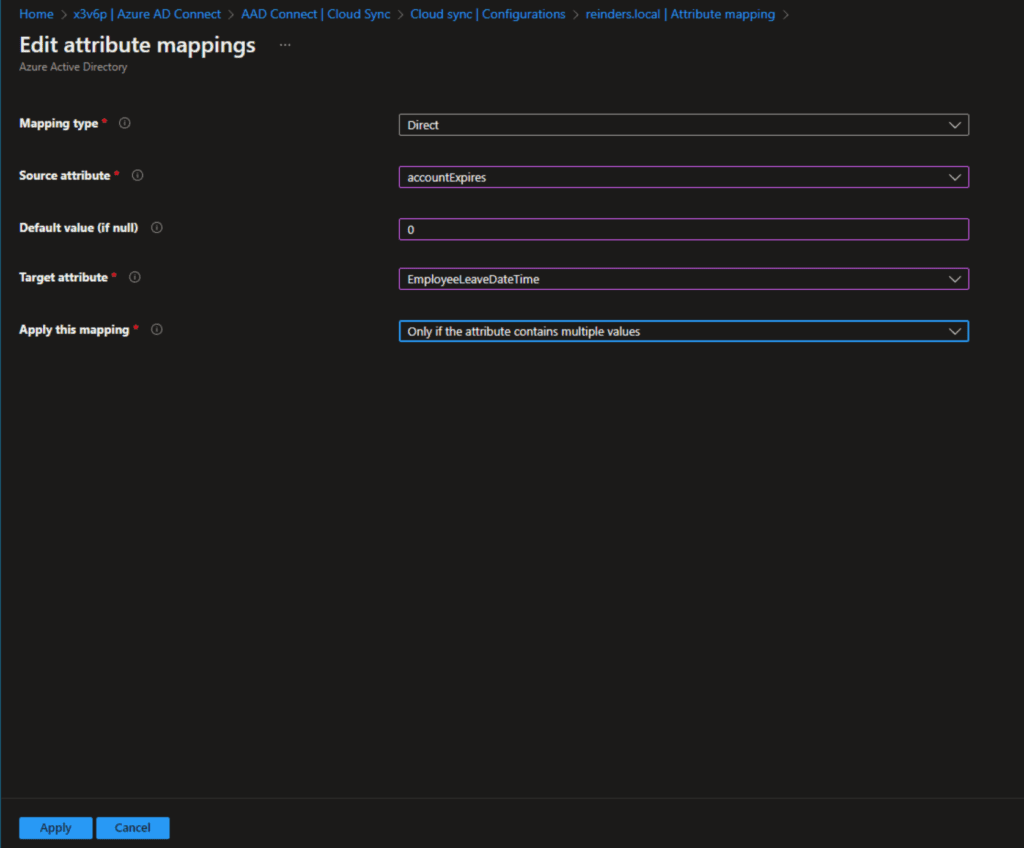
接下来,让我们看一下属性映射。在这里,我们可以选择编辑默认属性列表以及它们是如何从Active Directory同步到Azure AD的,甚至可以通过点击“+ 添加属性映射”来添加额外的项目。
请放心,这里有很多选项。正如我所说,微软不断为这个功能添加更多特性。因此,如果你注意到一些屏幕变动或增加/删除部分,也别感到惊讶。这就是云,伙计们!
最后,让我们看看表达式构建器。这是你真正可以为某些属性的同步添加一些自定义内容的地方,以及如何使用表达式来匹配一个Active Directory域中的特定用户属性和另一个AD域中的其他属性,以产生Azure AD中最佳的单个对象。同样,在这里有很大的潜力,如果你曾经使用过Azure AD Connect软件中的同步规则等自定义功能,你会对一般的设置很熟悉。
结论
好了,这是很多信息。而且,我确实想指出Azure AD Connect云同步的最大劣势 – 它的功能较少,支持的场景也较少于Azure AD Connect。
这是正常且经过设计的。Azure AD Connect 已经存在多年了,Azure AD Connect 云同步是大约一年前发布的。因此,老版本软件功能更加丰富。
我的建议是:一旦 Azure AD Connect 云同步支持的方案符合您的环境,就采取措施进行迁移。在我的“日常工作”中使用了相当多年的 Azure AD Connect 后,云功能看起来非常不错 – 并且需要管理和监视的内容大大减少。
请随时在下方留下评论或问题,谢谢您的阅读!
Source:
https://petri.com/install-azure-ad-connect-cloud-sync/