


Apache Doris 是一个高性能的实时分析数据库,拥有令人印象深刻的底层架构和代码设计。对于开发者来说,掌握源代码的编译和调试是理解 Doris 核心的关键。然而,构建过程涉及多个工具链和依赖配置,在调试过程中,您可能会遇到各种复杂的问题,这可能会让初学者感到不知所措。
本文将带您从源代码到运行时的过程,提供关于 Apache Doris 编译和调试程序的详细分析。从环境设置和代码检出到排除常见问题,我们结合实际案例帮助您快速入门 Doris 开发和调试。
概述
您是否曾想过一个 SQL 查询是如何从头到尾被解析和执行的?在 Apache Doris 中,这个过程涉及多个核心组件和复杂的内部机制。本文将引导您从源代码到运行时的旅程,提供对 Doris 构建和调试过程的全面分析,帮助您深入理解 SQL 执行原理。
1. 环境
基本环境
- 计算机配置。MacBook Pro(芯片:Apple M1,macOS:15.1)
- JDK。版本 17
- Doris 分支。使用 Doris Master 分支(具体为 branch-2.1)
安装环境依赖
使用Homebrew时,安装的JDK版本为17,因为在macOS上,arm64版本的Homebrew默认不包含JDK 8。目前,Doris仅支持JDK8和JDK17。
brew install automake autoconf libtool pkg-config texinfo coreutils gnu-getopt \ python@3 cmake ninja ccache bison byacc gettext wget pcre maven llvm@16 openjdk@17 npm
依赖说明
1. Java、Maven等。这些可以单独下载,以便更容易管理。
- 在macOS上,推荐使用Zulu JDK17。
- Maven可以从官方Maven网站下载。
- 手动下载的Java和Maven必须在环境变量中进行配置。
2. 其他依赖的环境变量(Apple Silicon Mac的示例):
export PATH=/opt/homebrew/opt/llvm/bin:$PATH
export PATH=/opt/homebrew/opt/bison/bin:$PATH
export PATH=/opt/homebrew/opt/texinfo/bin:$PATH
ln -s -f /opt/homebrew/bin/python3 /opt/homebrew/bin/python
将上述配置添加到你的~/.bashrc或~/.zshrc文件中,然后运行source ~/.bashrc或source ~/.zshrc以应用更改。
安装Thrift
注意:仅在调试FE(前端)时需要安装Thrift。当同时调试BE(后端)和FE时,BE的第三方库已包含Thrift。
MacOS:
1. Download: `brew install [email protected]`
2. Create a symbolic link:
`mkdir -p ./thirdparty/installed/bin`
# Apple Silicon 芯片 macOS
`ln -s /opt/homebrew/Cellar/[email protected]/0.16.0/bin/thrift ./thirdparty/installed/bin/thrift`
# Intel 芯片 macOS
`ln -s /usr/local/Cellar/[email protected]/0.16.0/bin/thrift ./thirdparty/installed/bin/thrift`
Note: Running `brew install [email protected]` on macOS may report that the version cannot be found. To resolve this, execute the following commands in the terminal:
1. `brew tap homebrew/core --force`
2. `brew tap-new $USER/local-tap`
3. `brew extract --version='0.16.0' thrift $USER/local-tap`
4. `brew install [email protected]`
Reference: `https://gist.github.com/tonydeng/02e571f273d6cce4230dc8d5f394493c`
获取你的代码
通过执行以下命令来克隆你的代码:
cd ~
mkdir DorisDev
cd DorisDev
git clone <https://github.com/GitHubID/doris.git>

设置环境变量
export DORIS_HOME=~/DorisDev/doris
export PATH=$DORIS_HOME/bin:$PATH
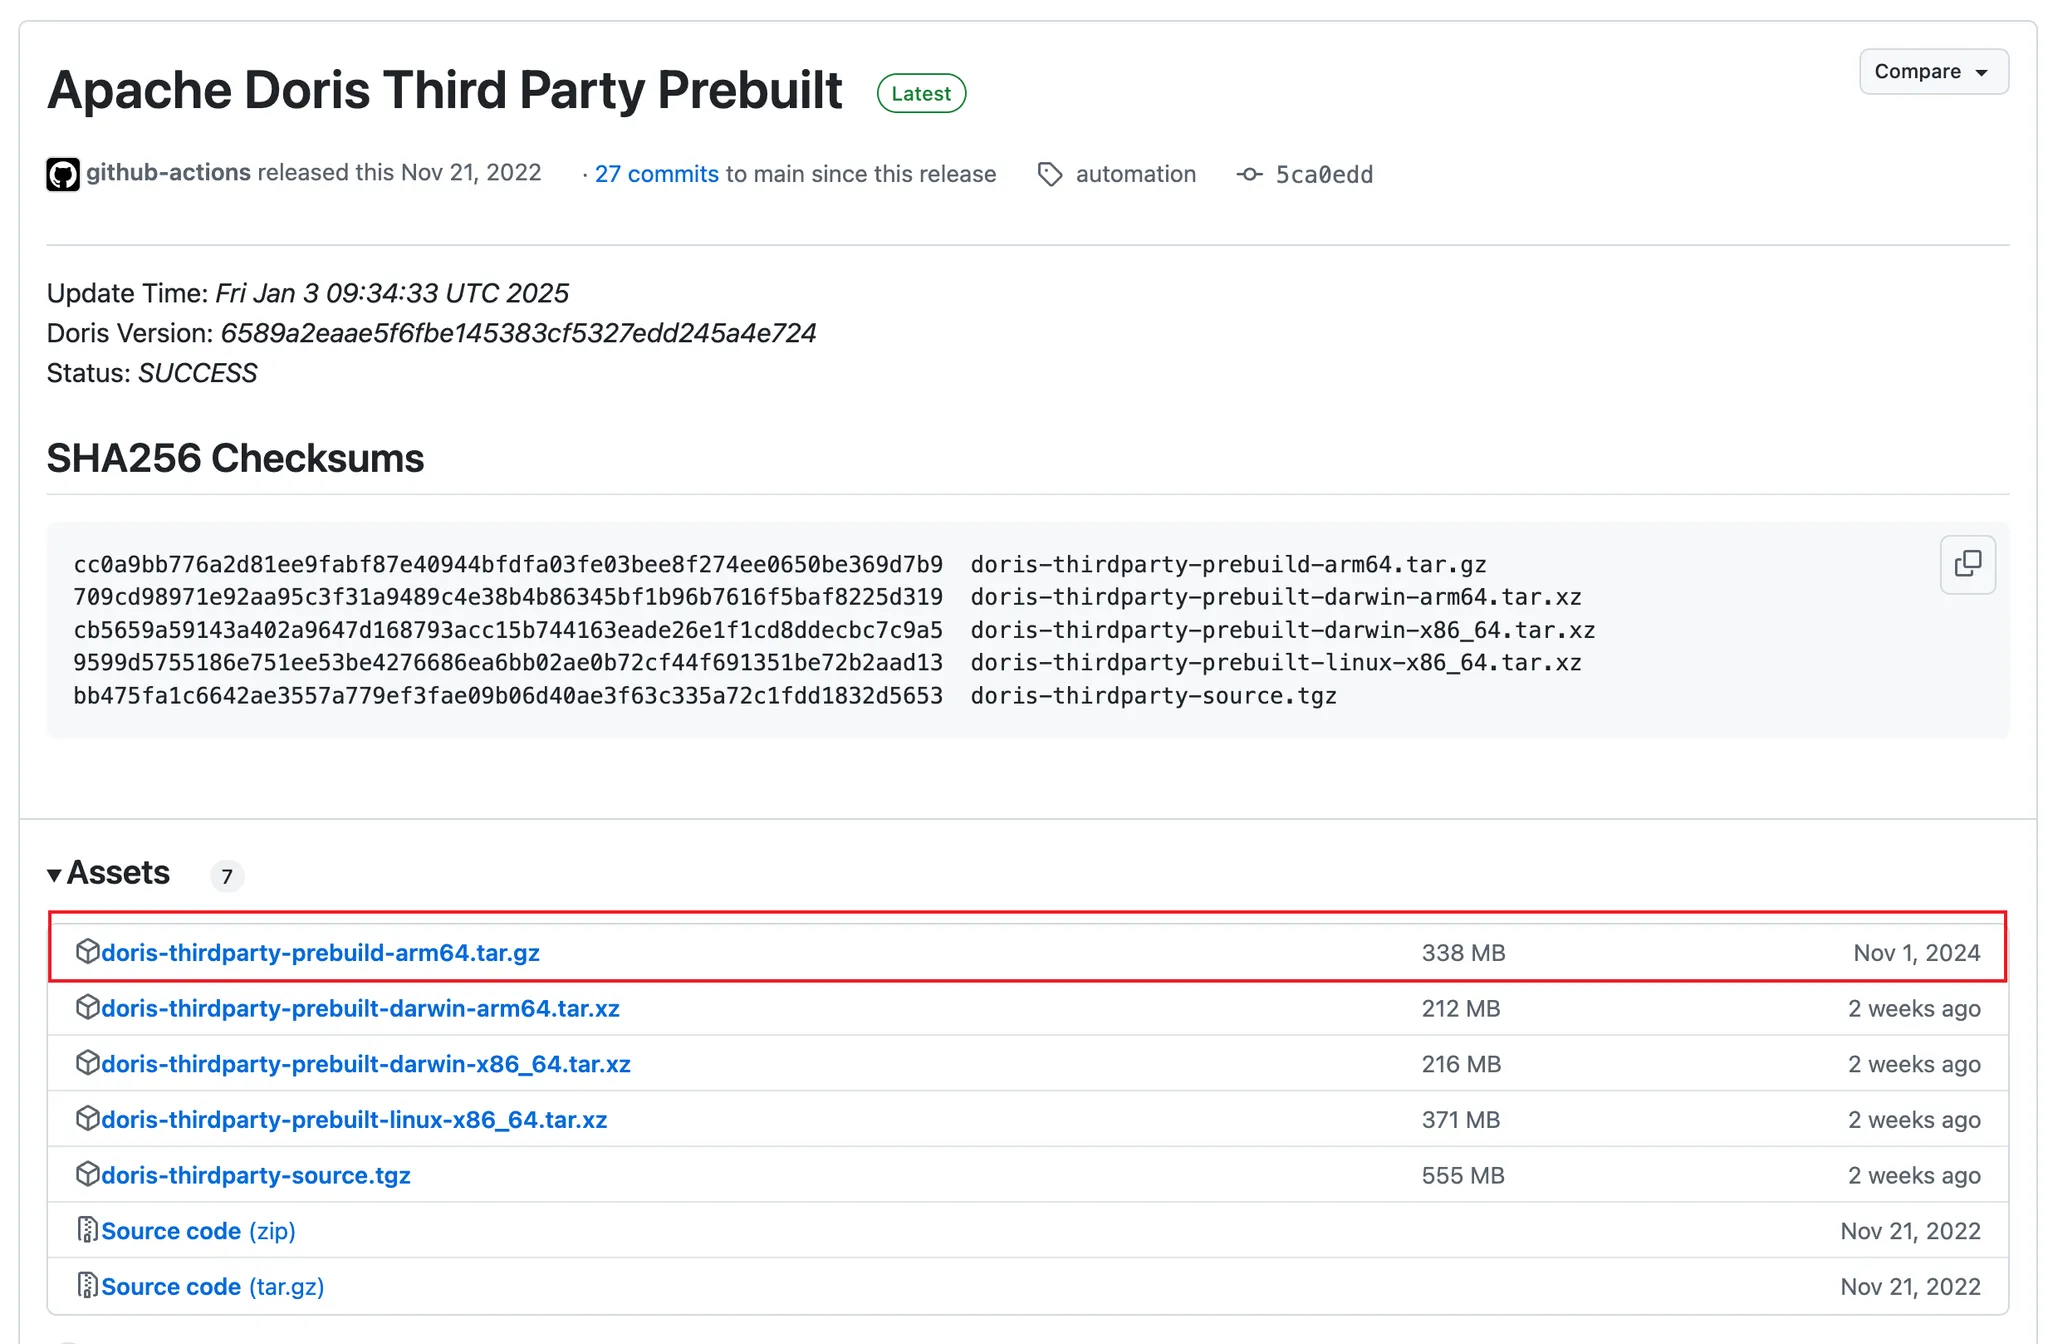
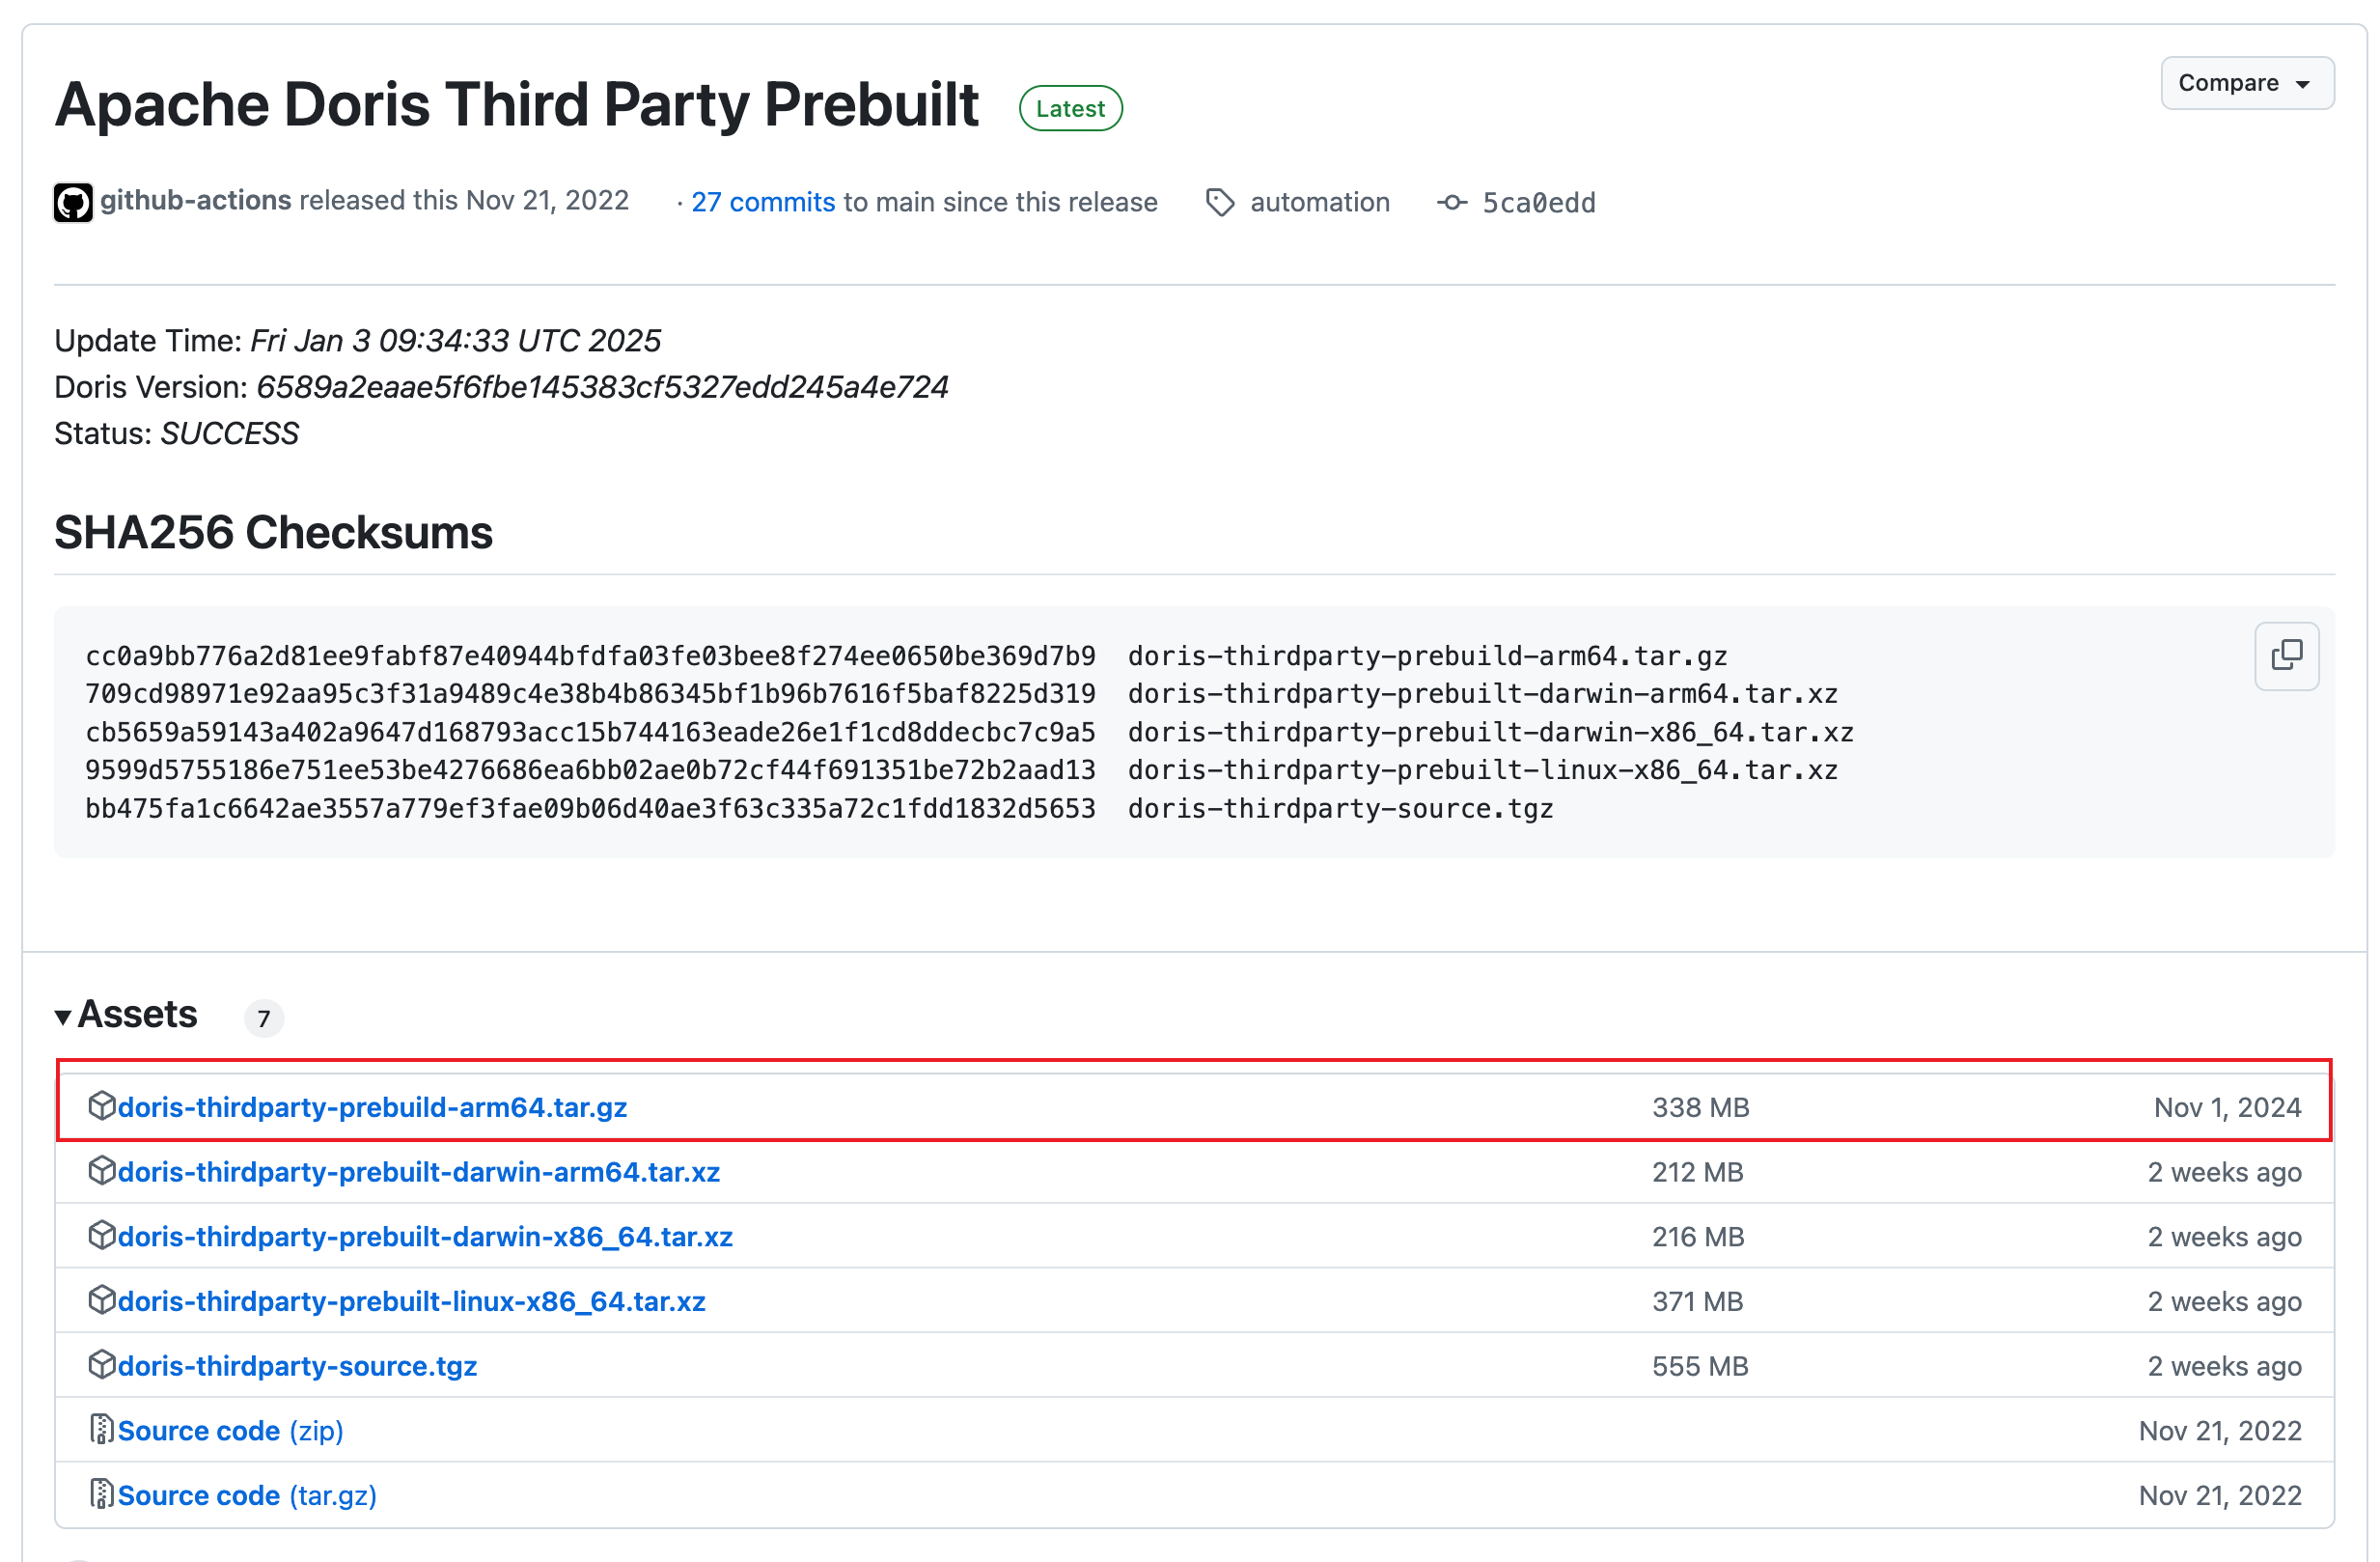
下载 Doris 构建依赖
1. 访问 Apache Doris 第三方预构建 页面 (链接) 查找所有第三方库的源代码。您可以直接下载 doris-thirdparty-source.tgz。
2. 或者,您可以从同一页面下载预编译的第三方库,这样可以避免自己编译这些库。请参考以下命令。
cd thirdparty
rm -rf installed
# For Intel Macs: curl -L <https://github.com/apache/doris-thirdparty/releases/download/automation/doris-thirdparty-prebuilt-darwin-x86_64.tar.xz> \\
-o - | tar -Jxf -
# For Apple Silicon Macs: curl -L <https://github.com/apache/doris-thirdparty/releases/download/automation/doris-thirdparty-prebuilt-darwin-arm64.tar.xz> \\
-o - | tar -Jxf -
# Verify that protoc and thrift run correctly:
cd installed/bin
./protoc --version
./thrift --versio
当运行 protoc 和 thrift 时,您可能会遇到由于开发者验证问题而无法打开它们的问题。在这种情况下,转到 安全性与隐私,在“通用”选项卡中点击 仍要打开 按钮以确认您要打开该二进制文件。有关更多详细信息,请参考 苹果支持。
增加系统最大文件描述符限制
修改后,运行相应文件上的 source 命令以应用更改。
# For bash: echo 'ulimit -n 65536' >>~/.bashrc
# For zsh: echo 'ulimit -n 65536' >>~/.zshrc
2. 编译 Doris
转到您的 Doris 主目录并运行构建脚本:
cd $DORIS_HOME
# Compile the entire Doris project:
sh build.sh
# Or compile only FE and BE:
sh build.sh --fe --be
如果要加快构建过程并且不需要 FE 前端页面,则可以在 build.sh 脚本中注释掉 FE UI 构建部分:
# FE UI must be built before building FE
#if [[ "${BUILD_FE}" -eq 1 ]]; then
# if [[ "${BUILD_UI}" -eq 1 ]]; then
# build_ui
# fi
#fi
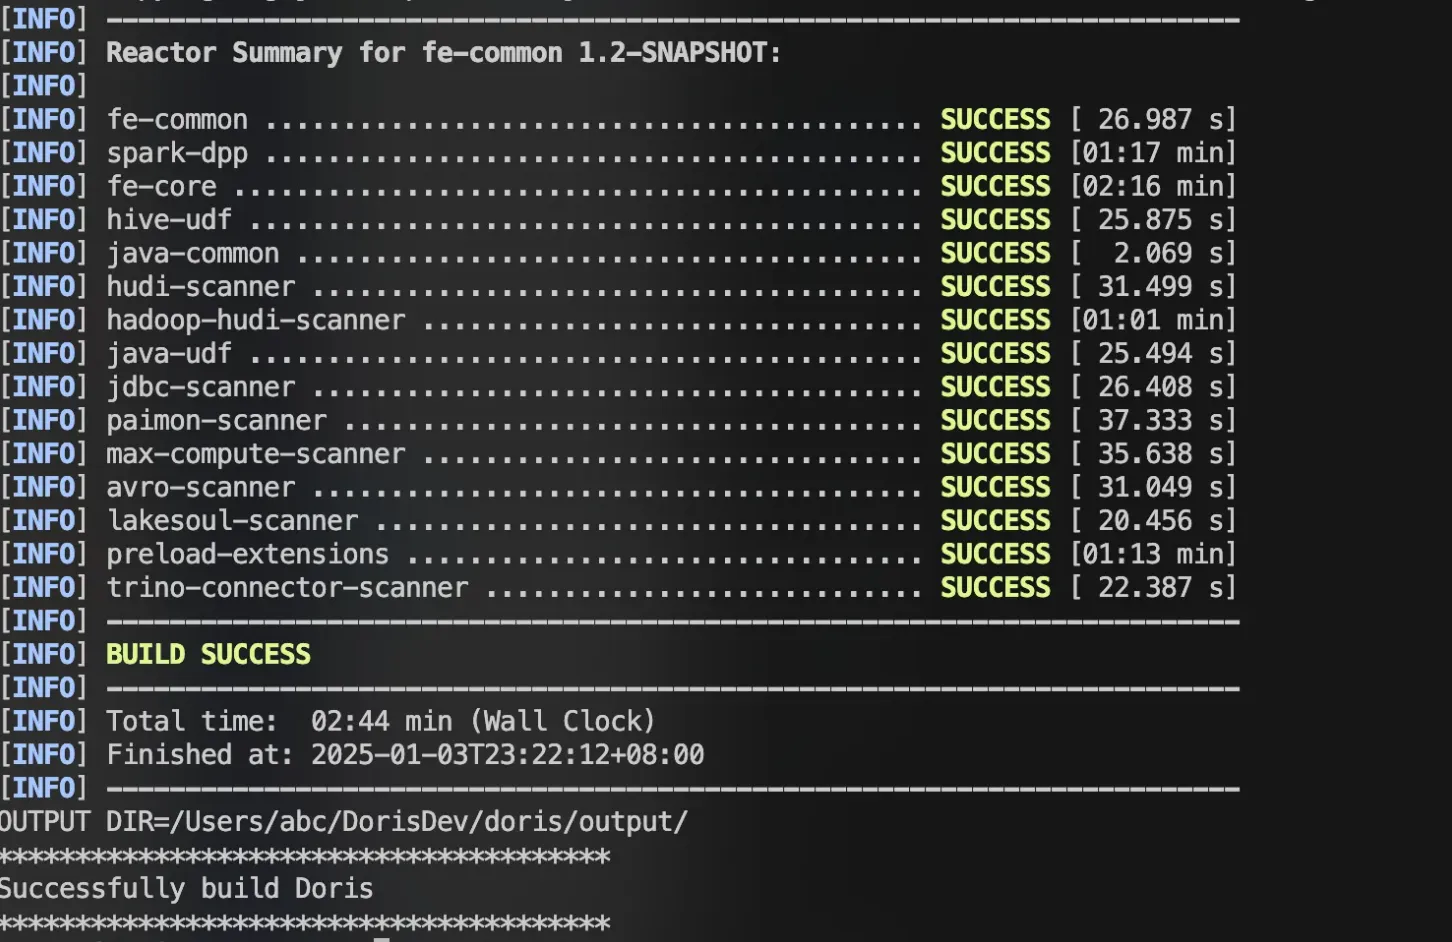
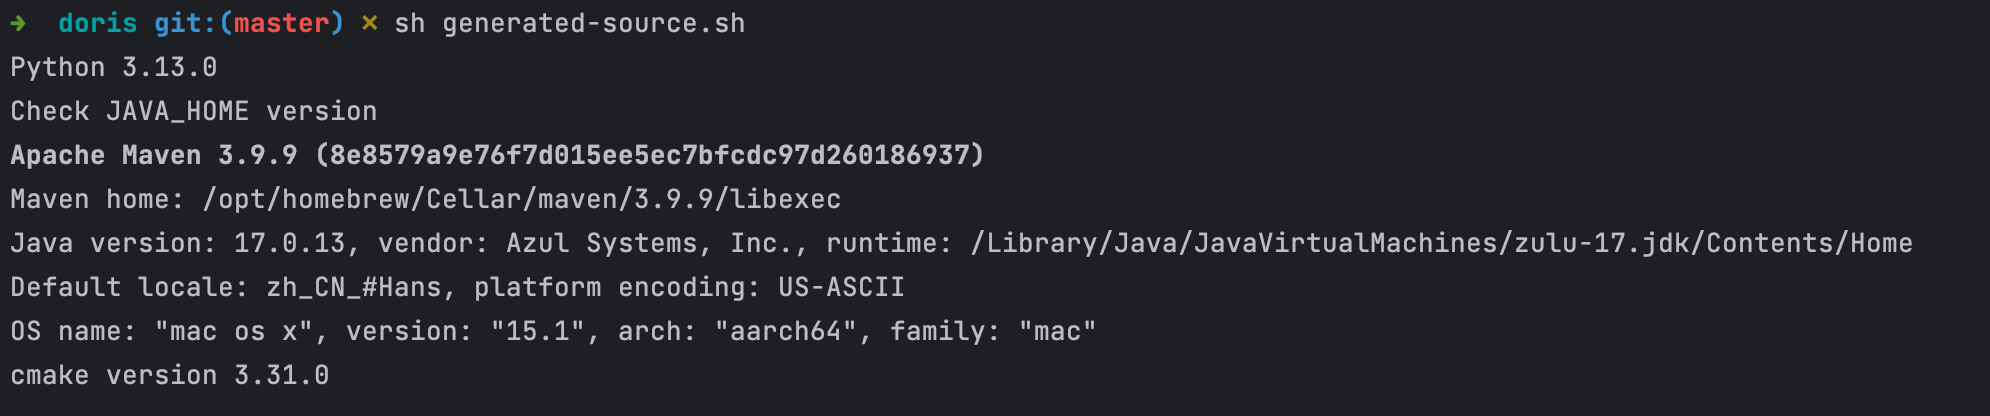
成功编译后,您应该会看到类似以下输出:
3. 调试
配置调试环境
此指南仅涵盖调试 Doris FE。
# Copy the compiled package to a separate directory:
cp -r output/ ../doris-run
# Configure FE/BE settings:
1. Set the IP and directories.
2. For BE, add the extra configuration: min_file_descriptor_number = 10000.
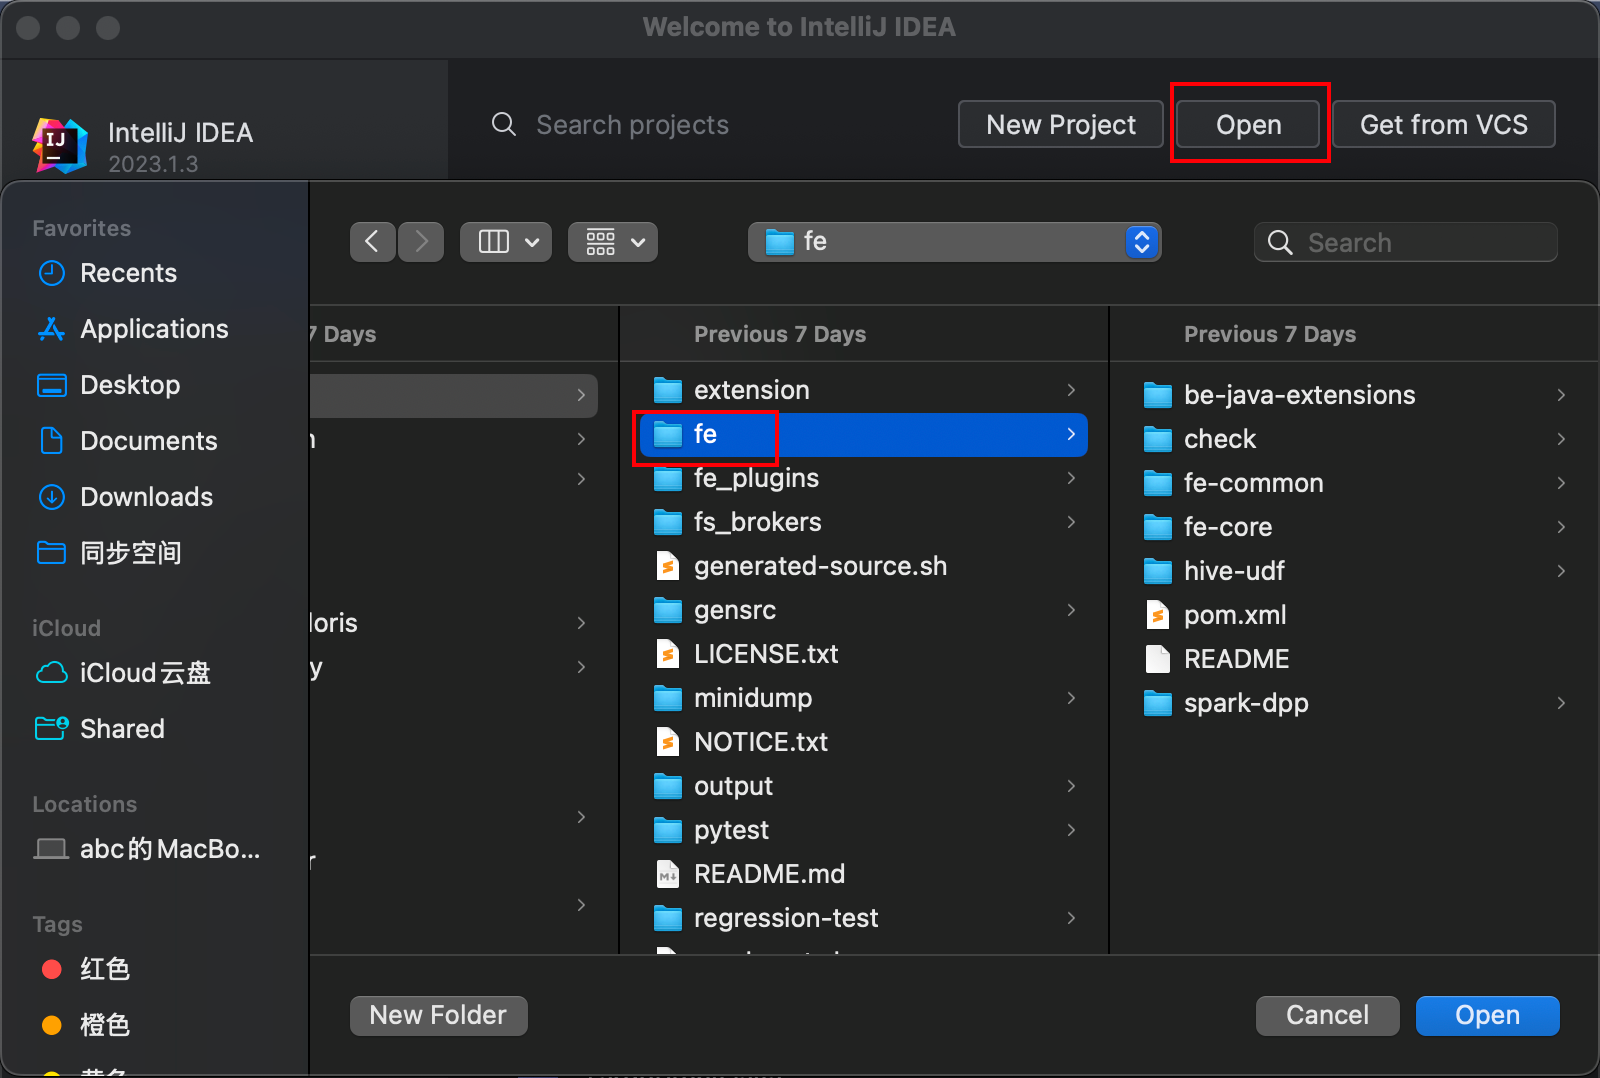
使用 IntelliJ IDEA 开始调试。
重要:不要打开 Doris 项目的根目录;相反,打开 FE 目录以避免与 CLion 冲突。
生成 FE 代码
打开 IDEA 终端,导航到代码的根目录,并执行:
sh generated-source.sh
等待看到“完成”消息。
配置 FE 的调试
1. 编辑配置。
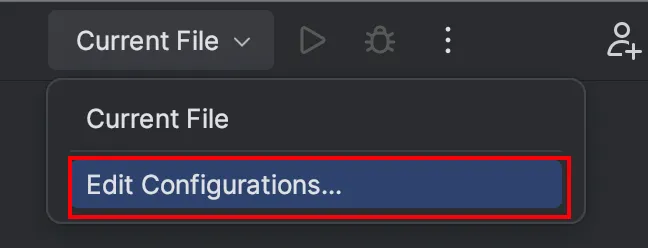
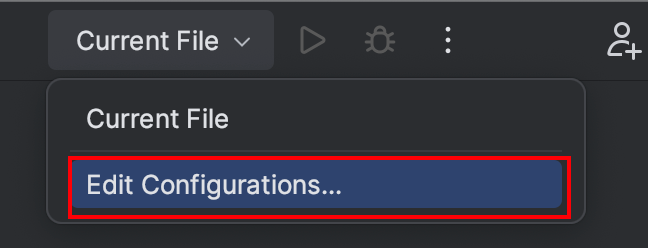
2. 添加 DorisFE 配置。单击左上角的 + 图标以添加一个应用程序配置。有关特定设置,请参考下面的图像。

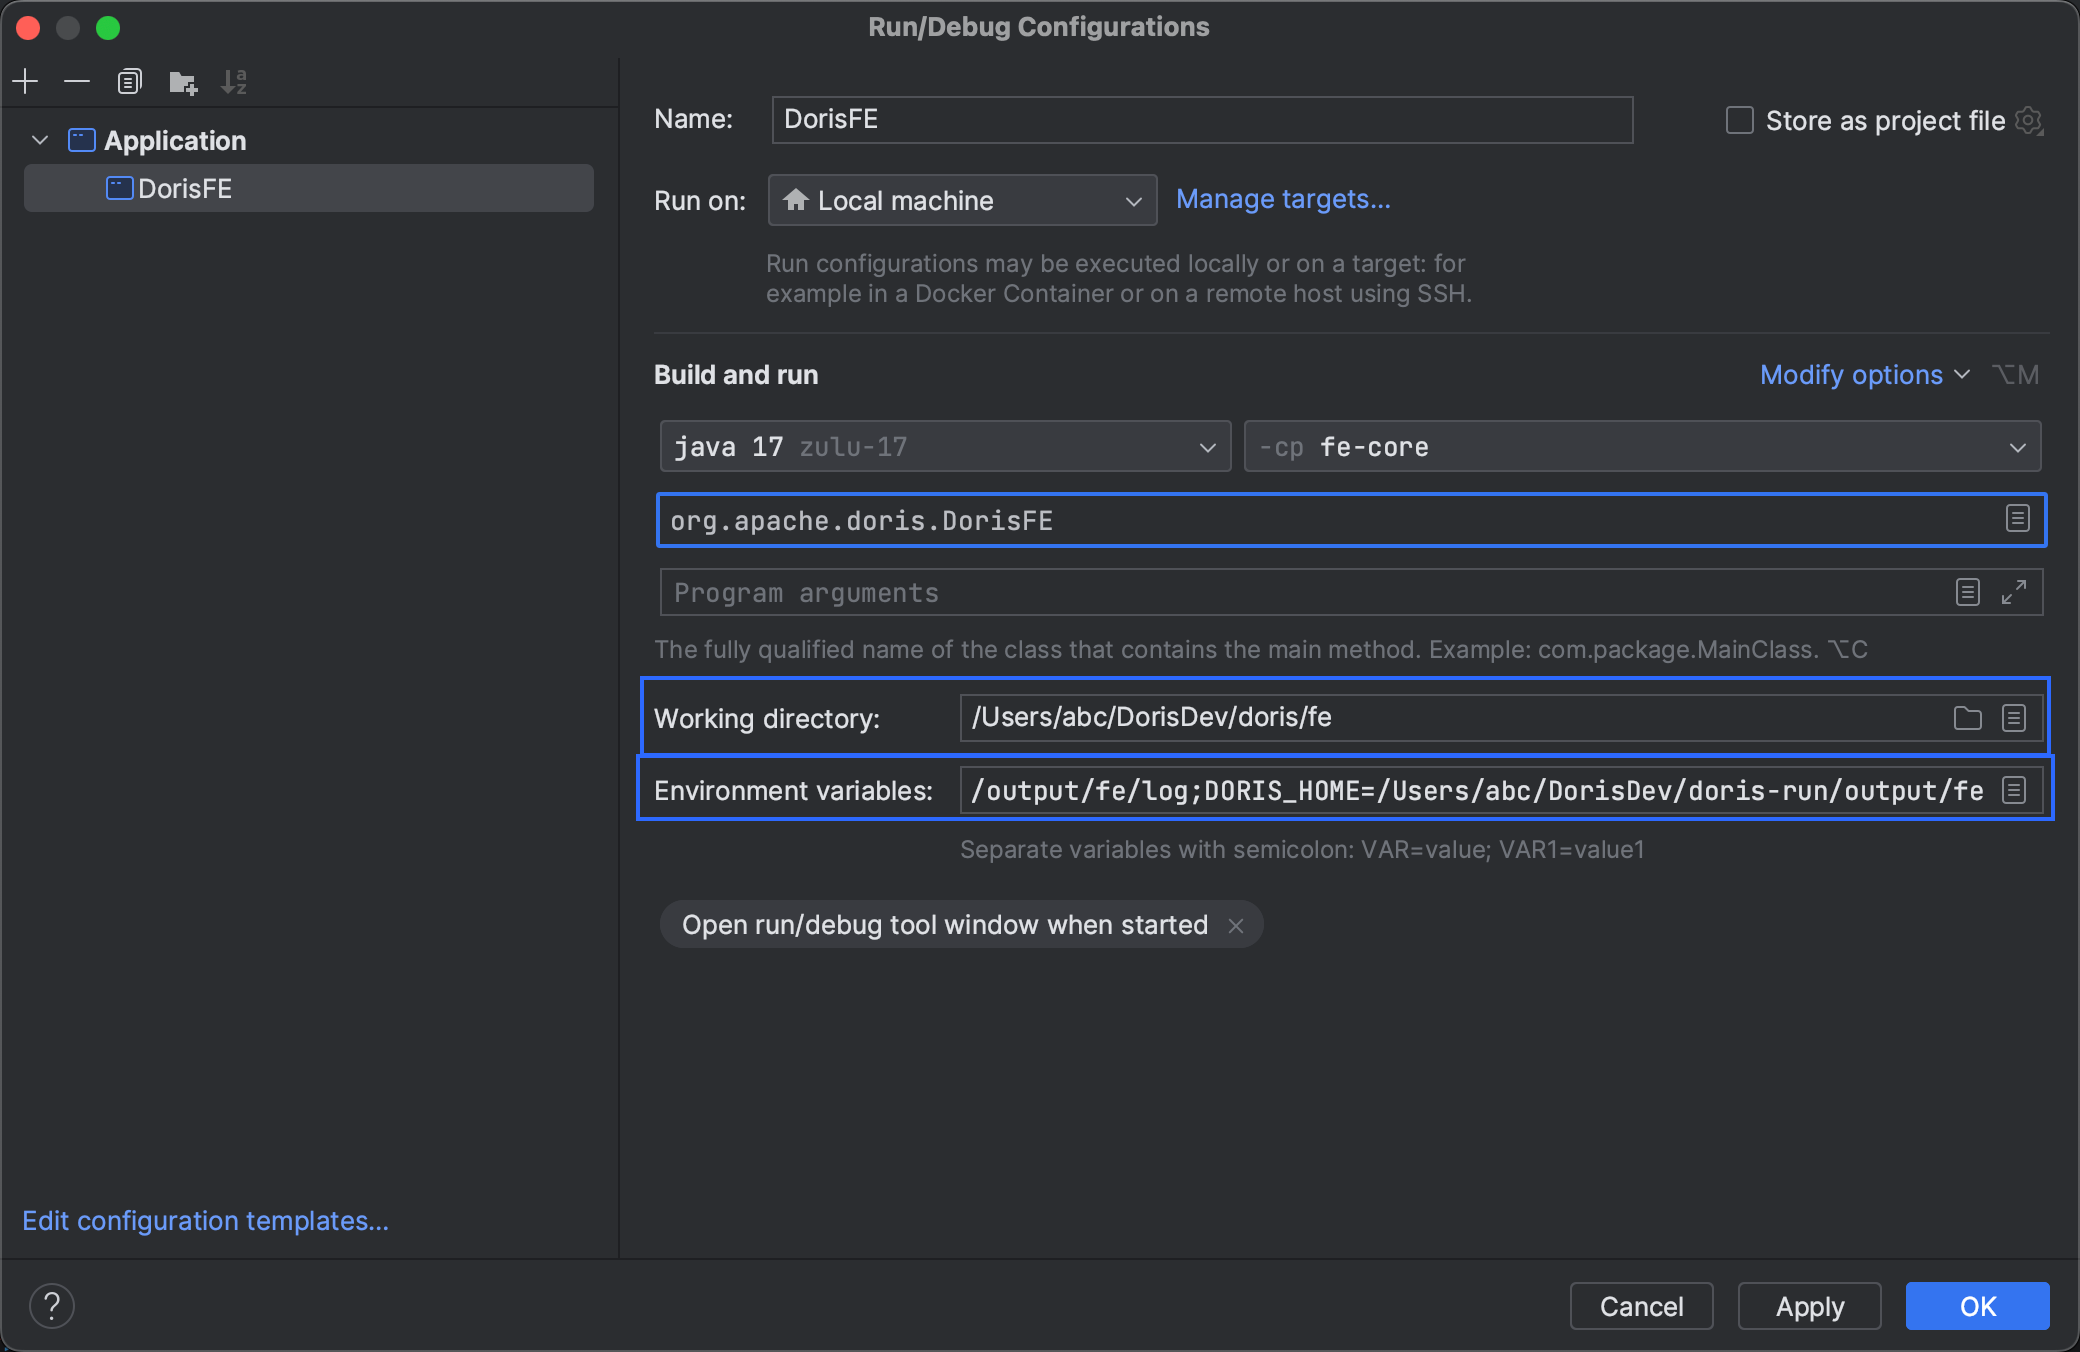
3. 工作目录。将其设置为源代码中的 fe 目录。
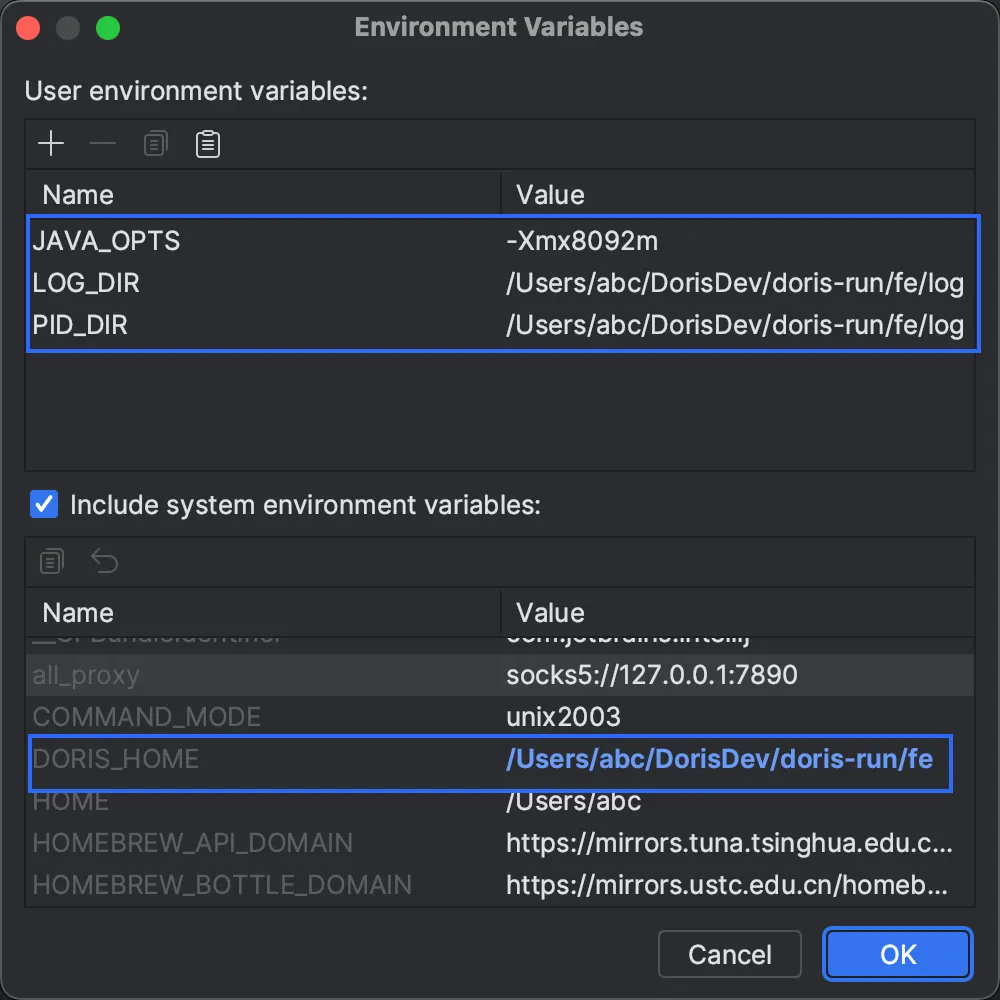
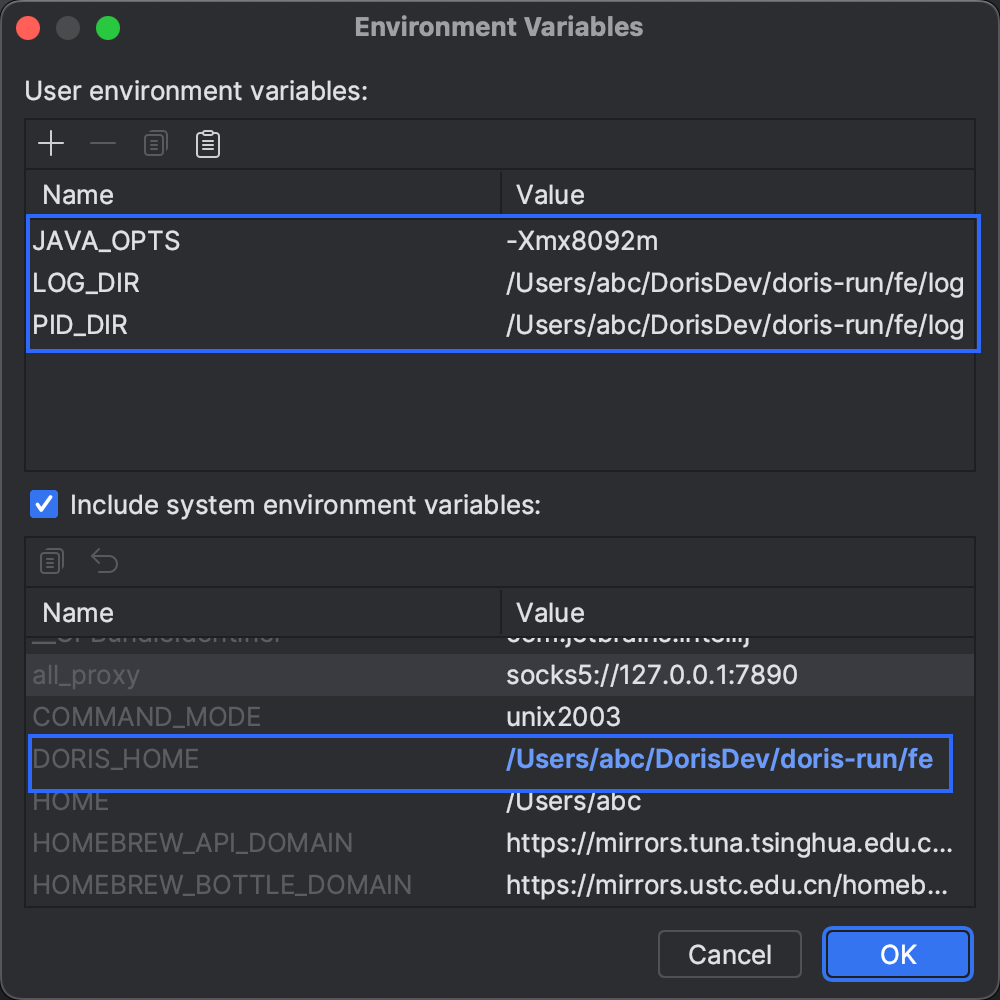
4. 环境变量。配置环境变量类似于在 Doris 根目录中的 fe/bin/start_fe.sh 中导出的变量。 DORIS_HOME 变量应指向您在设置期间复制的目录。
JAVA_OPTS=-Xmx8092m;
LOG_DIR=/Users/abc/DorisDev/doris-run/fe/log;
PID_DIR=/Users/abc/DorisDev/doris-run/fe/log;
DORIS_HOME=/Users/abc/DorisDev/doris-run/fe
启动 FE
点击 运行 或 调试。这将触发 FE 的构建过程;完成后,FE 将启动。在本指南中,我们选择 调试。
启动 BE
由于您已将编译好的软件包复制到 doris-run 目录,因此从该目录启动 BE:
sh bin/start_be.sh --daemon
调试 FE
1. 连接到 FE. 使用 MySQL 客户端或 DBeaver 连接到由 IDEA 启动的 FE。
mysql -uroot -h127.0.0.1 -P9030
2. 将 BE 节点添加到集群.
alter system add backend "127.0.0.1:9050";
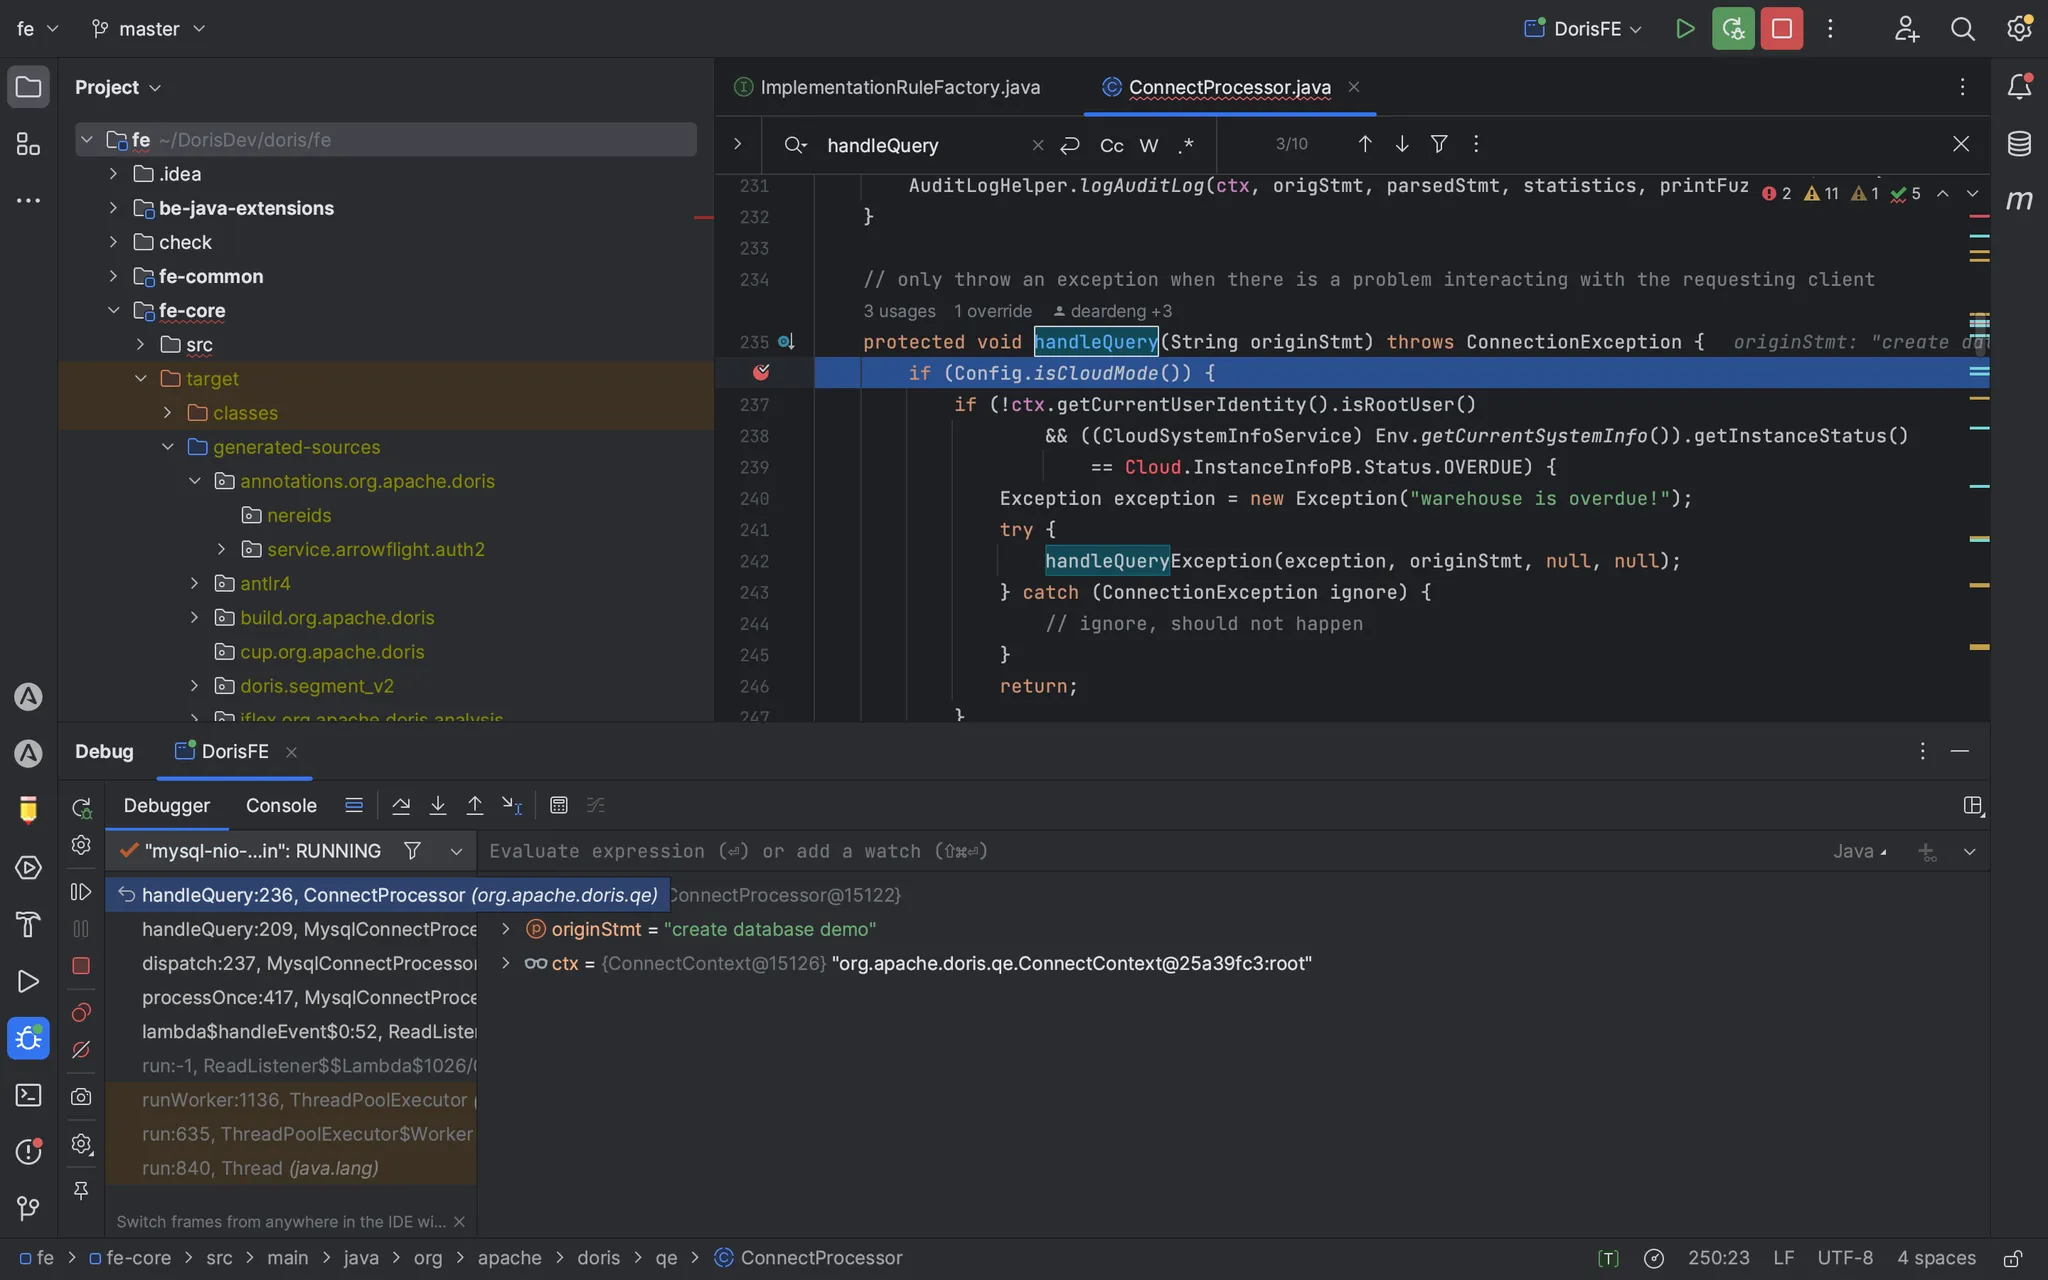
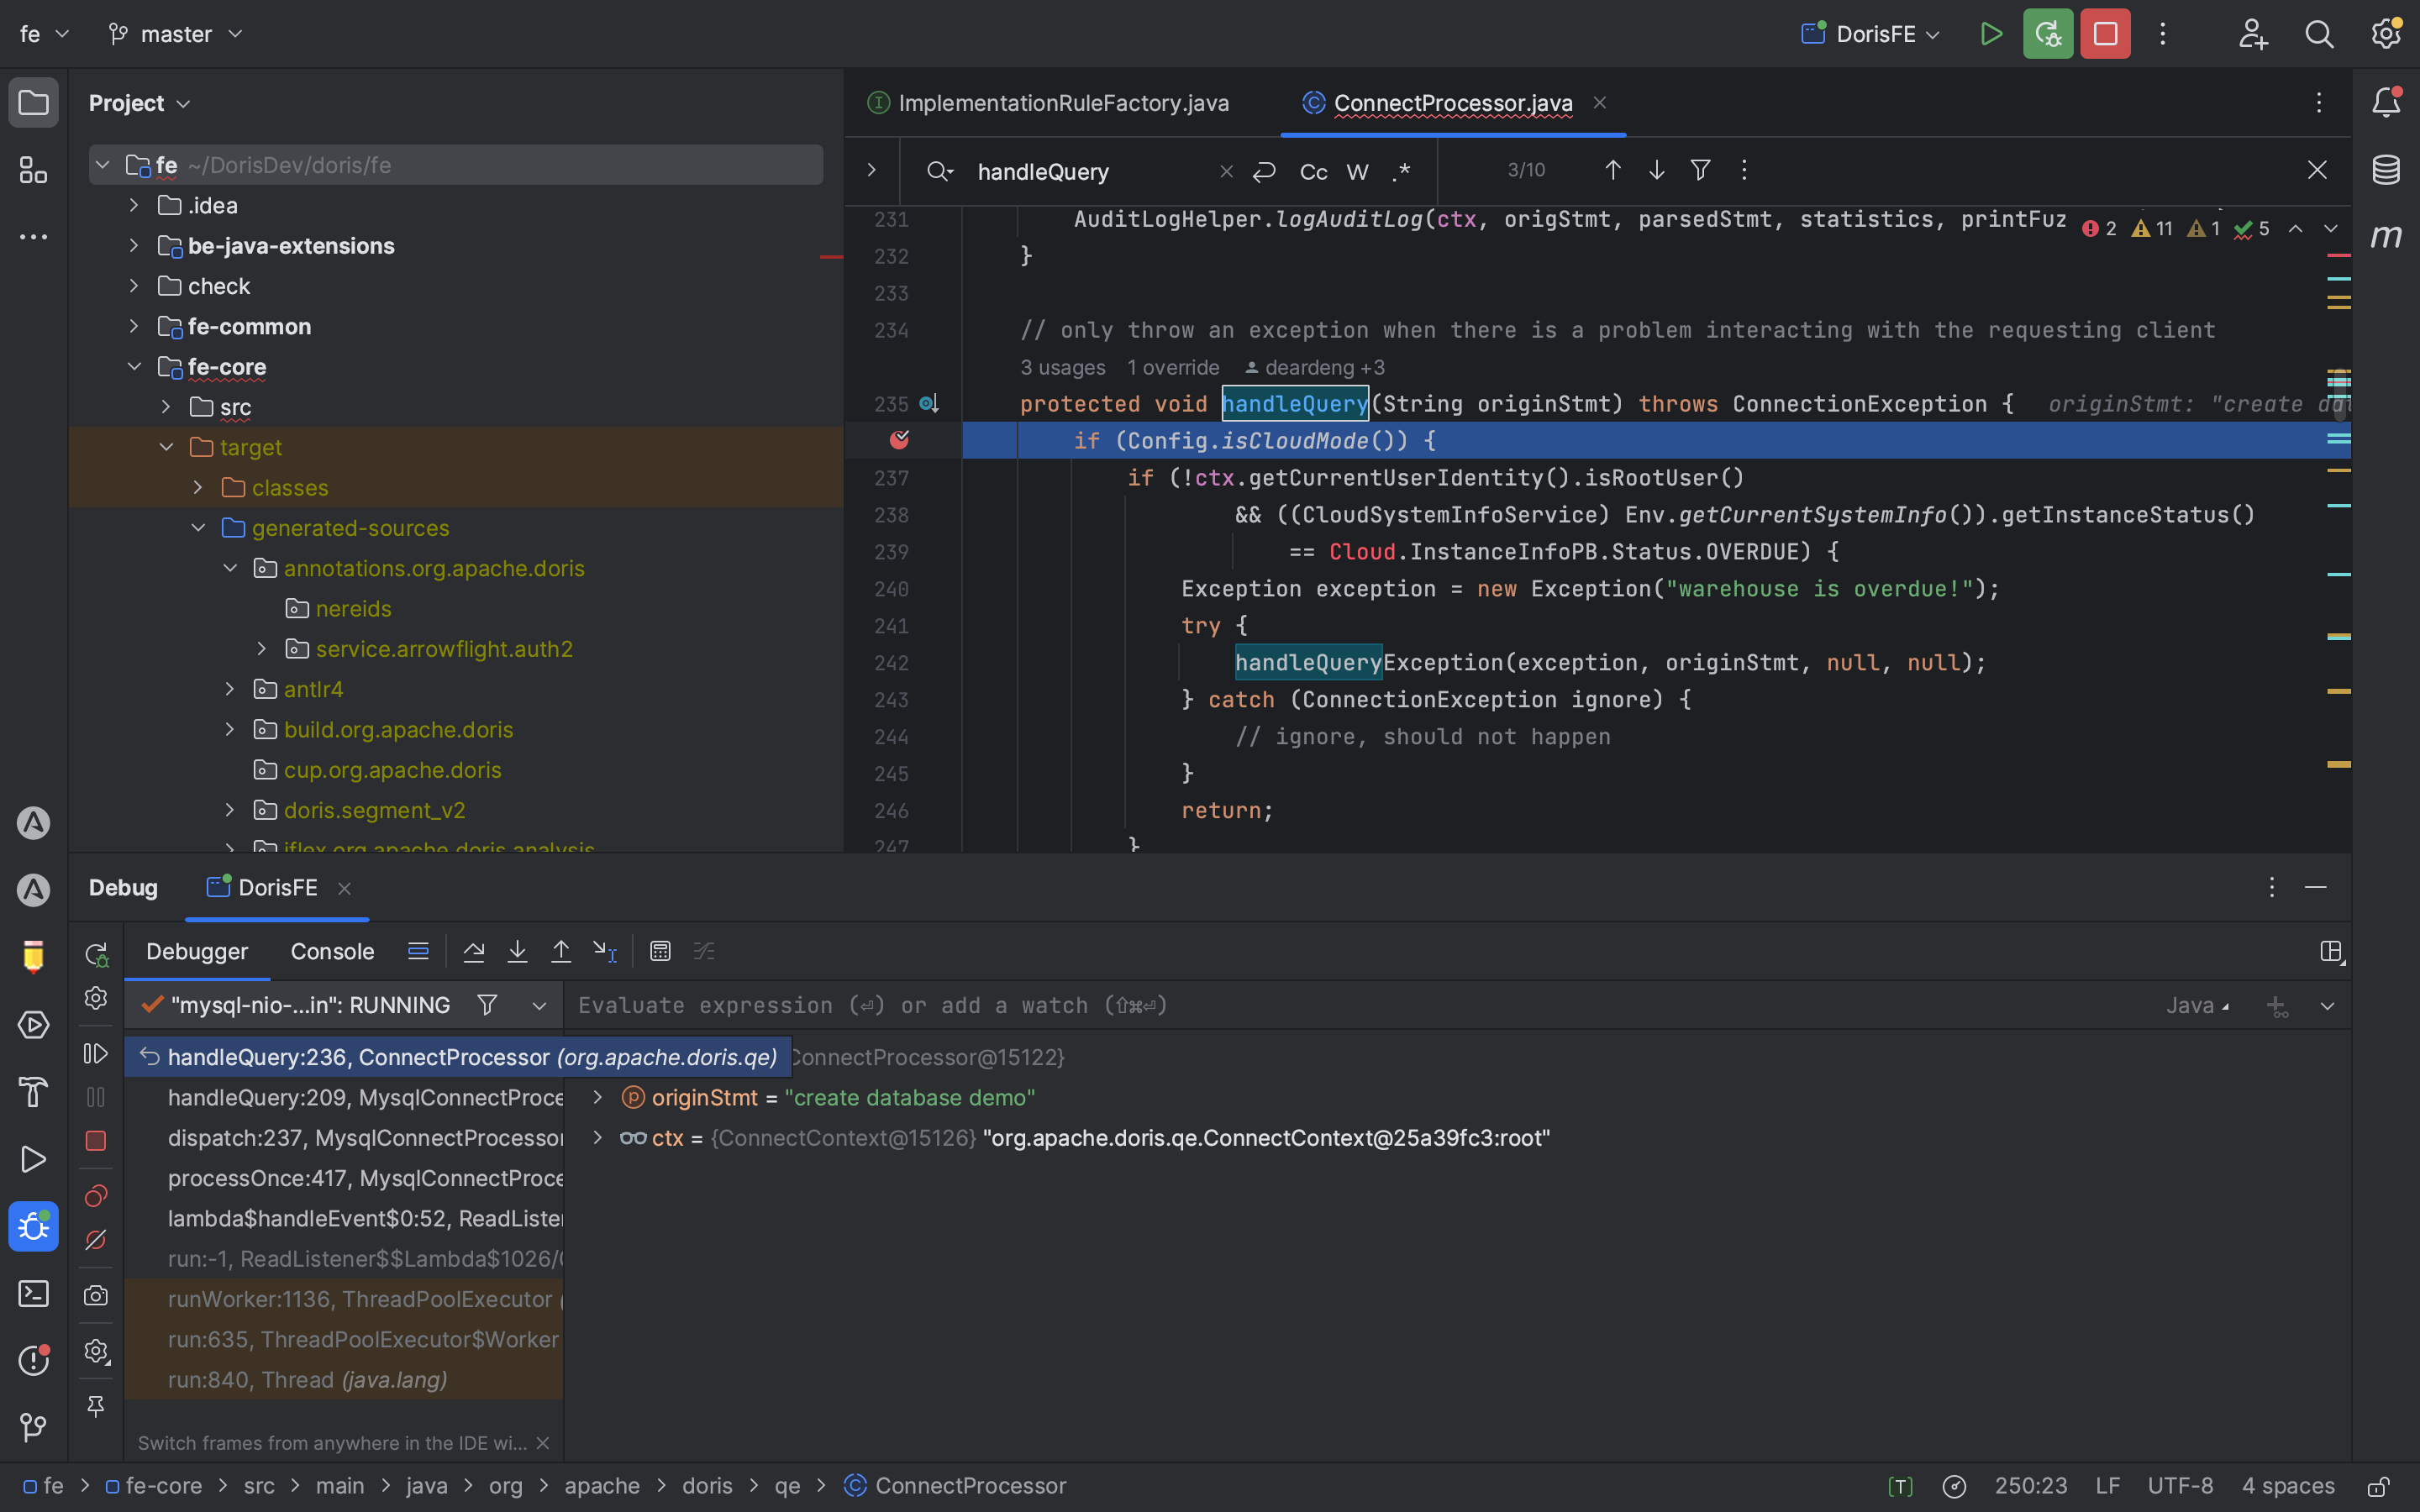
3. 在代码中设置断点。在项目中找到 ConnectProcessor 代码:


在 handleQuery 方法处设置断点。当您执行查询时,调试器将触发断点,您可以开始愉快的调试之旅。例如,如果您正在处理之前会议中提到的 Doris 语法迁移任务,您可以使用调试来迭代优化您的代码。


常见问题
问题 1
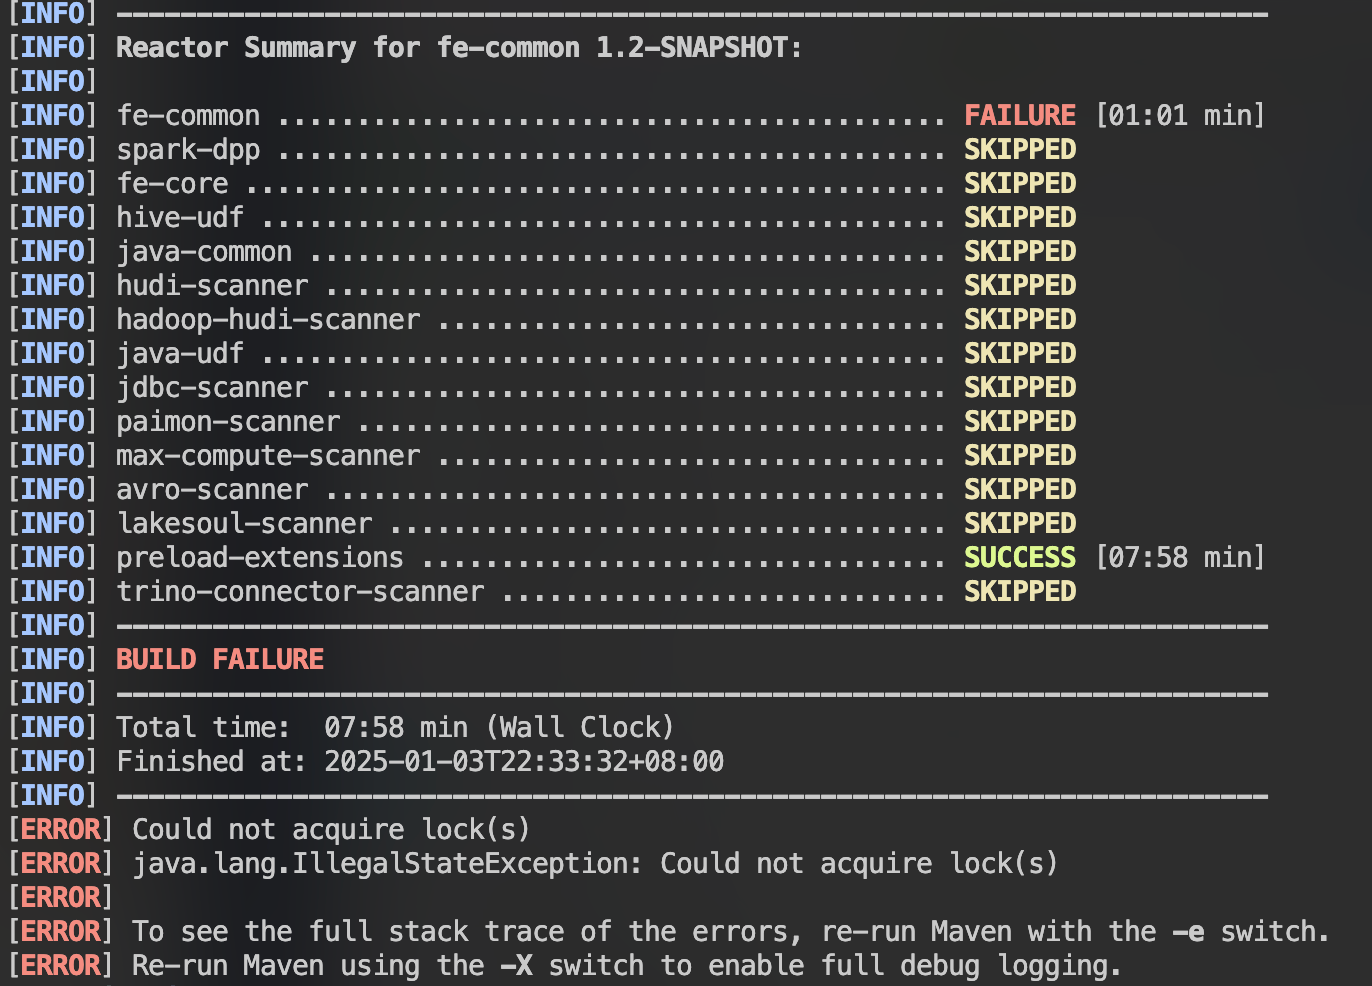
在编译过程中,您可能会遇到锁冲突错误:
Could not acquire lock(s)
回答
通过运行以下命令删除本地 Maven 仓库中的任何 .lock 文件:
find ~/.m2/repository -name "*.lock" -delete
问题 2
在编译过程中,可能会出现由于 Node.js 新版本引起的错误:
opensslErrorStack: ['error:03000086:digital envelope routines::initialization error'] library: 'digital envelope routines' reason: 'unsupported' code: 'ERR_OSSL_EVP_UNSUPPORTED'
回答
通过执行以下命令,将 Node.js 设置为使用传统的 OpenSSL 提供程序:
# Instruct Node.js to use the legacy OpenSSL provider export NODE_OPTIONS=--openssl-legacy-provider
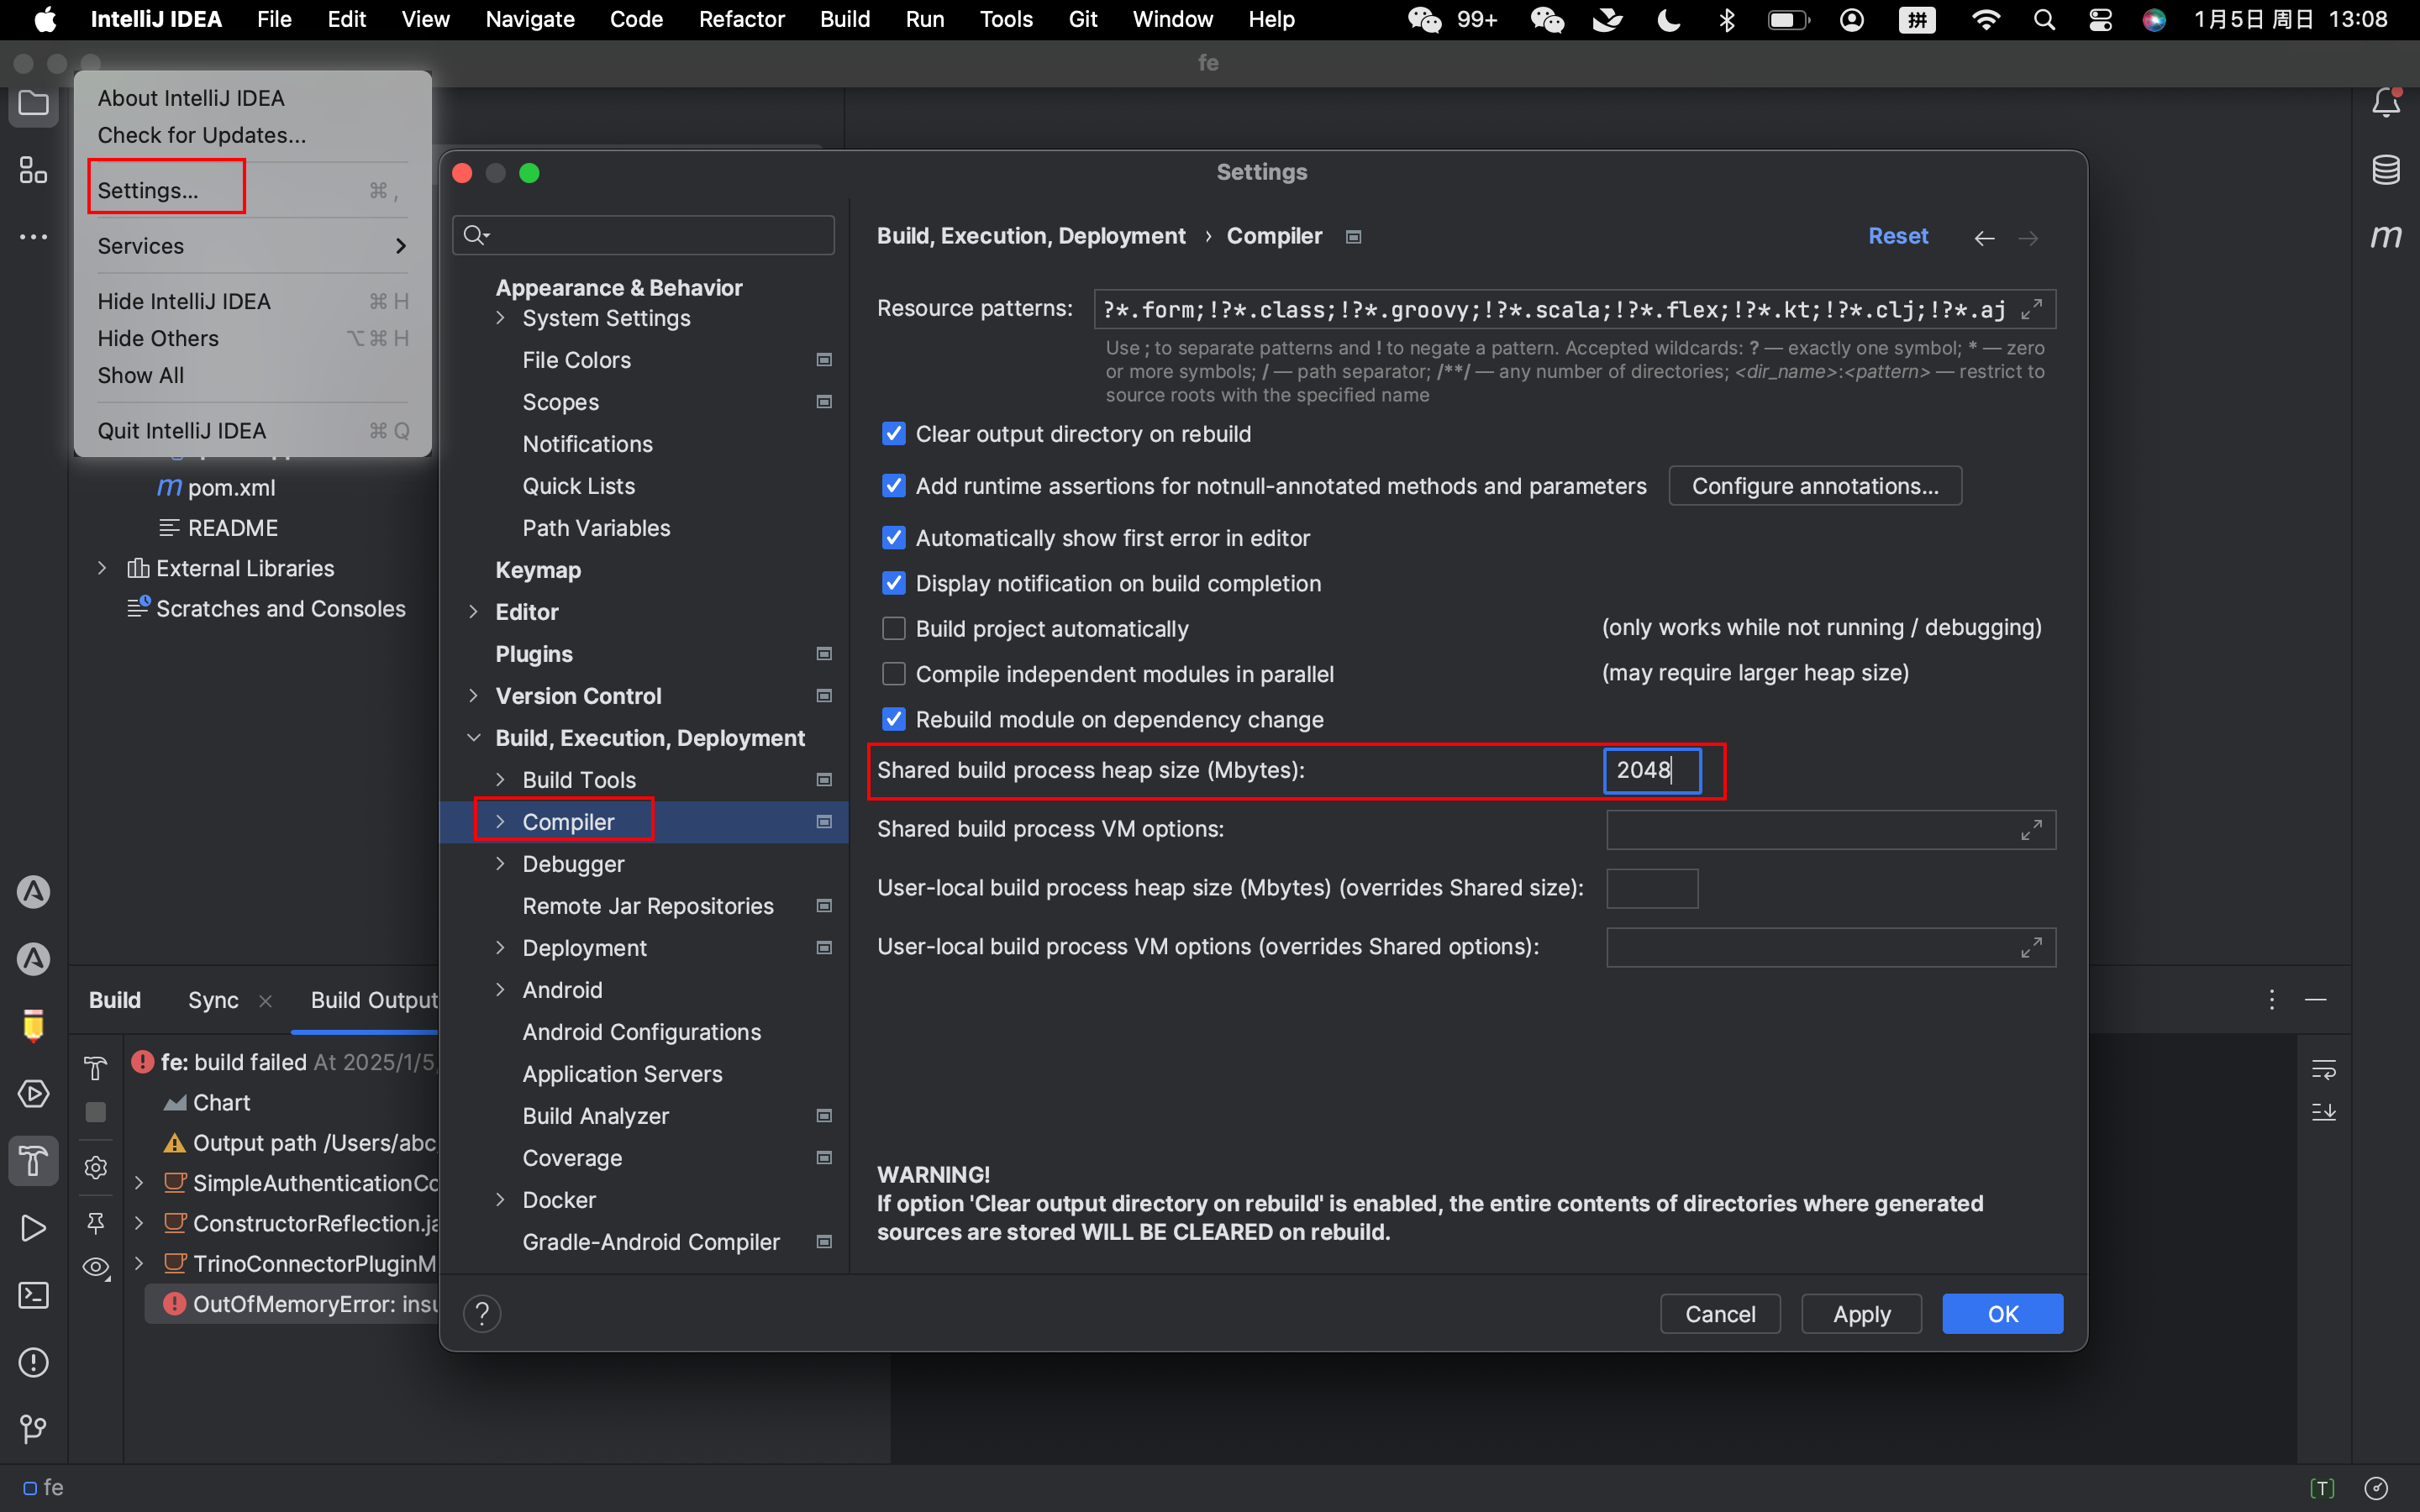
问题 3
IntelliJ IDEA 启动 FE 失败,错误为:
java: OutOfMemoryError: insufficient memory
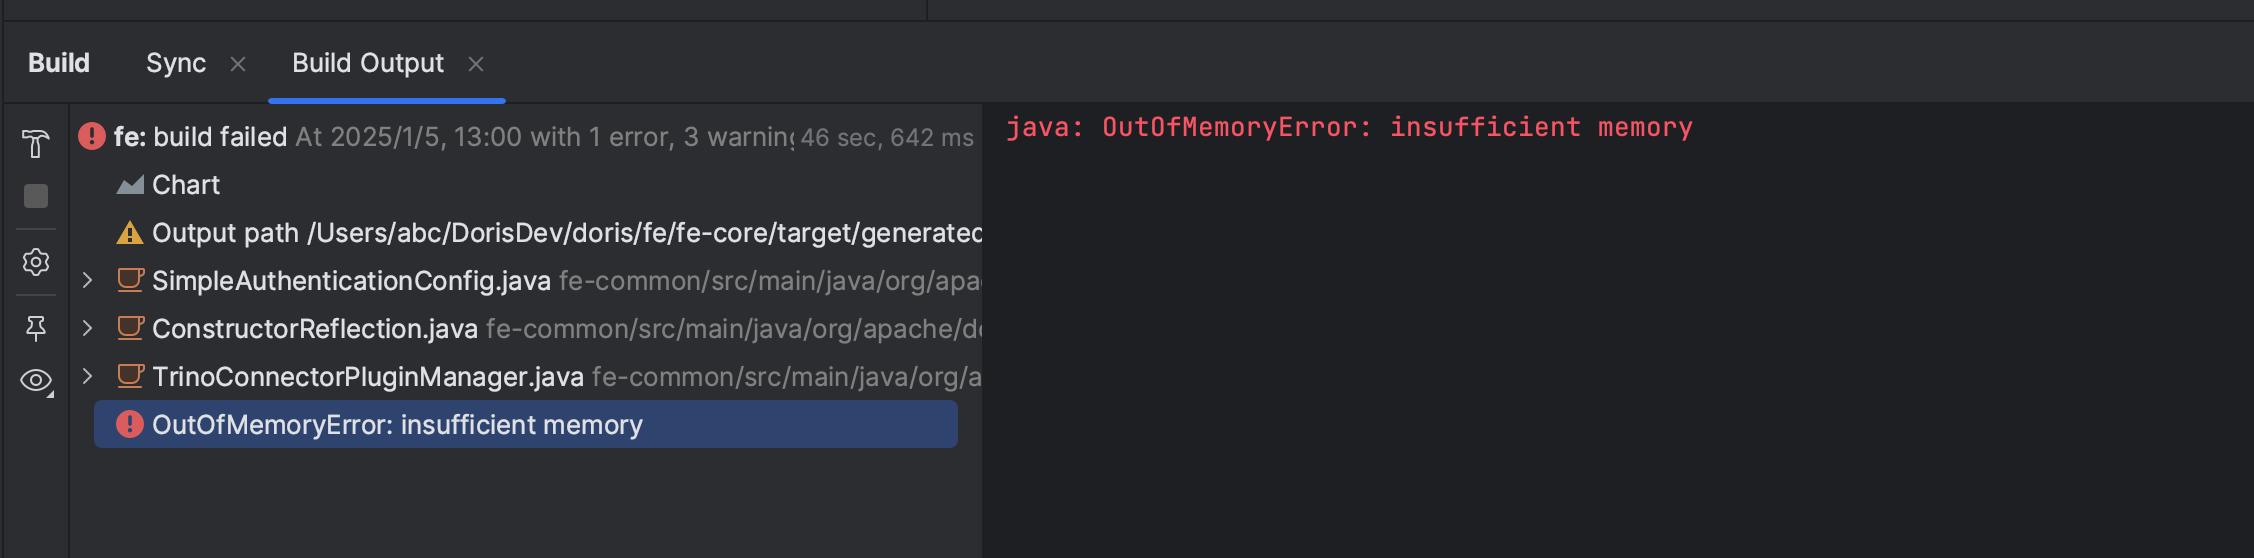
回答
Maven 的编译器可能没有足够的内存。请按照以下所示增加内存分配:
问题5
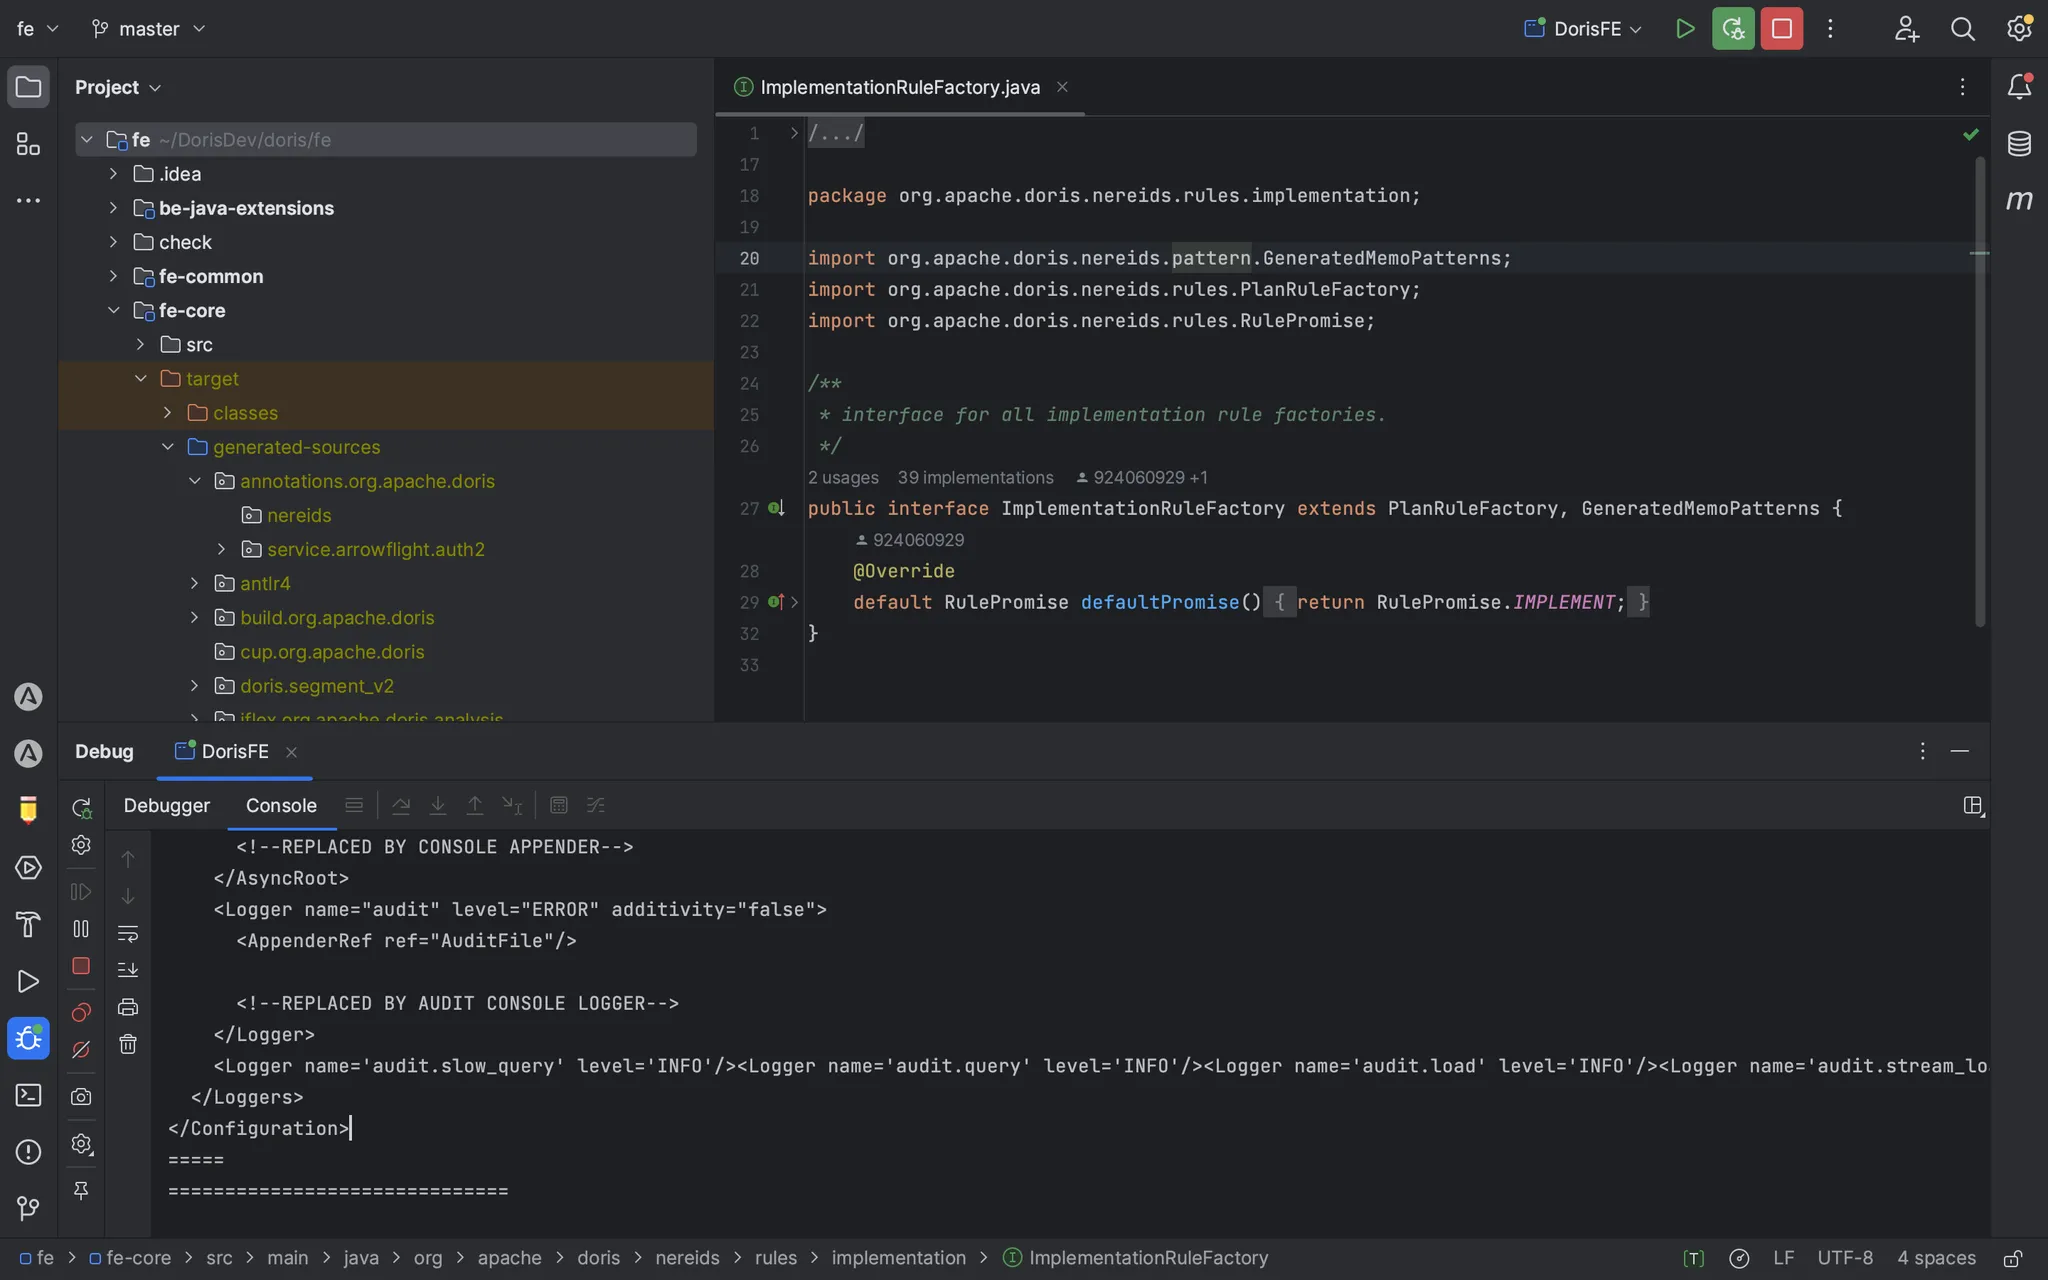
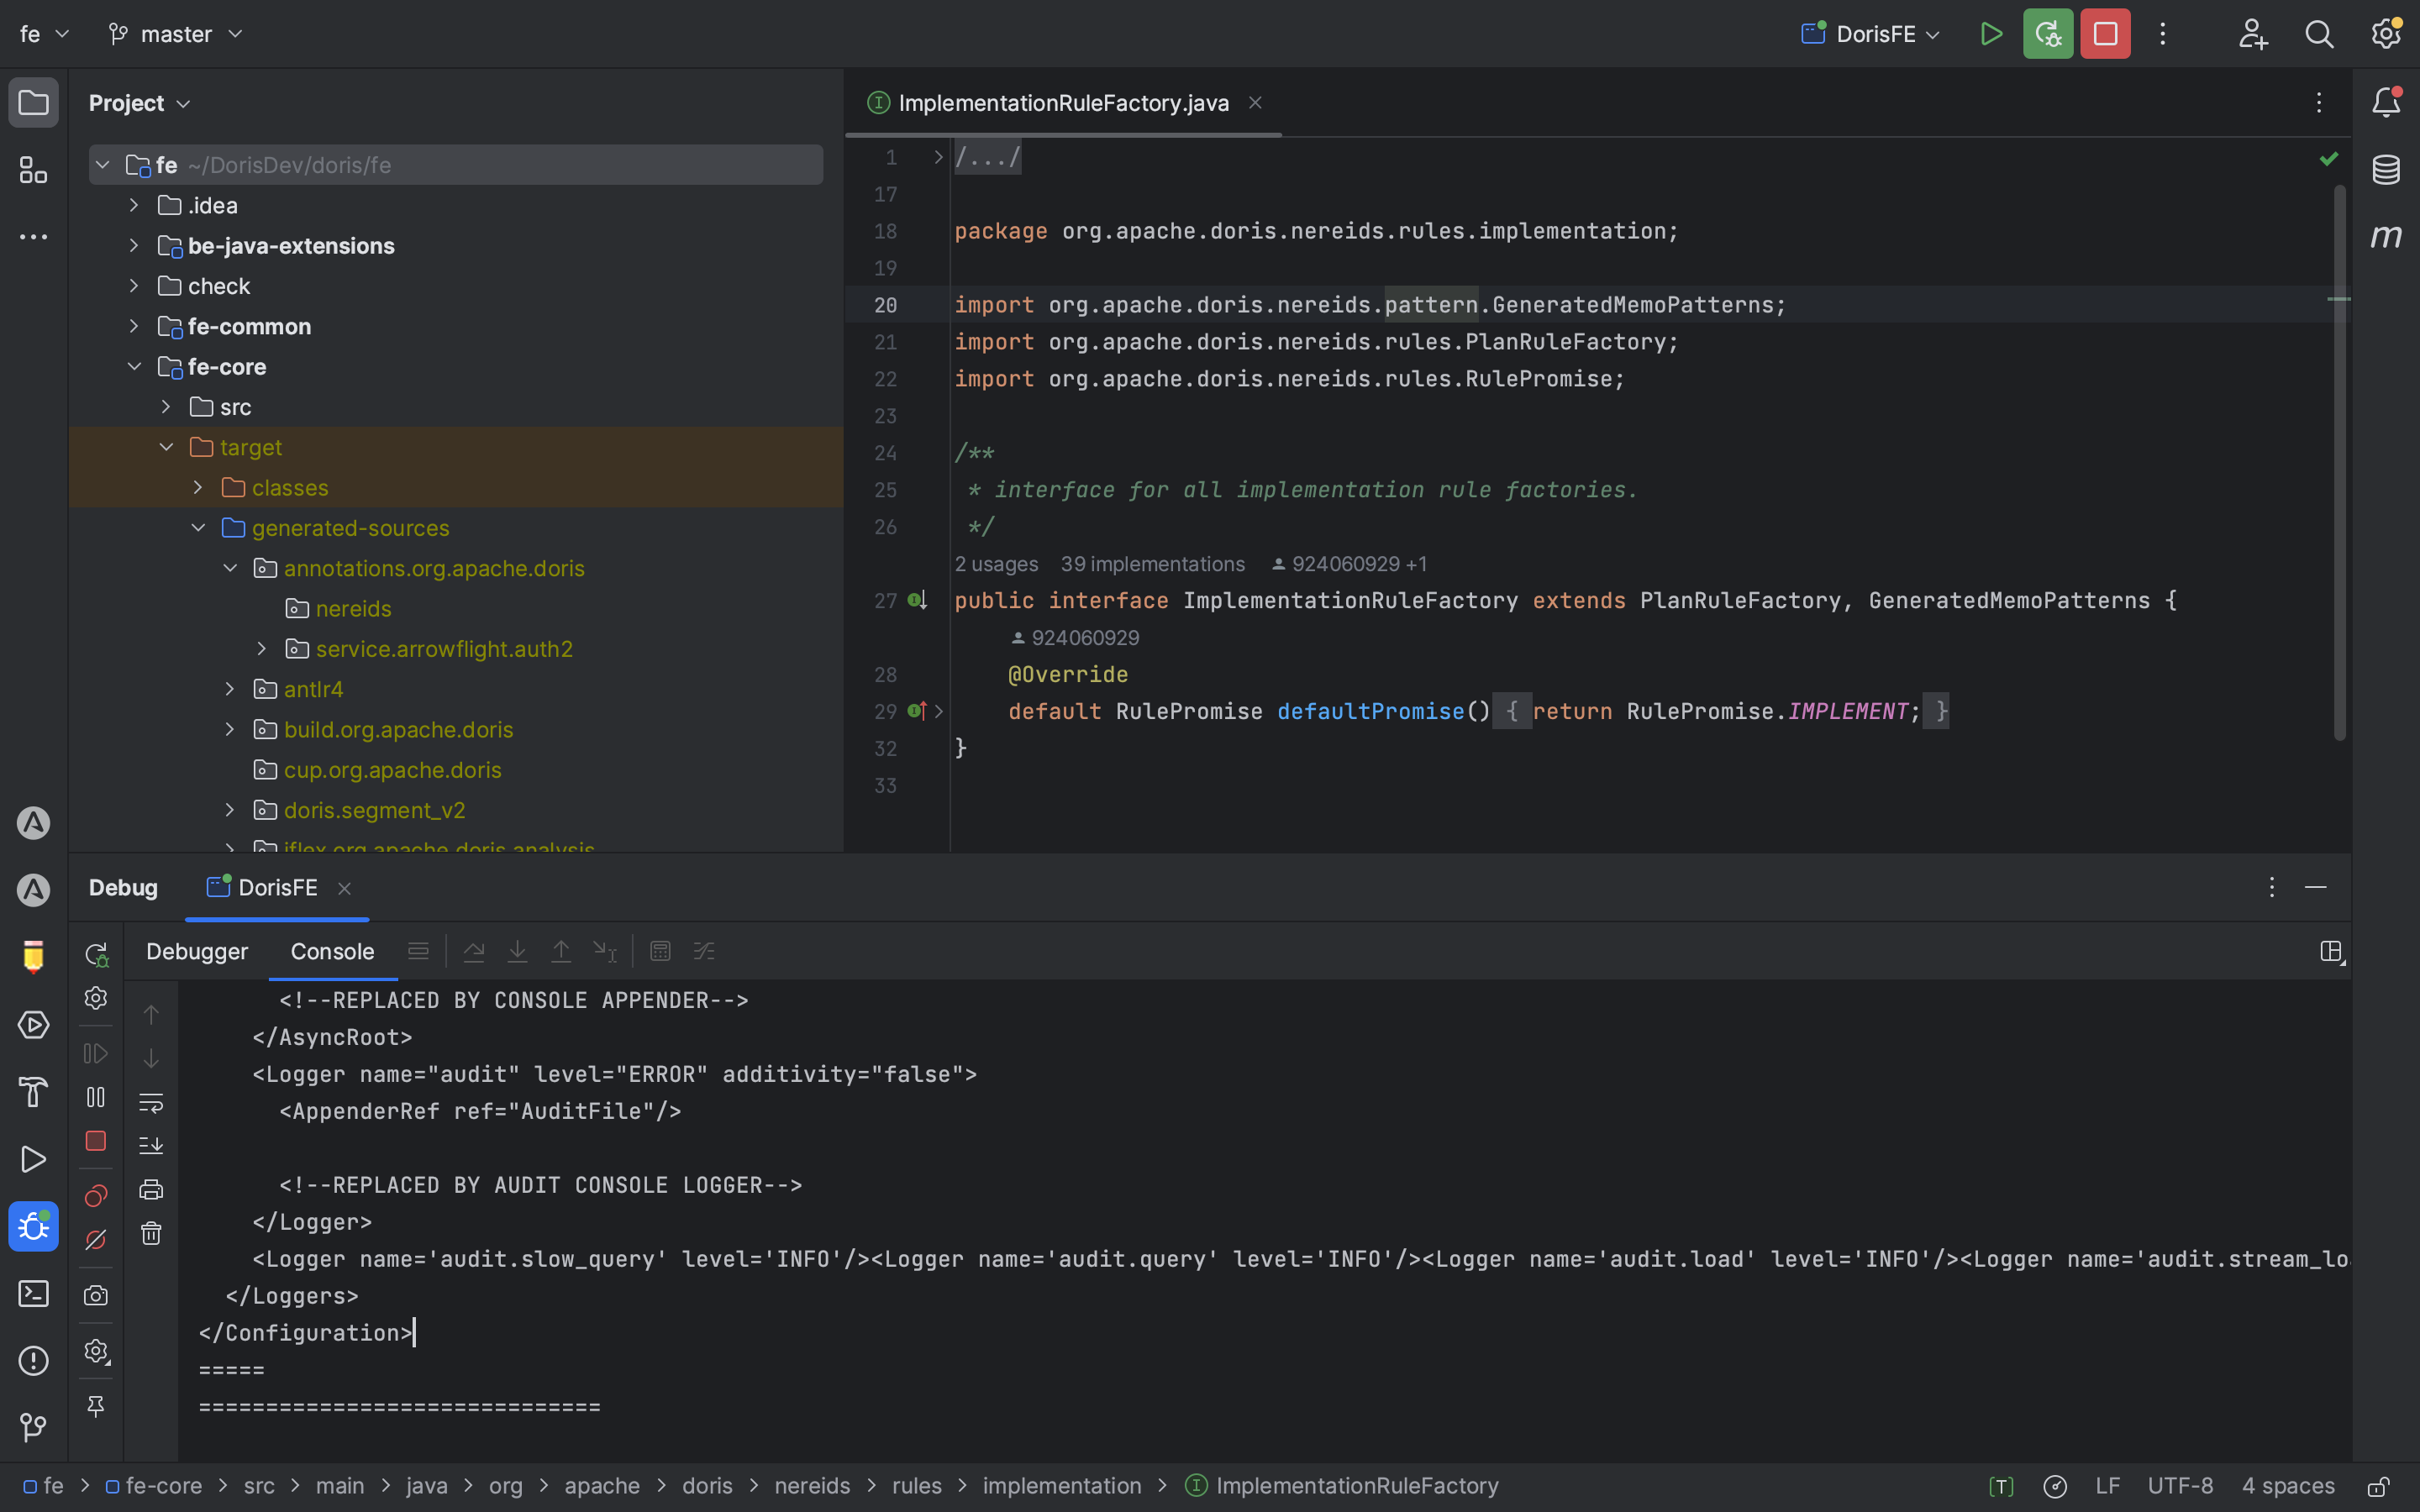
IntelliJ IDEA启动FE时出错:
java: cannot find symbol Symbol: class GeneratedMemoPatterns Location: package org.apache.doris.nereids.pattern
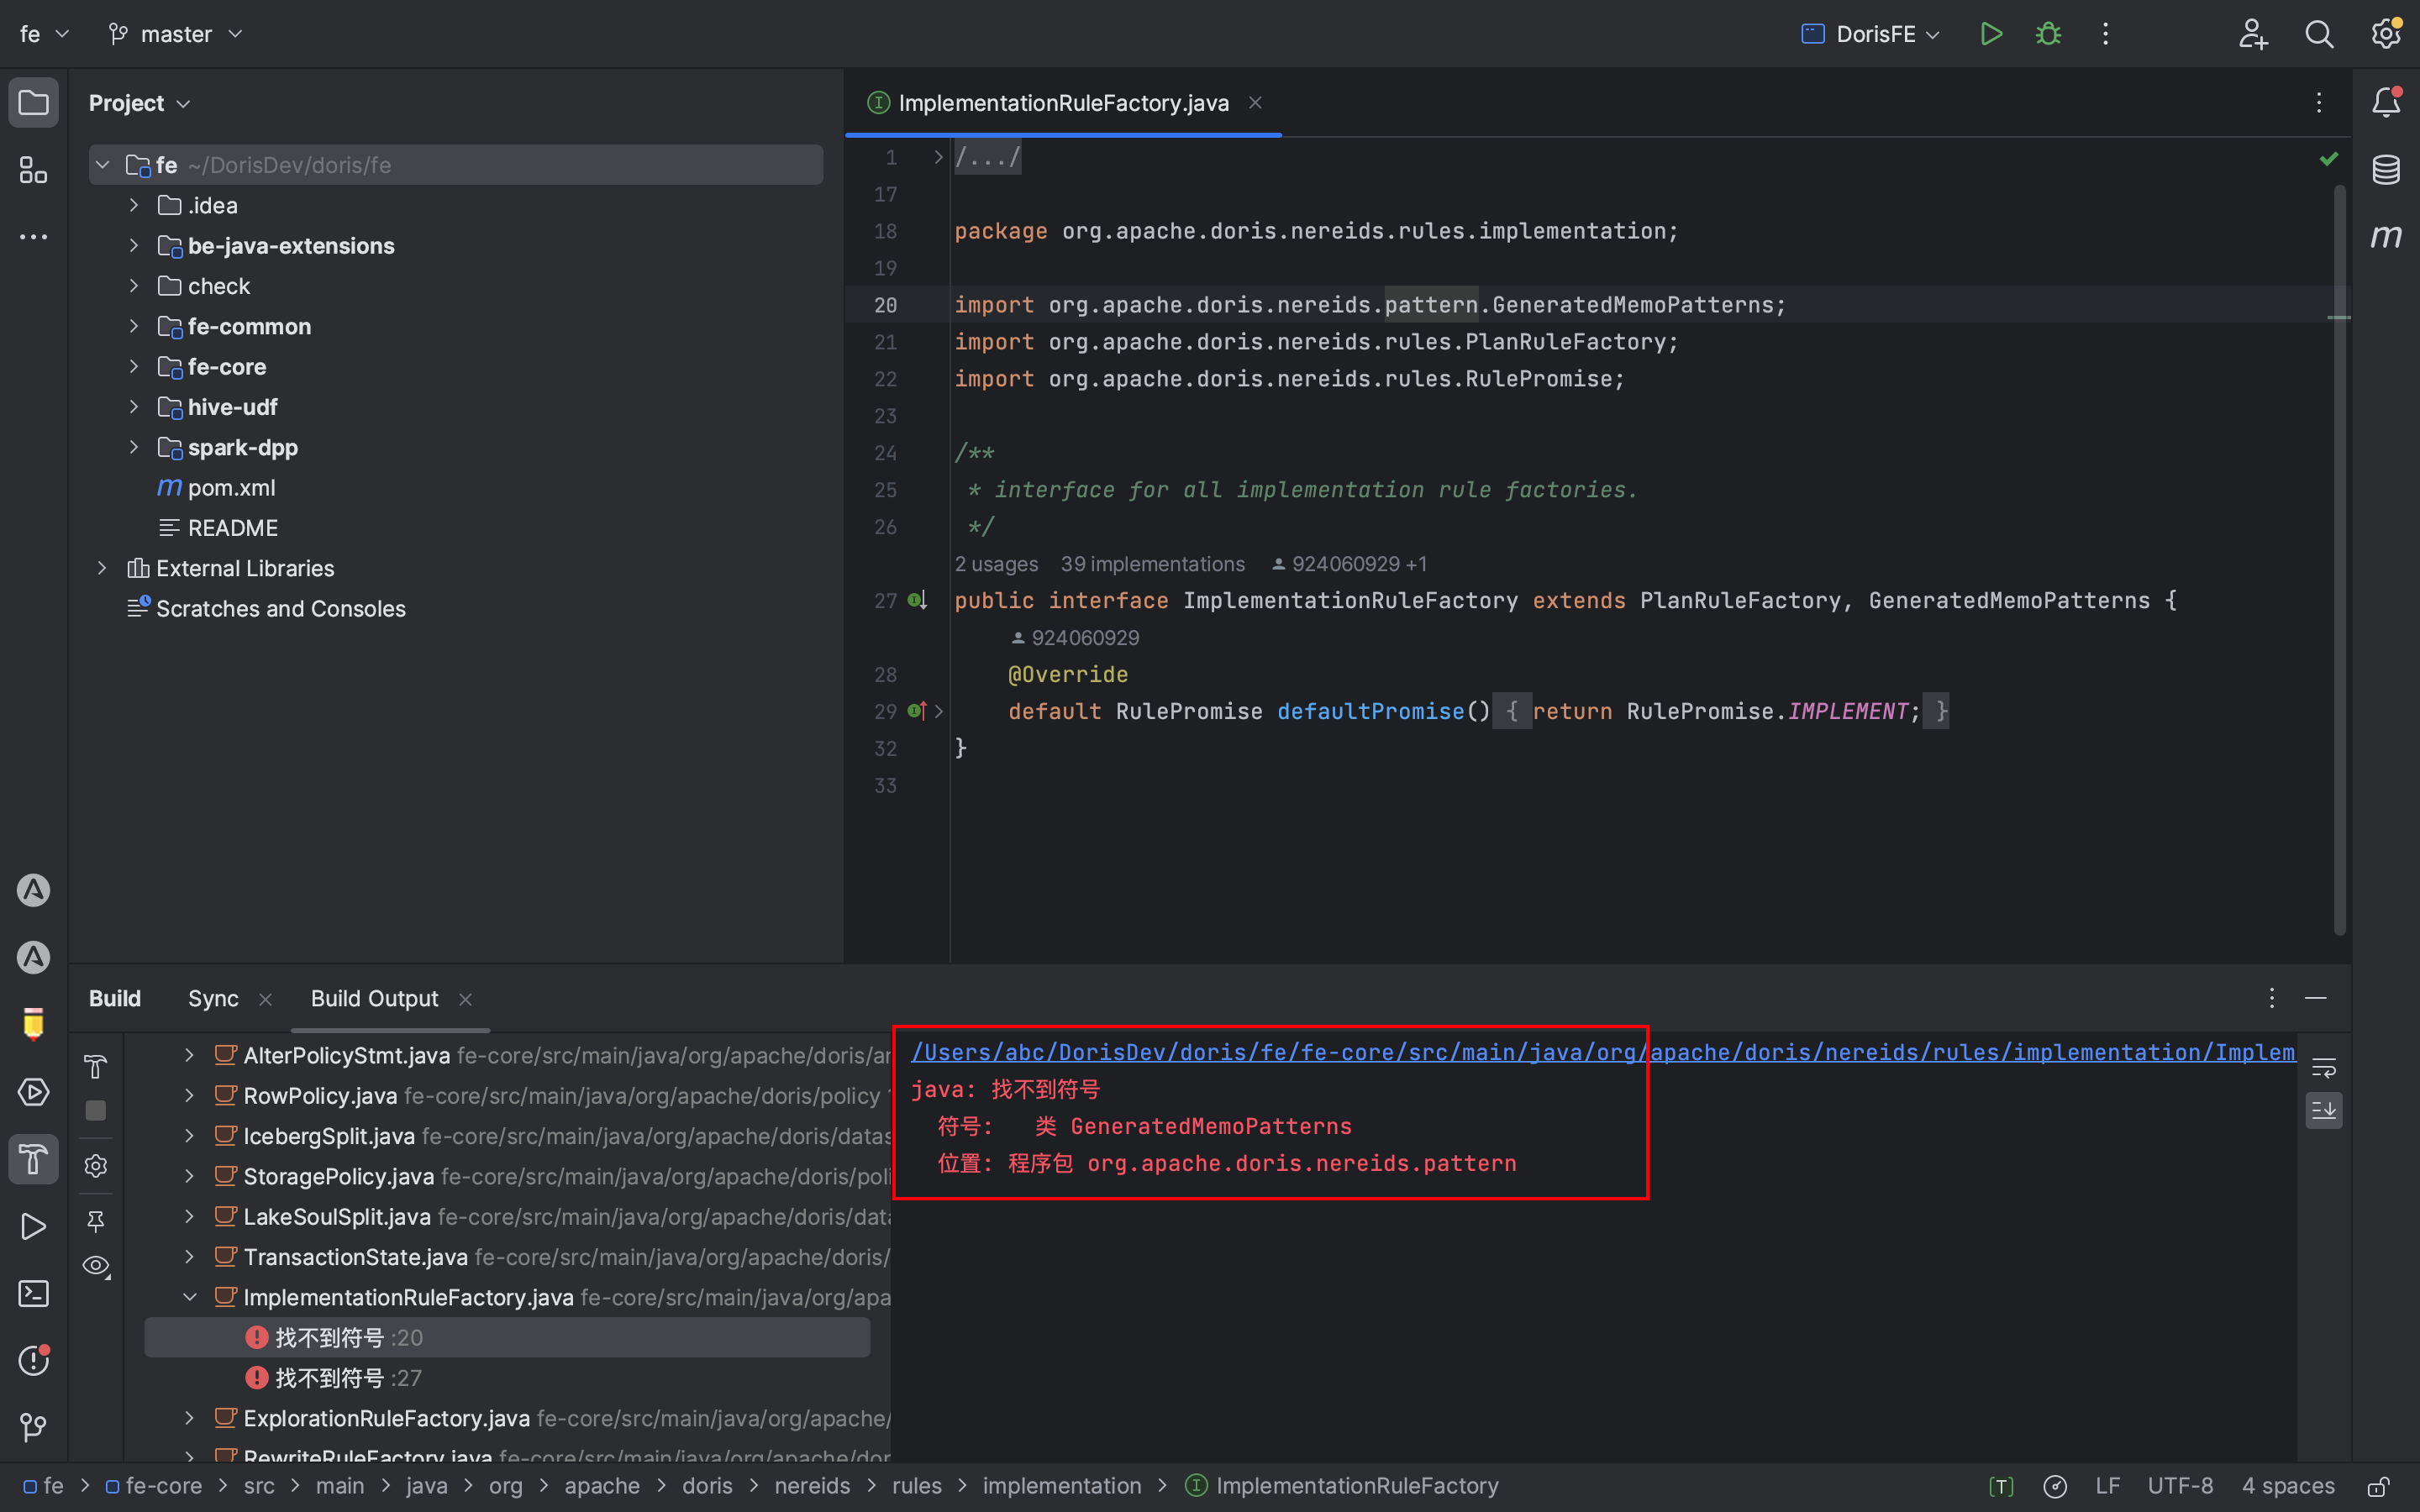 答案
答案
通过在Doris根目录执行以下命令解决此问题:
mv fe/fe-core/target/generated-sources/annotations/org/apache/doris/nereids/pattern/ fe/fe-core/target/generated-sources/org/apache/doris/
mv fe/fe-core/target/generated-sources/cup/org/apache/doris/analysis/ fe/fe-core/target/generated-sources/org/apache/doris/
问题5
在某些版本中,编译可能出现错误:
error: reference to ‘detail’ is ambiguous

答案
根据这个PR修改代码或执行以下命令:
wget https://github.com/apache/doris/pull/43868.patch
git apply 43868.patch
问题6
在某些版本中,在调试期间,端口9030上的FE启动失败,fe.log报告:
Can not find help zip file: help-resource.zip
答案
转到doris/docs目录,执行以下命令,然后重新启动FE:
cd doris/docs sh build_help_zip.sh
cp -r build/help-resource.zip ../fe/fe-core/target/classes
通过本指南,您可以更轻松地设置环境,编译和调试Apache Doris。祝调试愉快!
Source:
https://dzone.com/articles/guide-to-building-and-debugging-apache-doris