


我们都遇到过长时间等待加载屏幕的挫折,结果却发现页面无响应。到处都是加载图标,但似乎一切都停滞不前。让我为您描绘一个更清晰的画面:

这通常发生在网站在您刚进入页面时就尝试获取所有必要的数据时。可能是正在处理一个API请求,或者是多个API按顺序获取数据,导致页面加载延迟。
结果呢?用户体验极差。您可能会想,“这么大的公司怎么不重视用户体验呢?这真是令人失望。”因此,用户经常离开这个网站,这会影响关键指标,甚至可能影响收入。
但如果您能够提前获取这些繁重页面的数据,这样当用户到达页面时,他们可以立即与之交互呢?
这就是预取(prefetching)的概念所在,这正是我们将在本篇博客文章中深入探讨的内容。那么,废话少说,让我们开始吧!
目录
预取作为解决方案
以下是仅对语法和拼写进行了修改的修订版本:
对于上述问题,我们想要的是在页面加载到网站上之前获取给定页面的数据,这样用户就不需要在页面加载时获取数据。这称为预取。从技术角度来看,其定义如下:
它是一种提前获取所需数据的方法,以便主要组件不需要等待数据,从而增强用户体验。
这可以提高用户体验,增强客户对您网站的信心。
预取是一种简单而优雅的解决方案,比标准过程更加以用户为中心。要实现预取,我们需要了解用户在网站上的行为。也就是说,最常访问的页面,或者在小交互(如悬停)时获取数据的组件。
在分析了此类场景后,应用预取技术是有意义的。然而,作为开发者,我们应该注意使用这个概念。过多的预取也会减慢你的网站速度,因为你在尝试为未来的场景获取大量数据,这可能会阻塞主要页面的数据获取。
预取如何提升用户体验
让我们来看几个预取有益的场景:
-
在用户从首页访问最频繁的链接时提前加载数据/页面。例如,假设你有“联系我们”的链接。让我们假设这是用户最常查看的链接,且加载时包含大量数据。与其在“联系我们”页面加载数据时再获取数据,你可以在首页简单地获取数据,这样在“联系我们”页面就无需等待数据加载了。你可以阅读更多关于预取页面的内容在这里。
-
从父组件中获取数据并在子组件中加载。
-
预取需要在弹窗中显示的数据。
这些都是实现预取的一些方法,以及它如何帮助改善用户体验。
在这篇博客文章中,我们将讨论最后一个场景:“预取需要在弹窗中显示的数据”。这是一个典型的例子,预取可以带来好处,并为用户提供更流畅的体验。
理解问题
让我在这里定义问题。想象一下以下场景:
-
您有一个显示特定信息的组件。
-
这个组件内部有一个元素,当您悬停在它上面时,它会显示另一个弹窗/工具提示。
-
弹窗在加载时获取数据。
现在想象一下,用户悬停在元素上,需要等待数据被获取并在弹窗中显示。在这段等待期间,他们看到骨架加载器。
场景将如下所示:
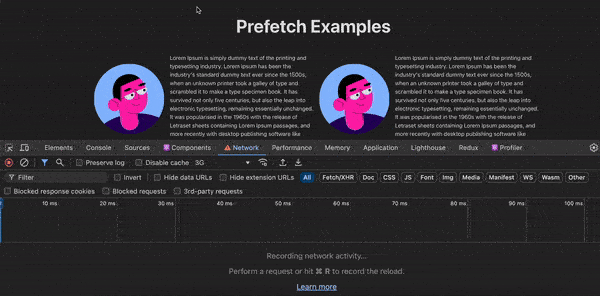
当用户在图片上悬停时,他们必须等待的时间太长真是令人沮丧:
为了解决这个问题,有两个解决方案可以帮助您开始并根据您的需要进行优化。
解决方案1:在父组件中预取数据
这个解决方案灵感来自于马丁·福勒的博客文章。它允许您在弹出窗口出现之前获取数据,而不是在组件加载时获取。
当您悬停在弹出窗口上时,弹出窗口会出现。我们可以在鼠标进入父组件时获取数据。在实际组件——图片——被悬停之前,我们将为弹出组件获取数据并传递给它。
这个解决方案并没有完全去除加载状态,但它可以帮助显著降低看到加载状态的机会。
解决方案2:在页面加载时预取数据
这个解决方案灵感来自于x.com,在那里,对于弹出组件,他们在主要页面加载时部分获取数据,并在组件挂载时获取其余数据。

正如您从上面的视频中可以看到,用户资料的详细信息在弹出窗口中查看。如果您仔细看,与关注者相关的详细信息是后来获取的。
这种技术当你有很多需要在弹窗中显示的数据,但在弹窗挂载或主页面加载时获取它们可能是代价高昂的。
一个更好的解决方案是在主页面部分加载所需的数据,当组件挂载时加载剩余的数据。
在我们的例子中,当鼠标进入图片的父元素时,我们获取了弹窗的数据。现在想象一下,一旦弹窗数据加载完成,你需要获取额外的详细信息。所以基于上述x.com的方法,我们可以在弹窗加载时获取额外的数据。这是它的结果:

在这里,我们做以下事情:
-
当鼠标进入图片的父元素时,我们获取主要数据,只需必要渲染弹窗。
-
这给了我们足够的时间来获取主要数据。
-
在弹窗加载时,我们获取另一组数据,即相册数量。当用户阅读姓名和电子邮件等数据时,我们将准备好显示下一组数据。
这样,我们可以通过进行小型和智能的调整来最小化屏幕上加载器的空白凝视😊。
如何使用React实现预取
在本节中,我们将简要介绍如何实现上述预加载示例应用程序。
项目设置
要开始创建预加载应用程序,请按照以下步骤操作:
您可以使用vitejs(我使用的是这个)或create-react-app来创建您的应用程序。在您的终端中粘贴以下命令:
yarn create vite prefetch-example --template react-ts
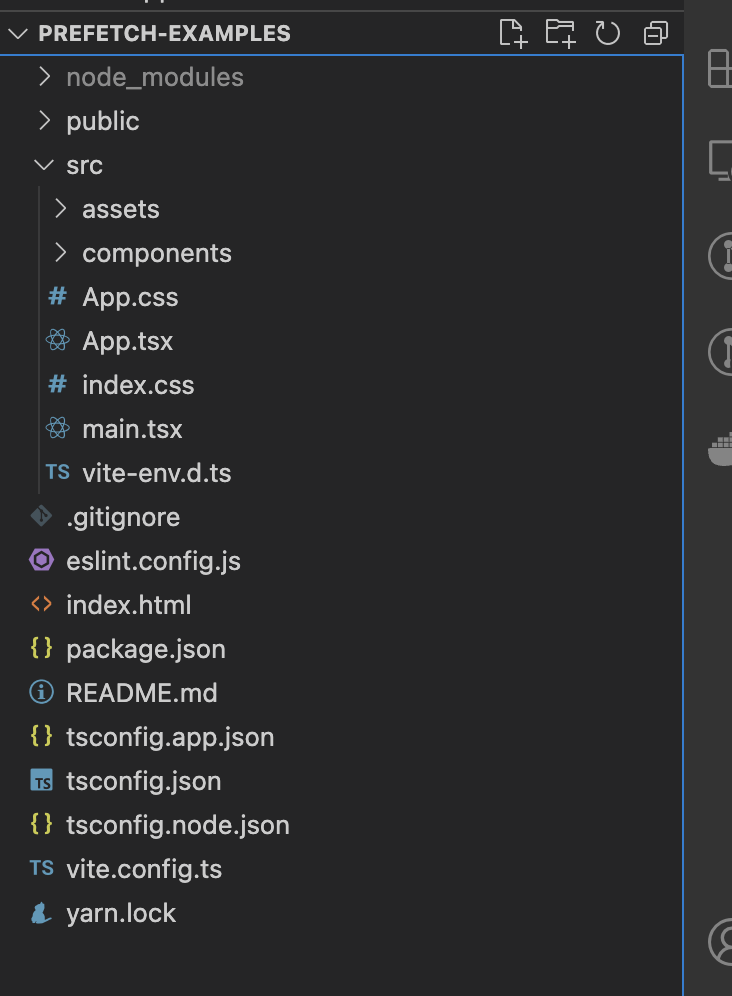
一旦应用程序创建完成,您打开prefetch-example文件夹时,应该会有以下的文件结构。
现在让我们深入了解为这个应用程序将要构建的组件。
组件
在这个例子中,我们将使用三个组件:
-
PopoverExample -
UserProfile -
UserProfileWithFetching
PopoverExample 组件
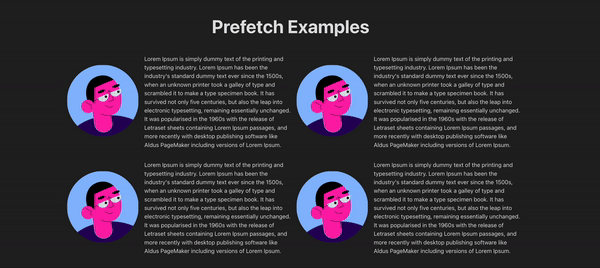
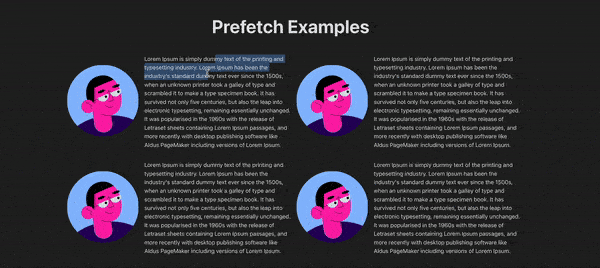
让我们从第一个组件开始,这个组件是 PopoverExample。这个组件显示一个图像头像和一些文本,在它的右侧。它应该看起来像这样:
这个组件的目的是作为一个类似现实生活场景的示例。这个组件中的图像在悬停时会加载一个弹出组件。

这是组件的代码:
import { useState } from "react";
import { useFloating, useHover, useInteractions } from "@floating-ui/react";
import ContentLoader from "react-content-loader";
import UserProfile from "./UserProfile";
import UserProfileWithFetching from "./UserProfileWithFetching";

export const MyLoader = () => (
    <ContentLoader
        speed={2}
        width={340}
        height={84}
        viewBox="0 0 340 84"
        backgroundColor="#d1d1d1"
        foregroundColor="#fafafa"
    >
        <rect x="0" y="0" rx="3" ry="3" width="67" height="11" />
        <rect x="76" y="0" rx="3" ry="3" width="140" height="11" />
        <rect x="127" y="48" rx="3" ry="3" width="53" height="11" />
        <rect x="187" y="48" rx="3" ry="3" width="72" height="11" />
        <rect x="18" y="48" rx="3" ry="3" width="100" height="11" />
        <rect x="0" y="71" rx="3" ry="3" width="37" height="11" />
        <rect x="18" y="23" rx="3" ry="3" width="140" height="11" />
        <rect x="166" y="23" rx="3" ry="3" width="173" height="11" />
    </ContentLoader>
);
export default function PopoverExample() {
    const [isOpen, setIsOpen] = useState(false);
    const [isLoading, setIsLoading] = useState(false);
    const [data, setData] = useState({});

    const { refs, floatingStyles, context } = useFloating({
        open: isOpen,
        onOpenChange: setIsOpen,
        placement: "top",
    });

    const hover = useHover(context);

    const { getReferenceProps, getFloatingProps } = useInteractions([hover]);

    const handleMouseEnter = () => {
        if (Object.keys(data).length === 0) {
            setIsLoading(true);
            fetch("https://jsonplaceholder.typicode.com/users/1")
                .then((resp) => resp.json())
                .then((data) => {
                    setData(data);
                    setIsLoading(false);
                });
        }
    };

    return (
        <div
            id="hover-example"
            style={{
                display: "flex",
                flexDirection: "row",
                alignItems: "center",
                textAlign: "left",
            }}
            onMouseEnter={handleMouseEnter}
        >
            <span
                style={{
                    padding: "1rem",
                }}
            >
                <img
                    ref={refs.setReference}
                    {...getReferenceProps()}
                    style={{
                        borderRadius: "50%",
                    }}
                    src="https://cdn.jsdelivr.net/gh/alohe/avatars/png/vibrent_5.png"
                />
            </span>
            <p>
                Lorem Ipsum is simply dummy text of the printing and typesetting
                industry. Lorem Ipsum has been the industry's standard dummy text ever
                since the 1500s, when an unknown printer took a galley of type and
                scrambled it to make a type specimen book. It has survived not only five
                centuries, but also the leap into electronic typesetting, remaining
                essentially unchanged. It was popularised in the 1960s with the release
                of Letraset sheets containing Lorem Ipsum passages, and more recently
                with desktop publishing software like Aldus PageMaker including versions
                of Lorem Ipsum.
            </p>
            {isOpen && (
                <div
                    className="floating"
                    ref={refs.setFloating}
                    style={{
                        ...floatingStyles,
                        backgroundColor: "white",
                        color: "black",
                        padding: "1rem",
                        fontSize: "1rem",
                    }}
                    {...getFloatingProps()}
                >
                    {isLoading ? (
                        <MyLoader />
                    ) : (
                        <UserProfile hasAdditionalDetails {...data} />
                    )}
                    {/* <UserProfileWithFetching /> */}
                </div>
            )}
        </div>
    );
}
这里发生了一些事情,让我逐步解释它们:
-
我们有一个名为
hover-example的父div,其中包含一张图片和一些文本。 -
接下来,我们条件性地渲染了一个类名为
floating的div。这是实际在您悬停在图片上时打开的弹出组件。- 我们使用了
floating-ui库及其基本的悬停示例来实现弹出层的悬停效果。
- 我们使用了
-
在弹出层中,我们条件性地加载了
UserProfile和骨架加载器。在获取用户资料数据时,这个加载器会出现。稍后会有更多相关内容。 -
我们在
MyLoader组件中使用了react-content-loader库。这个库还有一个网站可以帮助你创建加载器,你可以在这里查看。
UserProfile 组件
现在我们已经定义了我们的Popover示例,是时候深入了解UserProfile组件的细节了。
这个组件出现在弹出组件内部。这个组件的目的是加载从JSON占位符API获取的name、email、phone、website详情。
为了演示预取示例,我们必须确保 UserProfile 组件只是一个表现组件;也就是说,其中没有显式的取数逻辑。
这个组件的关键在于,数据获取是从父组件开始的,即 PopoverExample 组件。在这个组件中,当鼠标进入组件时(即 mouseenter 事件),我们开始获取数据。这是我们之前讨论的解决方案 #1。
这为您提供了足够的时间来获取数据,直到用户悬停在图片上。以下是代码:
import { useEffect, useState } from "react";
import ContentLoader from "react-content-loader";

const MyLoader = () => (
    <ContentLoader
        speed={2}
        viewBox="0 0 476 124"
        backgroundColor="#d1d1d1"
        foregroundColor="#fafafa"
    >
        <rect x="4" y="43" rx="0" ry="0" width="98" height="30" />
    </ContentLoader>
);

export default function UserProfile(props: Record<string, string | boolean>) {
    const { name, email, phone, website, hasAdditionalDetails } = props;
    const [isLoading, setIsLoading] = useState(false);
    const [additionalData, setAdditionalData] = useState(0);

    useEffect(() => {
        if (hasAdditionalDetails) {
            setIsLoading(true);
            fetch("https://jsonplaceholder.typicode.com/albums")
                .then((resp) => resp.json())
                .then((data: Array<unknown>) => {
                    const albumCount = data.reduce((acc, curr) => {
                        if (curr.userId === 1) acc += 1;

                        return acc;
                    }, 0);
                    setAdditionalData(albumCount);
                })
                .finally(() => {
                    setIsLoading(false);
                });
        }
    }, [hasAdditionalDetails]);

    return (
        <div id="user-profile">
            <div id="user-name">name: {name}</div>
            <div id="user-email">email: {email}</div>
            <div id="user-phone">phone: {phone}</div>
            <div id="user-website">website: {website}</div>
            {hasAdditionalDetails && (
                <>
                    {isLoading ? (
                        <MyLoader />
                    ) : (
                        <div id="user-albums">Album Count: {additionalData}</div>
                    )}
                </>
            )}
        </div>
    );
}
这个组件使用了 hasAdditionalDetails 属性。这个属性的目的是在组件挂载时加载附加数据。它展示了上面提到的解决方案 #2。
UserProfileWithFetching 组件
这个组件与 UserProfile 组件非常相似。它只包含组件加载时获取数据的逻辑。这个组件的目的是展示没有预取技术的通用解决方案的样子。
所以这个组件总是会在组件挂载时加载数据,显示骨架加载器。
以下是代码:
import { useEffect, useState } from "react";
import { MyLoader } from "./PopoverExample";

export default function UserProfileWithFetching() {
    const [isLoading, setIsLoading] = useState(false);
    const [data, setData] = useState<Record<string, string>>({});

    useEffect(() => {
        setIsLoading(true);
        fetch("https://jsonplaceholder.typicode.com/users/1")
            .then((resp) => resp.json())
            .then((data) => {
                setData(data);
                setIsLoading(false);
            });
    }, []);

    if (isLoading) return <MyLoader />;

    return (
        <div id="user-profile">
            <div id="user-name">name: {data.name}</div>
            <div id="user-email">email: {data.email}</div>
            <div id="user-phone">phone: {data.phone}</div>
            <div id="user-website">website: {data.website}</div>
        </div>
    );
}
这个应用的全部代码可以在 这里 找到。
过多的预取也会导致运行缓慢
提个建议,过多的预取并不好,因为:
-
这可能会减慢您的应用程序的运行速度。
-
如果不策略性地应用预取,它可能会降低用户体验。
预取需要在您了解用户行为时应用。也就是说,您可以通过指标预测用户行为,并能够判断他们是否会经常访问某个页面。在这种情况下,预取是个好主意。
所以请记住始终策略性地应用预取。
总结
就是这些啦!希望您喜欢我的博客文章。在本文中,您了解到实现预取可以显著提高Web应用程序的速度和响应性,从而改善用户满意度。
想深入了解,请参考以下文章:
Source:
https://www.freecodecamp.org/news/boost-web-performance-with-prefetching/