


Is your live stream crashing every time? If so, you’ll need to find a reliable way to host your stream. But if you can’t afford expensive options, no worries! NGINX RTMP will save the day. NGINX RTMP is a reliable open-source module, so you know what that means — it’s FREE!
In this tutorial, you’ll learn how to set up an NGINX RTMP server so you can set up a reliable live stream with your website.
Ready? Read on and start setting up a live stream!
Prerequisites
This tutorial will be a hands-on demonstration. If you’d like to follow along, be sure you have the following:
- A Linux server – This demo uses Ubuntu 20.04 LTS, but you can use any other Linux distribution with NGINX.
- NGINX installed on the Linux server.
- A non-root user with sudo privileges.
- Minimum resources required to run a live stream server – 2G RAM, 2 CPU Cores, and 20 GB HDD.
These values are suggestions only. The exact values depend on your actual traffic needs. The more traffic you have, the more powerful servers you will need to host and stream your live video. In a development environment, an NGINX RTMP server with 2 CPUs and 2 GB RAM is sufficient to test.
Configuring an RTMP Server
Now that the prerequisites are out of the way, you can now move on to installing and configuring your RTMP server. You’ll first install an NGINX module to convert your NGINX server into an RTMP server, then configure the NGINX configuration file to enable live streams for users.
1. Open your terminal and run the apt update command to update all your packages. This command synchronizes your package database with the latest database from Ubuntu.

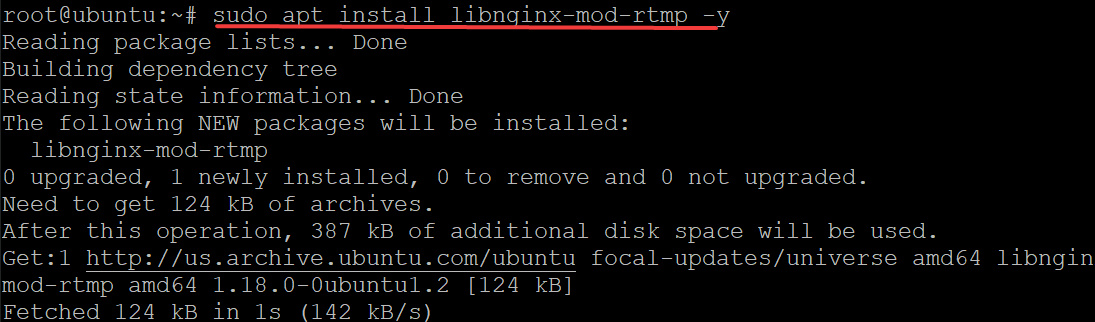
2. Next, run the following command to install an RTMP server on your Linux server.
The libnginx-mod-rtmp module is an NGINX module that converts your NGINX server into an RTMP server. This module enables NGINX to communicate with Adobe Flash player so you can stream your live video or audio, and is officially supported by its development team.
3. Open the /etc/nginx/nginx.conf file in your favorite editor to configure your RTMP live program. The nginx.conf file is an NGINX configuration file, which contains several directives or blocks to define the NGINX service’s behavior.
4. Finally, populate the nginx.conf file with the following code, save the changes and exit the editor.
The below code tells NGINX to act as an RTMP server and enables live streams for your users.
Securing Network by Setting up a Firewall
You’ve already configured your NGINX RTMP server, but you’ll need to secure your network and control the traffic flow. How? By setting up a firewall, Uncomplicated Firewall (UFW), which is the default firewall in Ubuntu.
If you put your NGINX RTMP server behind a firewall, you’ll have to allow the NGINX RTMP server port to be open. Since you’ve configured your NGINX RTMP server to listen on port 1935, you’ll allow this port through your firewall.
1. Run the following command to add a firewall rule that opens port 1935 on your firewall. This firewall rule allows your NGINX RTMP server port 1935 to be accessible for all incoming and outgoing requests.

2. Next, run the following command to disable and re-enable your firewall. This command basically restarts the firewall for any changes on the firewall to take effect.
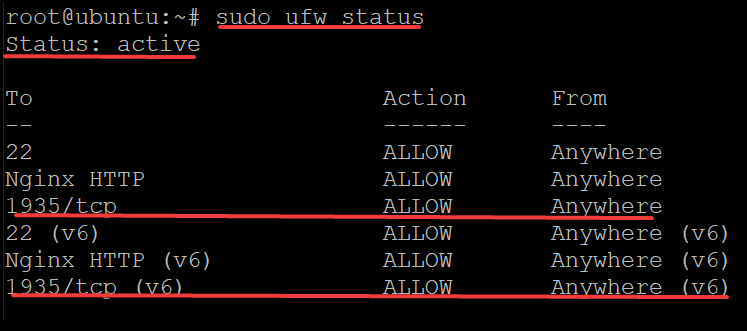
3. Finally, run the command below to check the status of your firewall and verify if port 1935 is accessible from all IP addresses (Anywhere).
Streaming Video using FFmpeg
Your NFINX RTMP server is now up, so it’s time to use FFmpeg to create an example video and stream it through your NGINX RTMP server. FFmpeg is a complete solution to record, convert and stream audio and video in many different applications like VLC, OMXPlayer, VobSub, and so on.
You’ll be testing video streaming on your server, and you can use any video that is small in size for streaming.
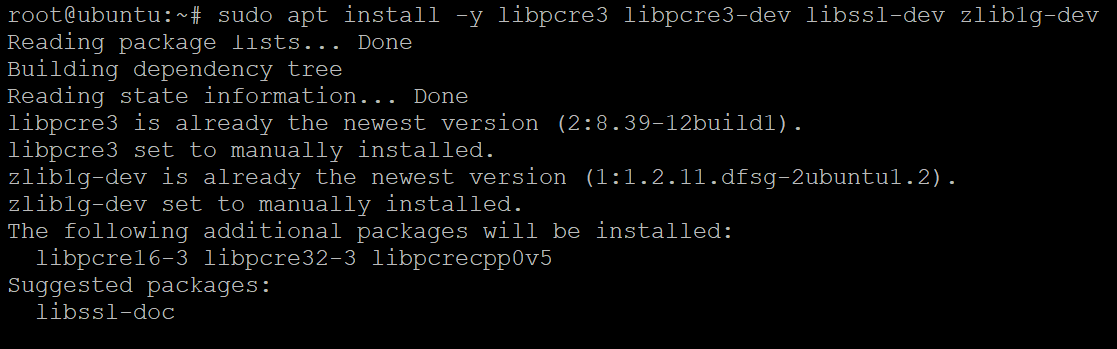
1. Run the apt install command below to install the required dependencies for FFmpeg to run properly.
The command below installs the following:
libpcre3– A regex library that is used by the ffmpeg toolkit to help parse and compile regular expressions.libpcre3-dev– This package contains the development headers of the libpcre3 package.libssl-dev– The OpenSSL cryptographic library used to create SSL/TLS connections in your RTMP server.zlib1g-dev: The zlib library is a compression and decompression library that speeds up audio and video file transfer over the Internet.
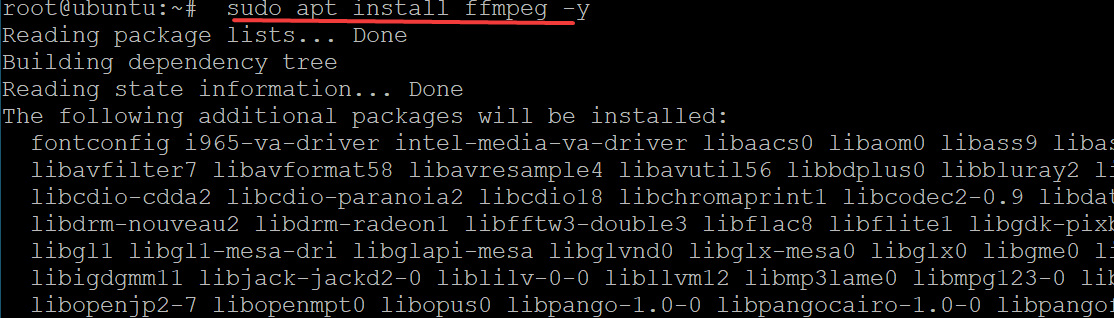
2. Next, run the following command to install ffmpeg on your server.
3. Lastly, run the ffmpeg command to perform the following and create a new live stream:
- Read input (
re) from the source file (i) at the original framerate. Be sure to replacevideo.mp4with your video’s path and filename. - Copy the video format verbatim (
c:v copy), and encode the audio n AAC codec (c:a aac). - Set the audio sample rate to 44100 Hz (
ar 44100). If your video’s sample rate is less than this value (44100 Hz), FFmpeg performs interpolation to increase the sample rate. - Set audio channels to one channel (mono) (
ac 1), and the video format that FFmpeg will stream (-f flv). - Set your RTMP live program (
rtmp://localhost/live/streamname.flv) that you configured in the “Configuring an RTMP Server” section (step four). You can changestreamname.flvto any name you prefer.
As you see below, the ffmpeg command prints out the frame per second it detects, the bitrate, and the fps of the newly created RTMP live stream.
Conclusion
In this tutorial, you’ve learned how to set up your NGINX RTMP server and enable live streams on your server by modifying the NGINX configuration file. You’ve also touched on setting up a video live stream using the FFmpeg tool through your NGINX RTMP server.
You’ve just realized that setting up a live stream doesn’t have to cost you every penny. At this point, why not integrate your stream into your web page using the HTML5 <video> element. Or set up an OBS Studio for your RTMP stream?