


Setting Up Great Expectations
In this tutorial, you’ll learn how to use GX Core, the open-source version of Great Expectations, to validate a Pandas DataFrame. We’ll walk through setting up a context, registering a Pandas data source, defining expectations, and validating data batches.
Note: We recommend you follow along with the DataLab notebook, but you can also create your own Python script.
1. Installing Great Expectations
Prerequisites
- Python 3.9 to 3.12 installed.
- To avoid conflicts, it is highly recommended that you install Great Expectations within a virtual environment (disclaimer: the setup of virtual environments is beyond the scope of this article).
- A sample dataset.
Note: If using the provided DataLab notebook, these prerequisites have already been satisfied. Feel free to skip them.
Use the following command to install GX via pip:
pip install great_expectations
This command installs the core package and all necessary dependencies.
2. Initializing the data context
Great Expectations requires a data context to manage configurations. We use an ephemeral data context to avoid persisting configurations.
import great_expectations as gx

# Get the Ephemeral Data Context
context = gx.get_context()
assert type(context).__name__ == "EphemeralDataContext"
Creating Your First Data Validation Suite
Now that GX is set up, let’s create a data validation suite.
1. Connecting to a data source and creating a data asset
A data source connects Great Expectations to your data, while a data asset represents a specific subset of data (e.g., a table, DataFrame, or file).
In this case, we will prepare everything to connect to a DataFrame called inventory_parts_df. The sample dataset is available in the provided DataLab, and it gets created once we run the SQL block:
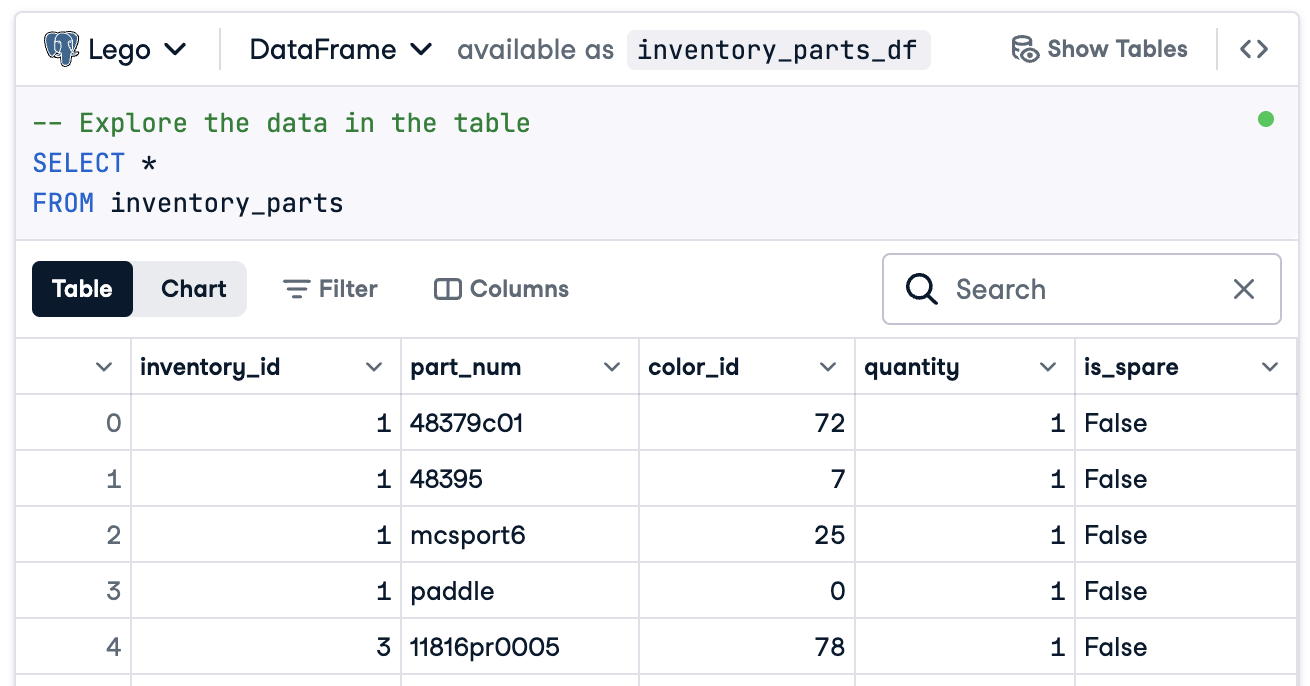
If you’re not using DataLab, create your own DataFrame with sample data.
Now, create your data source and asset:
# Add a Pandas Data Source
data_source = context.data_sources.add_pandas(name="inventory_parts")
# Add a Data Asset to the Data Source
data_asset = data_source.add_dataframe_asset(name="inventory_parts_asset")
2. Adding a batch definition
A batch definition identifies and organizes your data for validation. Here, we add a batch definition that covers the entire DataFrame:
# Define the Batch Definition name
batch_definition_name = "inventory_parts_batch"
# Add the Batch Definition
batch_definition = data_asset.add_batch_definition_whole_dataframe(batch_definition_name)
assert batch_definition.name == batch_definition_name
3. Retrieving a batch
A batch is a collection of data tied to a batch definition. To validate data, you’ll need to retrieve and link the batch to your DataFrame, in this case inventory_parts_df:
# Define the Batch Parameters
batch_parameters = {"dataframe": inventory_parts_df}
# Retrieve the Batch
batch = batch_definition.get_batch(batch_parameters=batch_parameters)
4. Creating a suite and defining expectations
Expectations are rules for validating data. In this example, we’ll define the following simple expectations:
- Ensure
inventory_idvalues are non-null. - Ensure
part_numvalues are unique.
# Create an Expectation Suite
expectation_suite_name = "inventory_parts_suite"
suite = gx.ExpectationSuite(name=expectation_suite_name)
# Add Expectations
suite.add_expectation(
    gx.expectations.ExpectColumnValuesToNotBeNull(column="inventory_id")
)
suite.add_expectation(
    gx.expectations.ExpectColumnValuesToBeUnique(column="part_num")
)
# Add the Expectation Suite to the Context
context.suites.add(suite)
You can explore all the available expectations in the Expectation Gallery. We encourage you to add a few more!
After defining the expectations, GX outputs the expectation suite configuration:
{
  "name": "inventory_parts_suite",
  "id": "b2de0b69-0869-4163-8dde-6c09884483f7",
  "expectations": [
    {
      "type": "expect_column_values_to_not_be_null",
      "kwargs": {
        "column": "inventory_id"
      },
      "meta": {},
      "id": "53d6c42a-d190-412f-a113-783b706531f4"
    },
    {
      "type": "expect_column_values_to_be_unique",
      "kwargs": {
        "column": "part_num"
      },
      "meta": {},
      "id": "362a2bdc-616d-4b3a-b7f0-c73808caee78"
    }
  ],
  "meta": {
    "great_expectations_version": "1.2.4"
  },
  "notes": null
}
The suite includes the following details:
- Suite name and ID: A unique name (
inventory_parts_suite) and identifier to track and manage the suite. - Expectations: Each rule specifies:
- The type of check (e.g., ensuring a column has no null values or unique entries).
- Parameters, such as the column being validated.
- Metadata and a unique ID for each expectation, allowing for easier tracking and customization.
- Metadata: Version information for Great Expectations, ensuring compatibility with the tool.
- Notes: A placeholder for adding descriptive comments about the suite (optional).
This structured output acts as both documentation and a reusable configuration for validating your dataset so your expectations are clearly defined, traceable, and ready for future use.
5. Validating the data
Finally, validate the batch against the defined expectations and evaluate the results.
# Validate the Data Against the Suite
validation_results = batch.validate(suite)
# Evaluate the Results
print(validation_results)
After running the validation, Great Expectations provides a detailed report on whether the dataset meets the defined expectations:
{
  "success": false,
  "results": [
    {
      "success": true,
      "expectation_config": {
        "type": "expect_column_values_to_not_be_null",
        "kwargs": {
          "batch_id": "inventory_parts-inventory_parts_asset",
          "column": "inventory_id"
        },
        "meta": {},
        "id": "53d6c42a-d190-412f-a113-783b706531f4"
      },
      "result": {
        "element_count": 580069,
        "unexpected_count": 0,
        "unexpected_percent": 0.0,
        "partial_unexpected_list": [],
        "partial_unexpected_counts": [],
        "partial_unexpected_index_list": []
      },
      "meta": {},
      "exception_info": {
        "raised_exception": false,
        "exception_traceback": null,
        "exception_message": null
      }
    },
    {
      "success": false,
      "expectation_config": {
        "type": "expect_column_values_to_be_unique",
        "kwargs": {
          "batch_id": "inventory_parts-inventory_parts_asset",
          "column": "part_num"
        },
        "meta": {},
        "id": "362a2bdc-616d-4b3a-b7f0-c73808caee78"
      },
      "result": {
        "element_count": 580069,
        "unexpected_count": 568352,
        "unexpected_percent": 97.98006788847535,
        "partial_unexpected_list": [
          "48379c01",
          "paddle",
          "11816pr0005",
          "2343",
          "3003",
          "30176",
          "3020",
          "3022",
          "3023",
          "30357",
          "3039",
          "3062b",
          "3068b",
          "3069b",
          "3069b",
          "33291",
          "33291",
          "3795",
          "3941",
          "3960"
        ],
        "missing_count": 0,
        "missing_percent": 0.0,
        "unexpected_percent_total": 97.98006788847535,
        "unexpected_percent_nonmissing": 97.98006788847535,
        "partial_unexpected_counts": [
          {
            "value": "3069b",
            "count": 2
          },
          {
            "value": "33291",
            "count": 2
          },
          {
            "value": "11816pr0005",
            "count": 1
          },
          {
            "value": "2343",
            "count": 1
          },
          {
            "value": "3003",
            "count": 1
          },
          {
            "value": "30176",
            "count": 1
          },
          {
            "value": "3020",
            "count": 1
          },
          {
            "value": "3022",
            "count": 1
          },
          {
            "value": "3023",
            "count": 1
          },
          {
            "value": "30357",
            "count": 1
          },
          {
            "value": "3039",
            "count": 1
          },
          {
            "value": "3062b",
            "count": 1
          },
          {
            "value": "3068b",
            "count": 1
          },
          {
            "value": "3795",
            "count": 1
          },
          {
            "value": "3941",
            "count": 1
          },
          {
            "value": "3960",
            "count": 1
          },
          {
            "value": "48379c01",
            "count": 1
          },
          {
            "value": "paddle",
            "count": 1
          }
        ],
        "partial_unexpected_index_list": [
          0,
          3,
          4,
          5,
          6,
          7,
          8,
          9,
          10,
          11,
          12,
          13,
          14,
          15,
          16,
          17,
          18,
          19,
          20,
          21
        ]
      },
      "meta": {},
      "exception_info": {
        "raised_exception": false,
        "exception_traceback": null,
        "exception_message": null
      }
    }
  ],
  "suite_name": "inventory_parts_suite",
  "suite_parameters": {},
  "statistics": {
    "evaluated_expectations": 2,
    "successful_expectations": 1,
    "unsuccessful_expectations": 1,
    "success_percent": 50.0
  },
  "meta": {
    "great_expectations_version": "1.2.4",
    "batch_spec": {
      "batch_data": "PandasDataFrame"
    },
    "batch_markers": {
      "ge_load_time": "20241129T122532.416424Z",
      "pandas_data_fingerprint": "84a1e1939091fcf54324910def3b89cd"
    },
    "active_batch_definition": {
      "datasource_name": "inventory_parts",
      "data_connector_name": "fluent",
      "data_asset_name": "inventory_parts_asset",
      "batch_identifiers": {
        "dataframe": "<DATAFRAME>"
      }
    }
  },
  "id": null
}
This report details the quality of your data, highlighting successes and failures. Here’s a simplified explanation of the results:
Overall validation: The validation result was partially successful: 50% of the expectations passed, and 50% failed. A failed expectation indicates a data quality issue that needs attention. In this case, one column did not meet the defined rule.
Expectation 1: inventory_id should have no missing values
- Result: Passed
- Explanation: Every value in the
inventory_idcolumn is present, with no null or missing entries. This indicates good data completeness for this column.
Expectation 2: part_num should have unique values
- Result: Failed
- Explanation: The
part_numcolumn contains 97.98% duplicate values, meaning only a few values are unique. - Highlights:
- Example duplicate values include “3069b” and “33291”.
- The tool also shows how frequently these duplicates appear and their row positions, making it easier to locate and fix the issues.
Of course, this is just a sample dataset, and we purposefully included a passing and a failing expectation so you can see both validation results.
That’s it! You’ve successfully run end-to-end data validations.
Integrating Great Expectations into Data Pipelines
In a production setting, validations must be embedded directly into the workflow to continuously monitor data quality at every stage.
In this section, we’ll discuss how you can integrate Great Expectations into your data pipelines.
These are examples to give you an idea, and extra configurations not included here may be required. Check out each tool’s documentation for up-to-date syntax!
Integration with ETL tools
Integrating Great Expectations with popular ETL tools like Apache Airflow or Prefect is relatively straightforward. Embedding validation steps directly into the ETL processes will allow you to catch and address data issues in real time before they affect downstream analysis.
Let’s walk through a simple example of integrating Great Expectations with Prefect to run data validation as part of an automated ETL workflow:
from prefect import task, Flow
import great_expectations as ge
# Define a task to run Great Expectations validation
@task
def validate_data():
    context = ge.data_context.DataContext()
    batch_kwargs = {"path": "path/to/your/datafile.csv", "datasource": "your_datasource"}
    batch = context.get_batch(batch_kwargs, suite_name="your_expectation_suite")
    results = context.run_validation_operator("action_list_operator", assets_to_validate=[batch])

    # Check validation results and raise an alert if validation fails
    if not results["success"]:
        raise ValueError("Data validation failed!")
# Define your ETL flow
with Flow("ETL_with_GE_Validation") as flow:
    validation = validate_data()
# Execute the flow
flow.run()
In this example, we define a Prefect flow with a task for running Great Expectations validation.
The validate_data() task loads the Great Expectations context, retrieves the data batch, and applies the expectation suite.
If the data does not meet the validation criteria, the task raises an alert, stopping the workflow and preventing downstream errors.
Continuous data validation
You can schedule validation jobs using various tools, such as cron jobs on Unix-based systems or managed services like Apache Airflow. For this example, we’ll demonstrate how to schedule validation runs using Airflow, which is well-suited for orchestrating data pipelines.
Here’s how you can set up an Airflow DAG (Directed Acyclic Graph) to run Great Expectations validations daily:
from airflow import DAG
from airflow.operators.python_operator import PythonOperator
from datetime import datetime
import great_expectations as ge
# Define the DAG and set the schedule to run daily
default_args = {
	  'owner': 'airflow',
	  'start_date': datetime(2024, 1, 1),
	  'retries': 1,
}
dag = DAG(
      'great_expectations_validation',
	default_args=default_args,
	schedule_interval='@daily',  # Runs once a day
)
# Define the function to run the validation
def run_validation():
    context = ge.data_context.DataContext()
    batch = context.get_batch(batch_kwargs, suite_name="your_expectation_suite")
    results = context.run_validation_operator("action_list_operator", assets_to_validate=[batch])
    return results
# Set up the task in Airflow
validation_task = PythonOperator(
      task_id='run_great_expectations_validation',
      python_callable=run_validation,
      dag=dag,
)
# Set the task in the DAG
validation_task
In this example, we define a DAG that schedules a validation run once a day (@daily).
The run_validation() function executes the validation by loading the Great Expectations context and running the defined expectation suite against the data.
Best Practices for Data Validation with Great Expectations
Following best practices is always best advised for scalability and efficiency, and it’s no different for data validation with Great Expectations.
Start small and iterate
Begin with foundational data quality checks and gradually expand. It’s better to focus on basic expectations initially, as this helps to avoid overcomplicating the process, which makes for a smoother integration and easier troubleshooting. As your understanding of the dataset improves, you can add more complex validations.
Collaborate across teams
Data quality is not just a technical concern. Collaborate across business teams to define expectations and ensure the implemented validation aligns with the underlying business logic and goals. This cross-functional approach guarantees that data serves its intended purpose and meets the requirements of all stakeholders.
Automate where possible
Automate the process wherever feasible to integrate data validation into data pipelines. Integrating automated validation checks enables continuous monitoring of data quality without manual intervention, which significantly improves efficiency.
Conclusion
Great work! You’ve learned how to configure and validate data in Great Expectations. These techniques will help maintain high data quality and transparency in your workflows.
To continue building your skills, check out these resources:
- ETL and ELT in Python: Learn how to transform and move data effectively.
- Introduction to Data Quality: Explore the fundamentals of data quality management.
- Cleaning Data in Python: Master data cleaning techniques to ensure accuracy and consistency.
- Data Quality Dimensions Cheat Sheet: A handy guide to data quality dimensions.
Source:
https://www.datacamp.com/tutorial/great-expectations-tutorial