


Introduction
As developers, we often build projects on the side, whether for fun or to learn something new. These projects also serve as proof of our skills.
You should have proof of work. Beyond your code, users should be able to use your application, and for that, it should not just be in localhost:3000, but accessible through a link. To achieve this, you need to deploy your application and map it to a custom domain for better readability and easy sharing.
In this article, you will get introduced to DigitalOcean App Platform, and see how easy it is to go from deploying an application to mapping it to a custom domain in just a few clicks.
Prerequisites
-
A DigitalOcean account to access the App Platform.
-
Custom domain available on NameCheap or similar platform.
What is DigitalOcean App Platform?
App Platform is a fully managed platform-as-a-service (PaaS) that helps developers build, deploy, and scale applications with ease. It abstracts away much of the infrastructure management, allowing you to focus on code and deployment.
It can automatically analyze and build code from git providers like GitHub and GitLab, and publish your applications to the cloud. It can also publish using container images that you have already uploaded to DigitalOcean Container Registry or Docker Hub.
With features like DDoS mitigation, auto OS patching, vertical scaling, HTTP support, global CDN and domain support, the App Platform makes it simple to publish and manage your apps.
Step 1 – Deploying using App Platform
Once the application is ready, you can deploy it from monorepos,container images, or using GitHub Actions.
A monorepo is a version-controlled code repository that holds many projects. While these projects may be related, they are often logically independent and run by different teams.
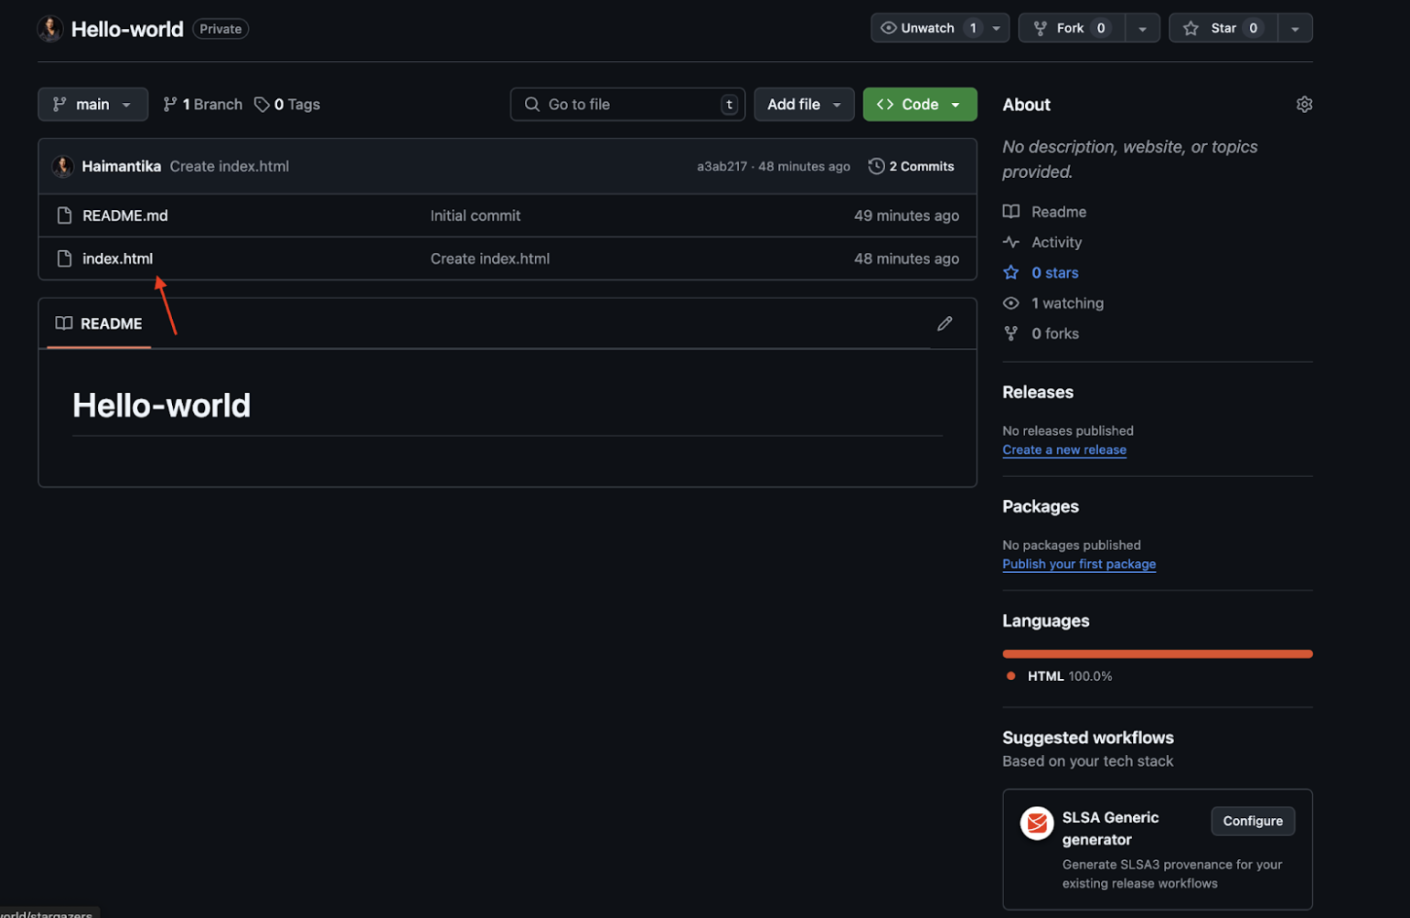
Let us see how we can deploy applications using the App Platform with GitHub. Let’s say you have a private GitHub repository with an index.html file that contains this simple hello world code:
Deploy Using Github
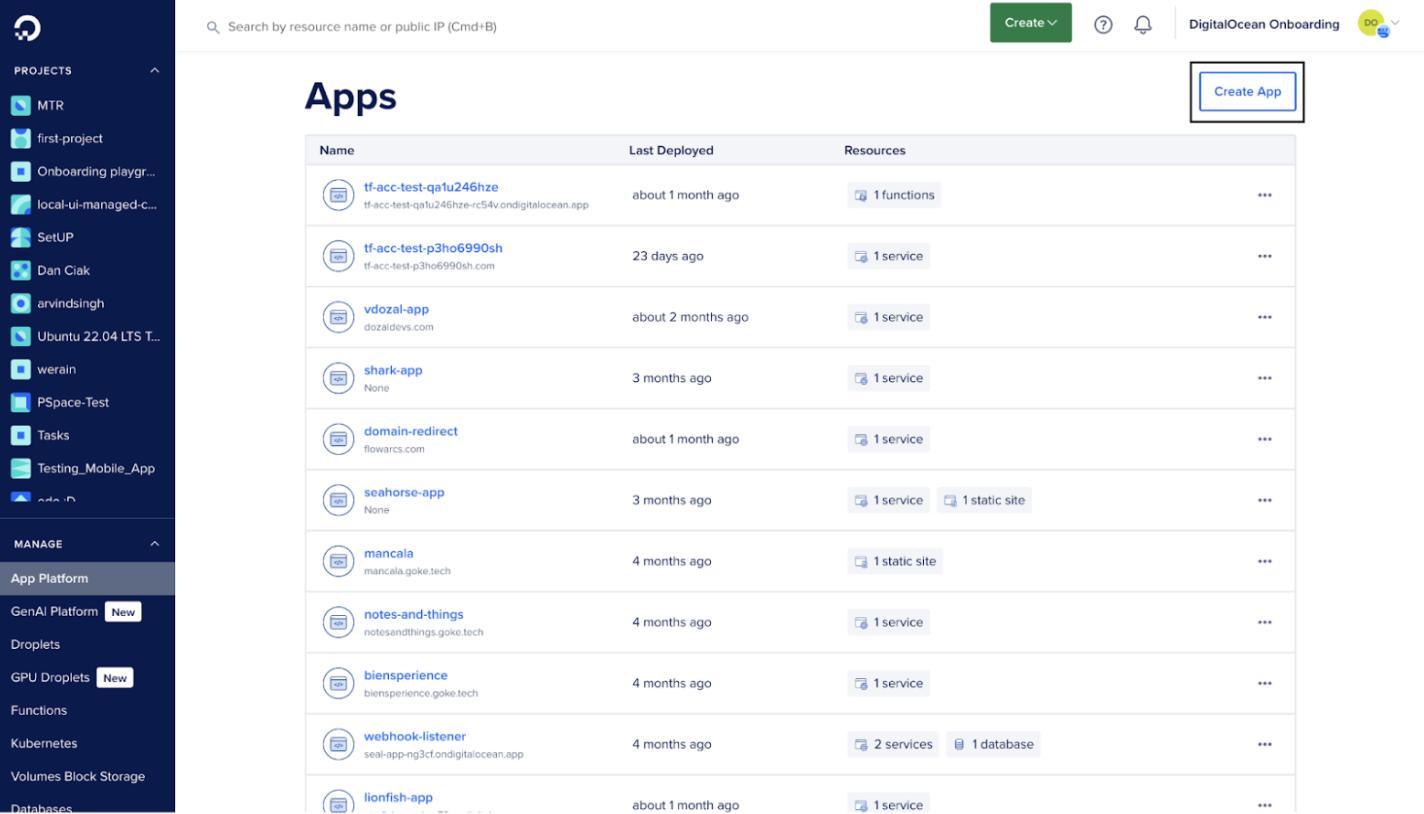
- Go to the Apps page and click on Create App.
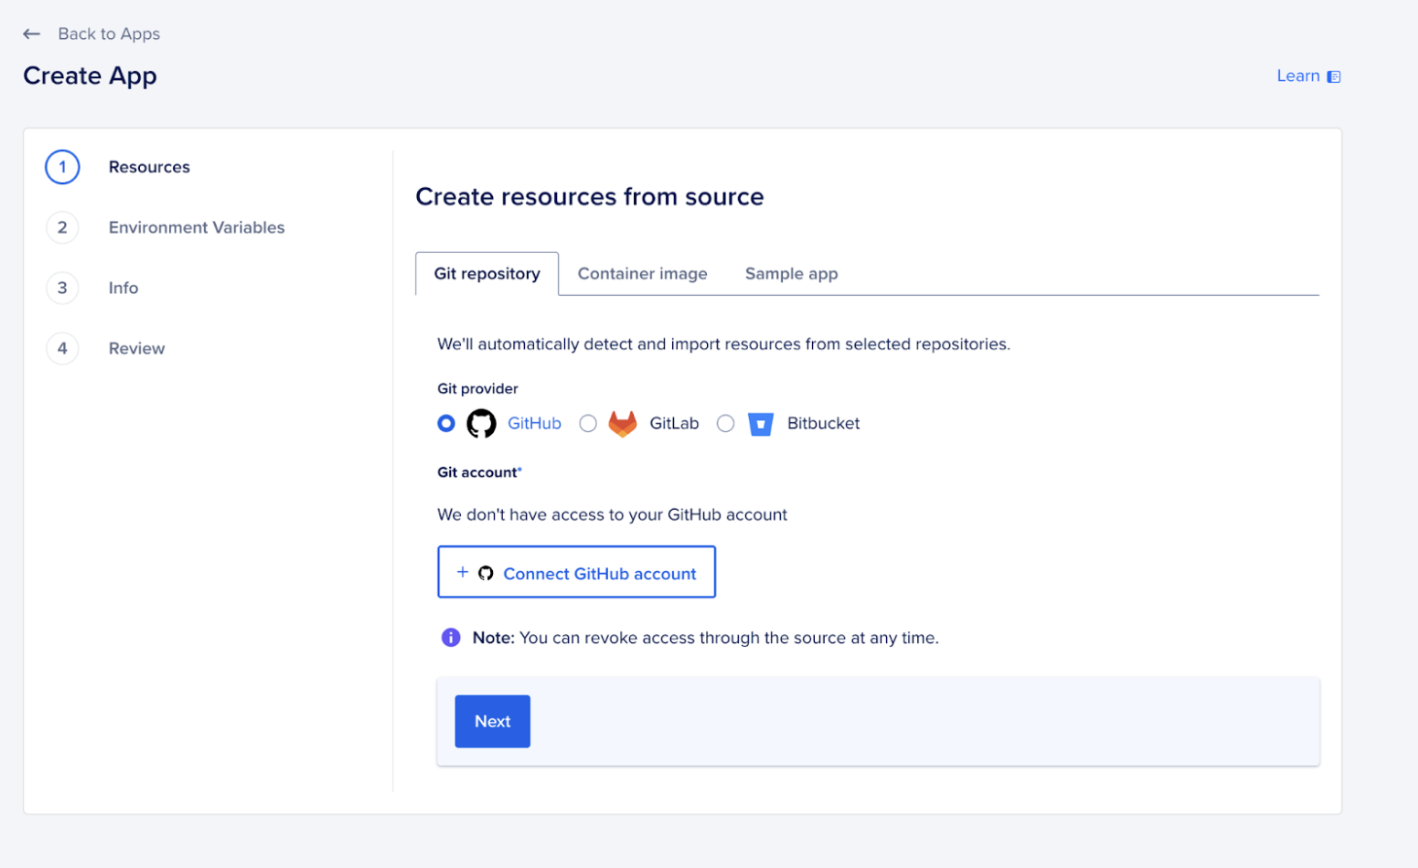
- Connect your GitHub account and then select the GitHub repository that contains your source code.
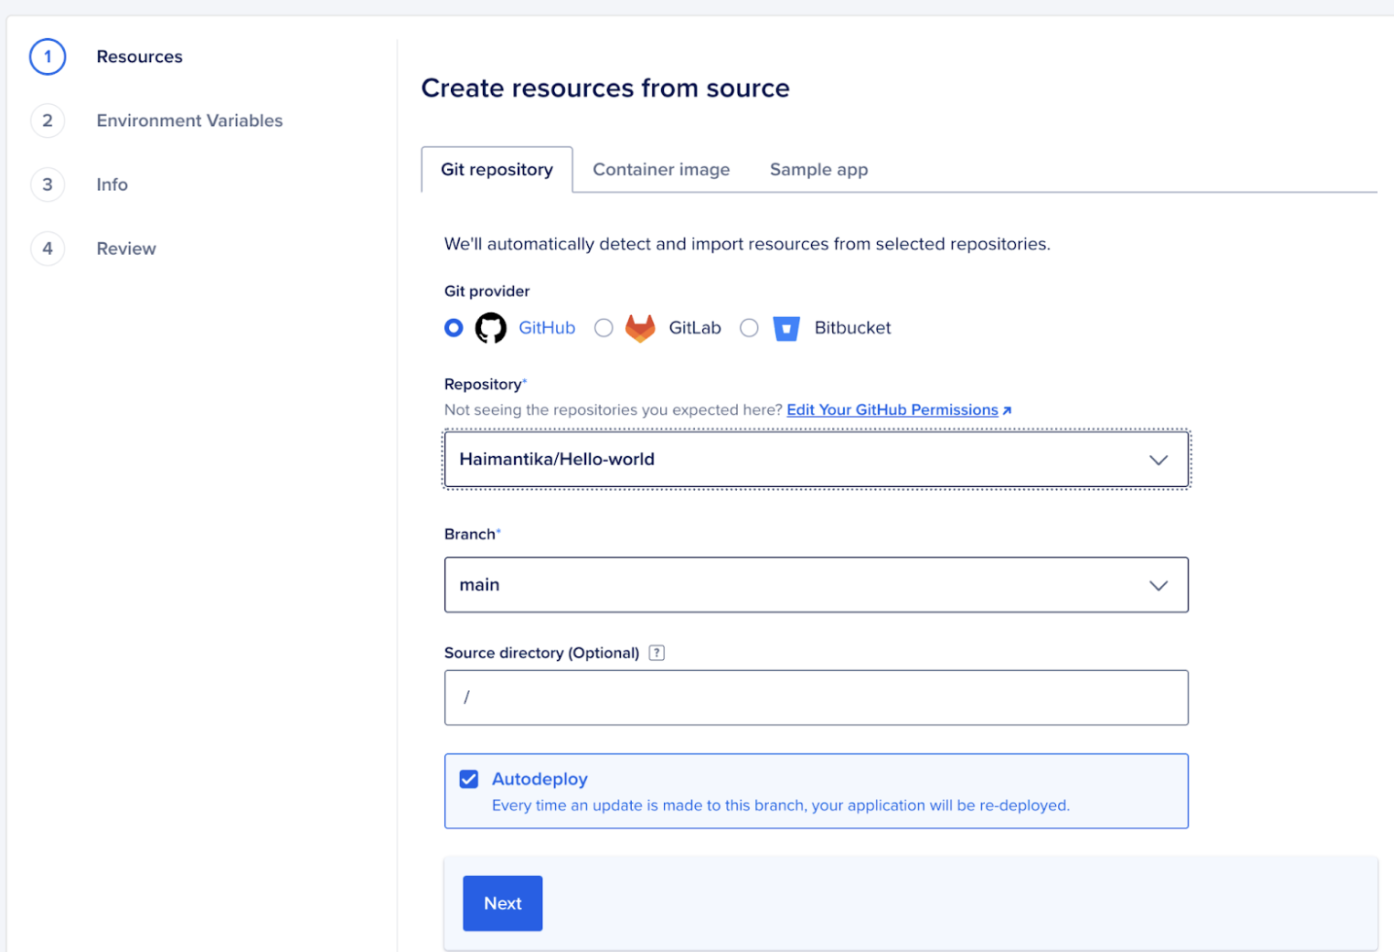
- In the Source Directory field, specify the folder that contains the source as shown in the image below. Since our demo repository only consists of an
index.htmlfile in the root directory, we will go ahead with the default/. If your code follows a monorepo structure, make sure you choose the particular directory where the code is located.
Select auto-deploy, this will automatically re-deploy whenever you push a new change:
- Configure resources for your app and click on Next. This is what you will see:
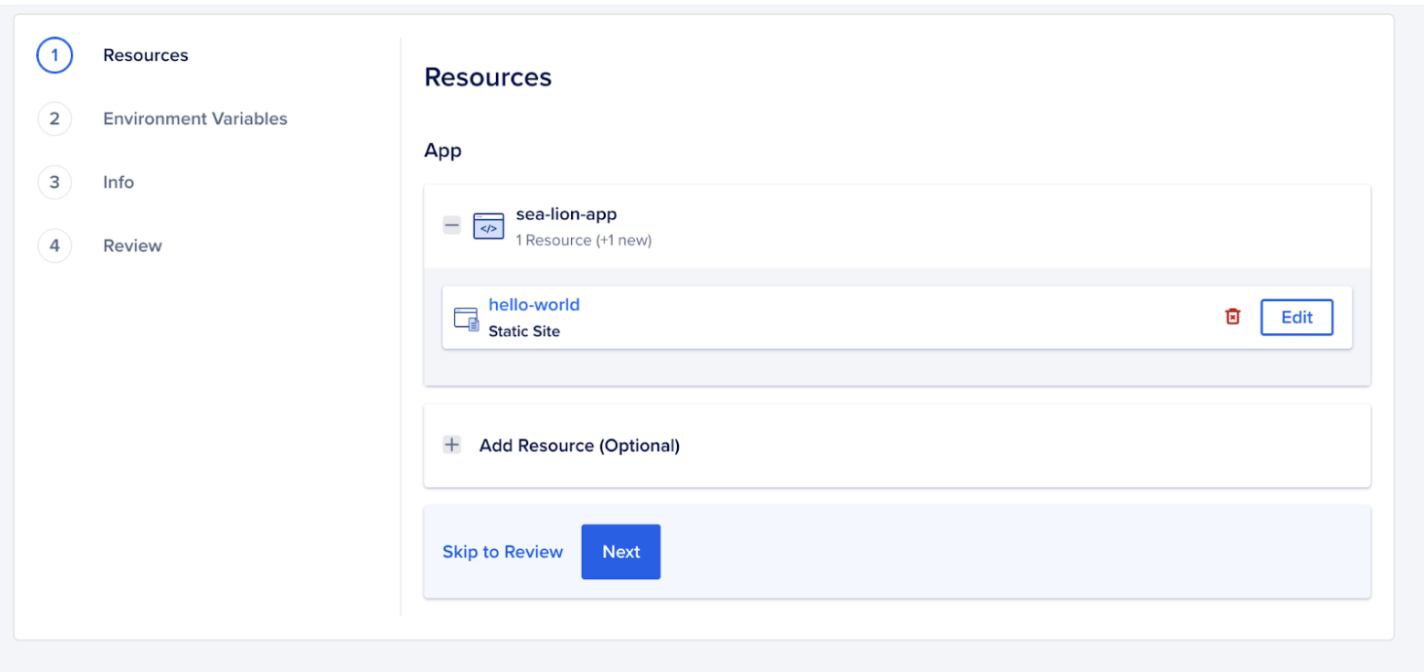
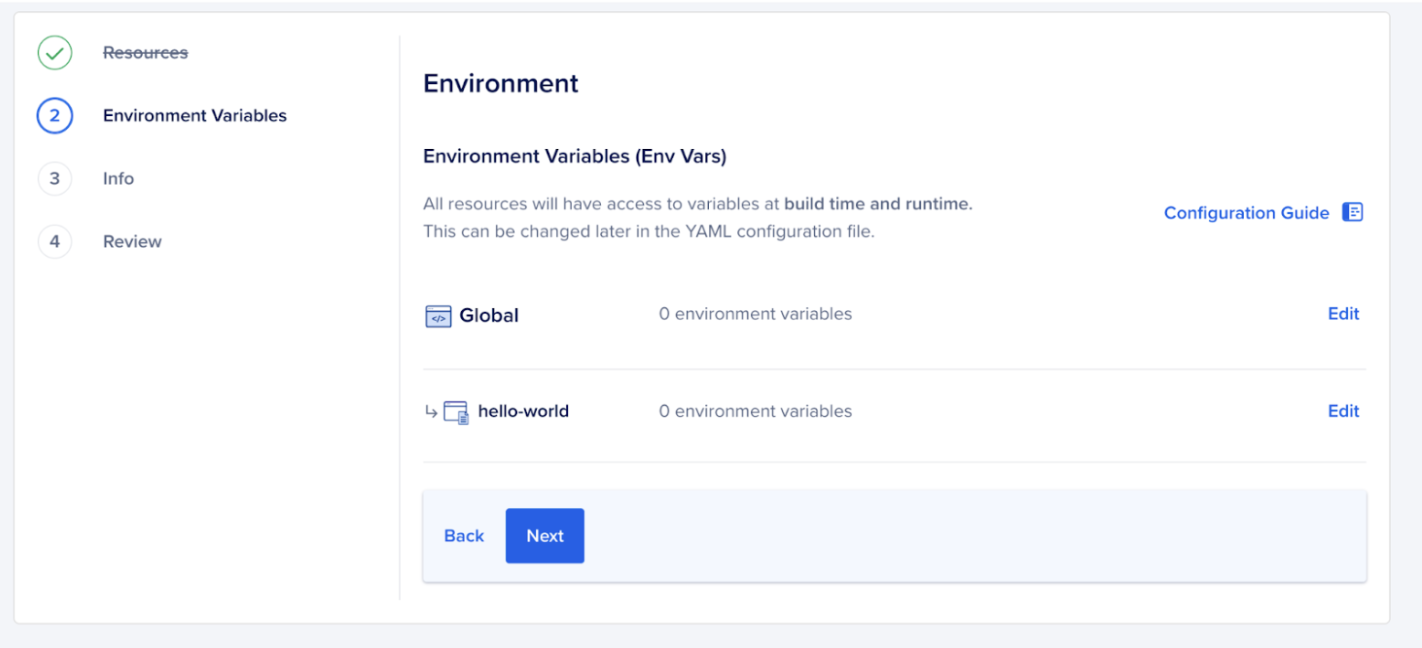
- Next, it will go through some checks before it finally deploys the app. For more complicated apps, such as the ones using an API, you may need to add environment variables, in the next pages, you can configure those.
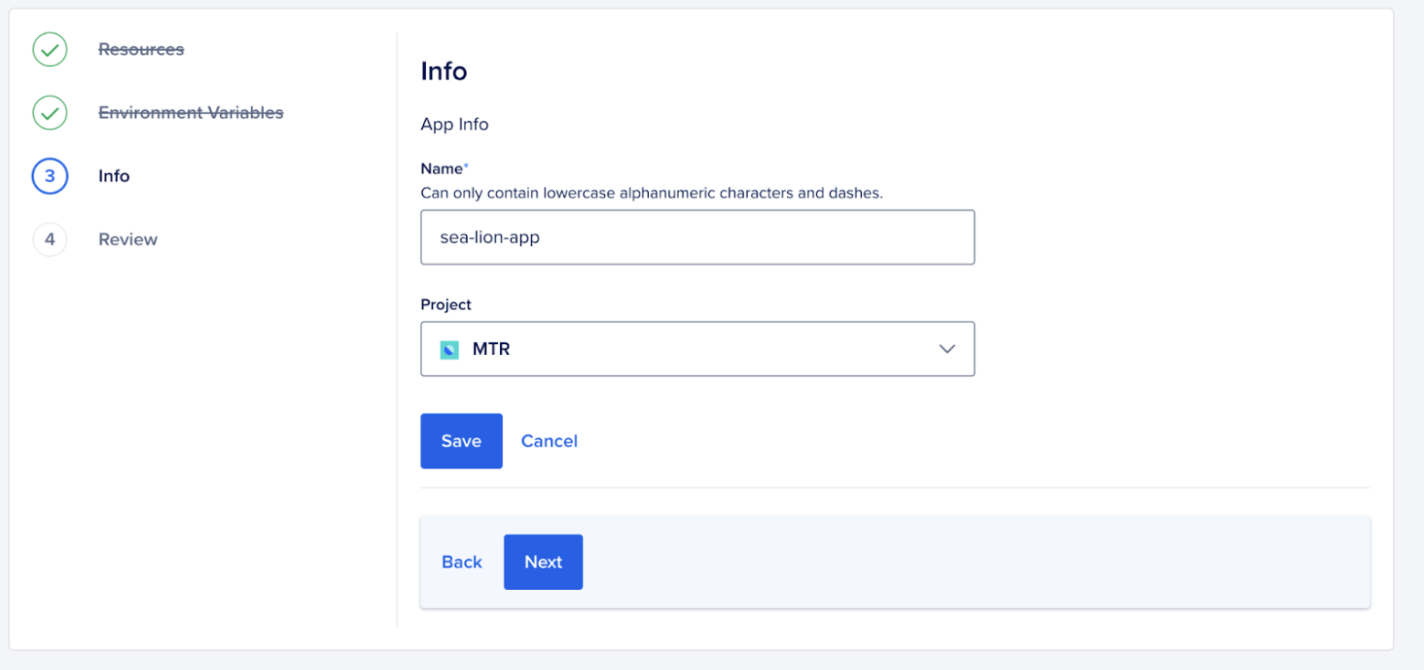
- In the next step, you can edit the name of the application and choose the resource under which your app will be deployed.
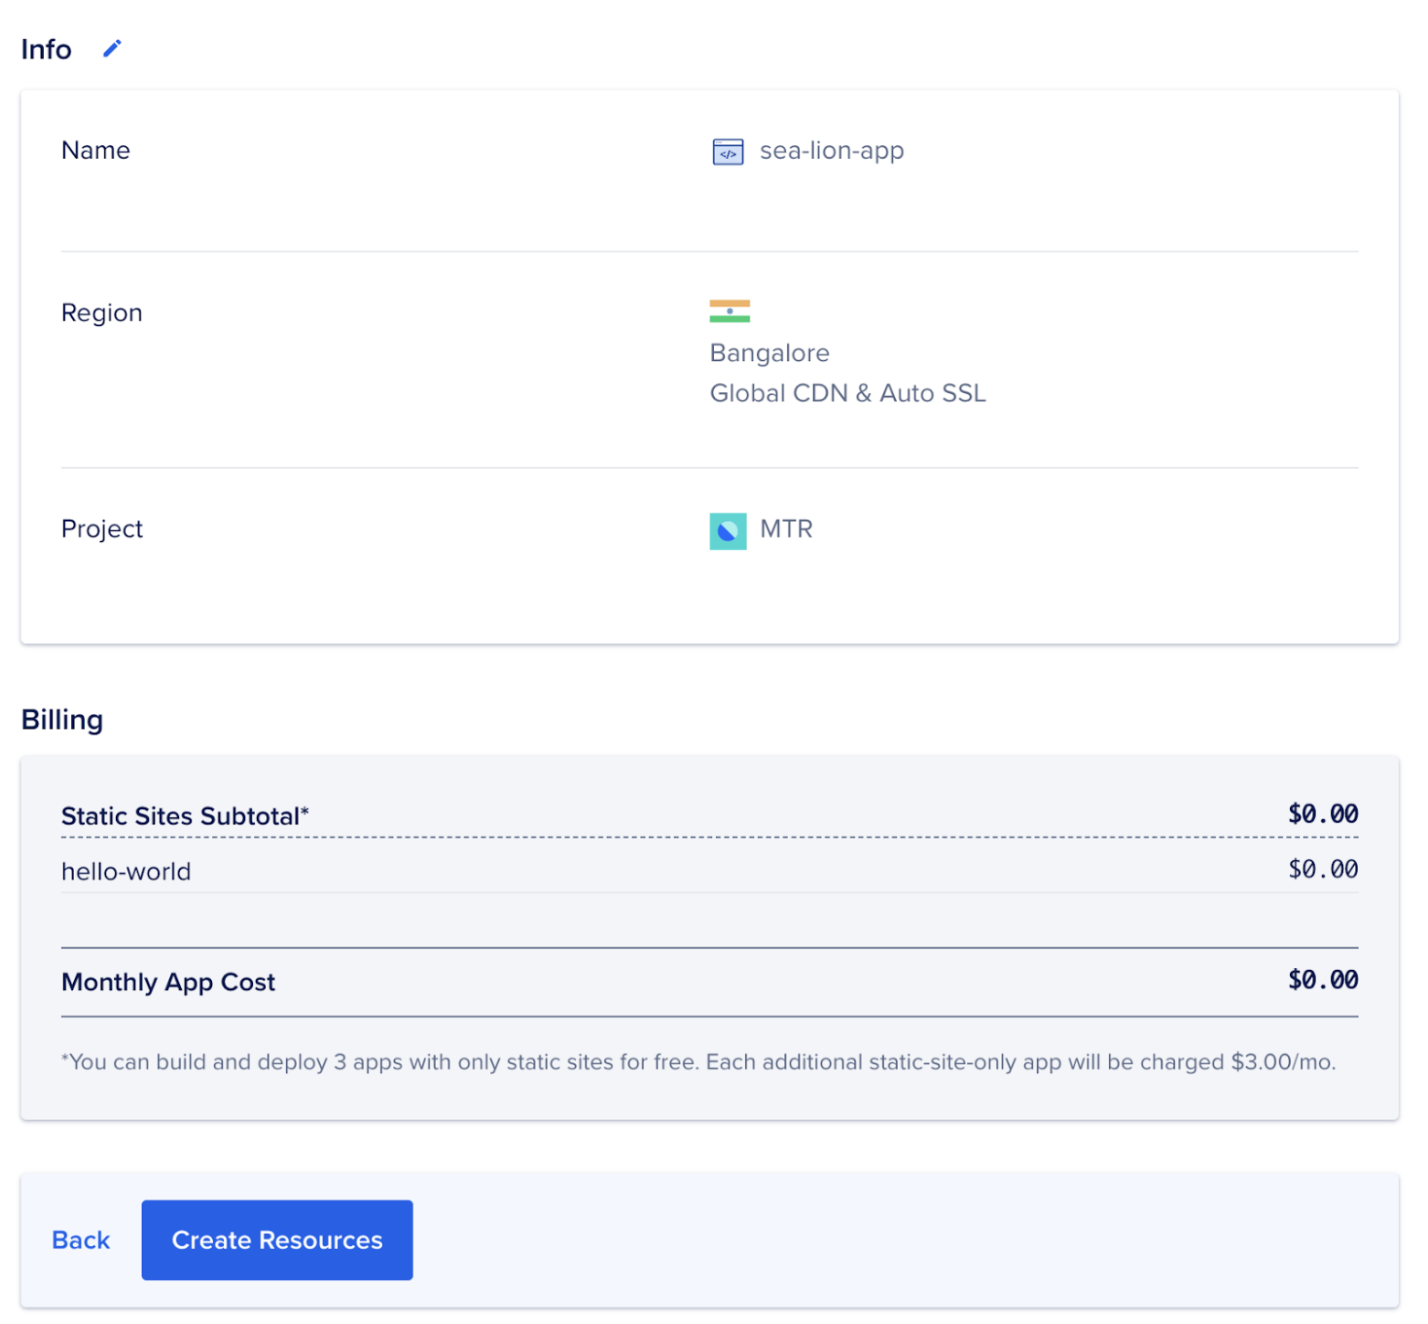
- Then you click on
Nextto view theReviewpage, where you get to see other app related information like billing, location, etc. Then finally click onCreate resourceto get the app deployed.
- This will take a few minutes. Once the app deploys, you can view the app at the URL and other details in the
Overviewpage.

If you follow all the steps above, this is how your application will look like: https://sea-lion-app-l8cvv.ondigitalocean.app/.
Step 2: Mapping the application to a custom domain
Now that your application is successfully deployed and has an ondigitalocean.app domain, in this step, you will see how you can map it to a custom domain.
There are two ways by which you can add a custom domain to your app:
-
Using the control panel
For this article, you will see how you can configure custom domain using the control panel.
-
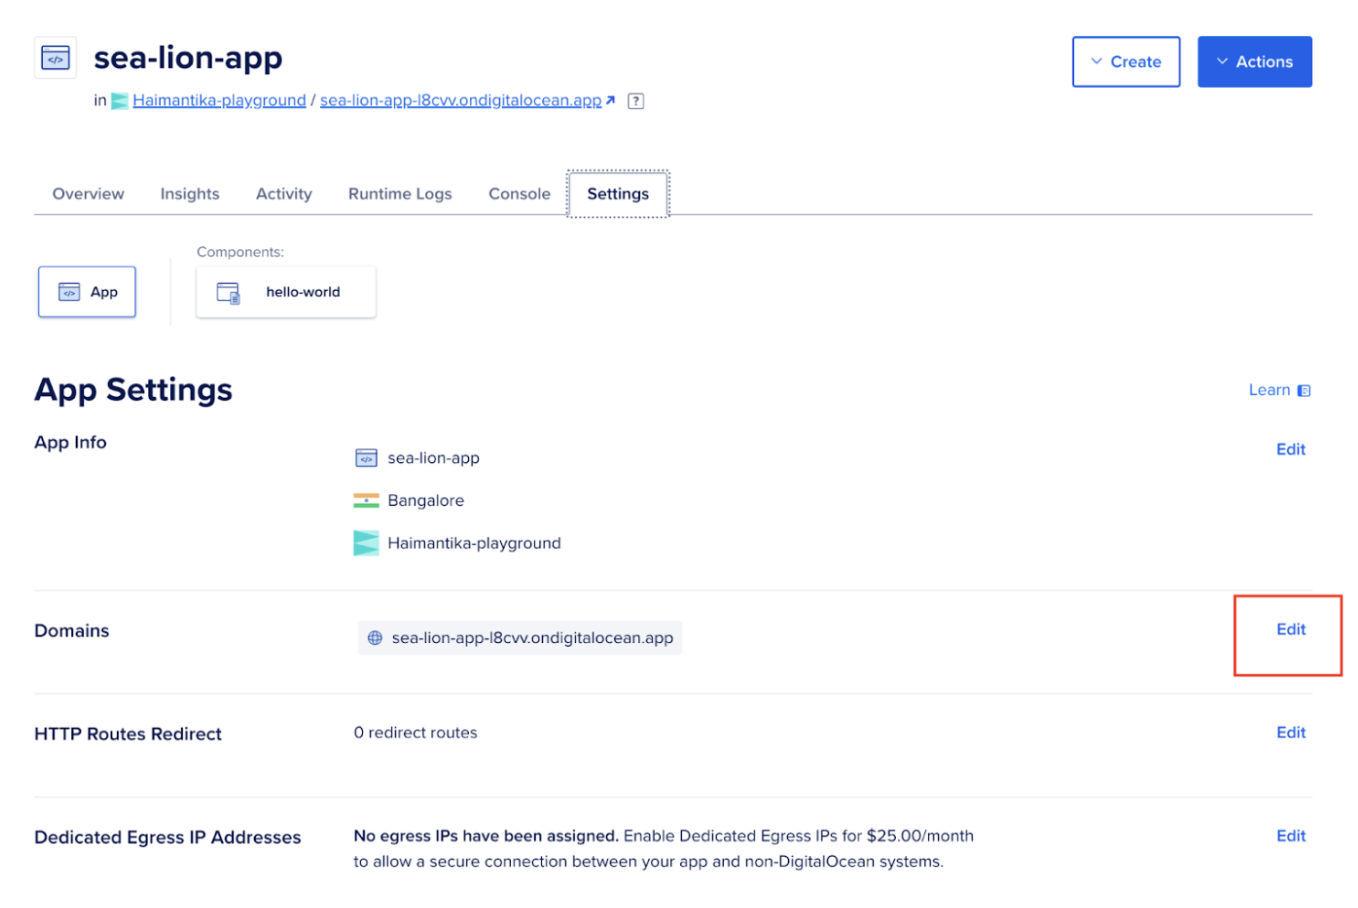
Login toDigitalOcean Cloud and select the app you want to add the domain to, and then click on the
Settingstab. -
Then, click the
Editlink to the right ofDomains, andthen click theAdd Domainbutton.
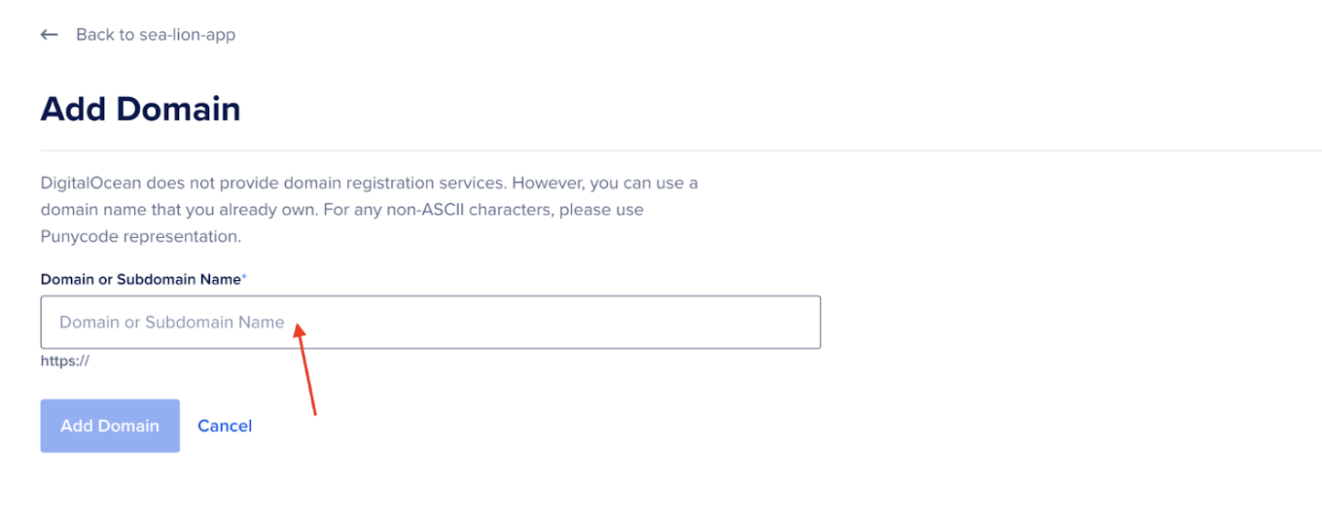
- As soon as you start typing your domain name in the text field below. You will get two options to add your custom domain.
-
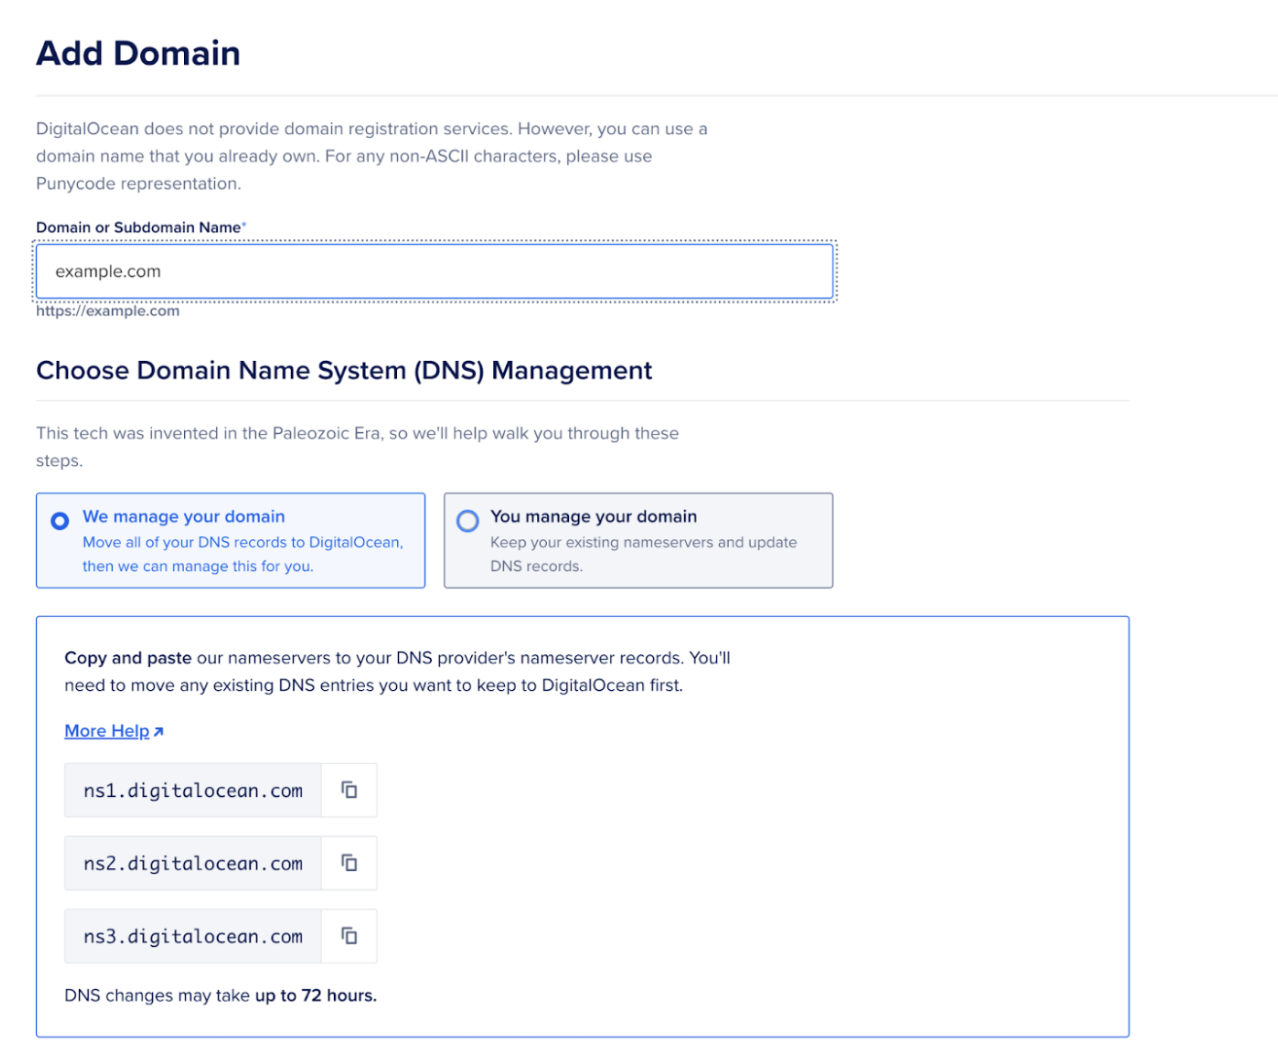
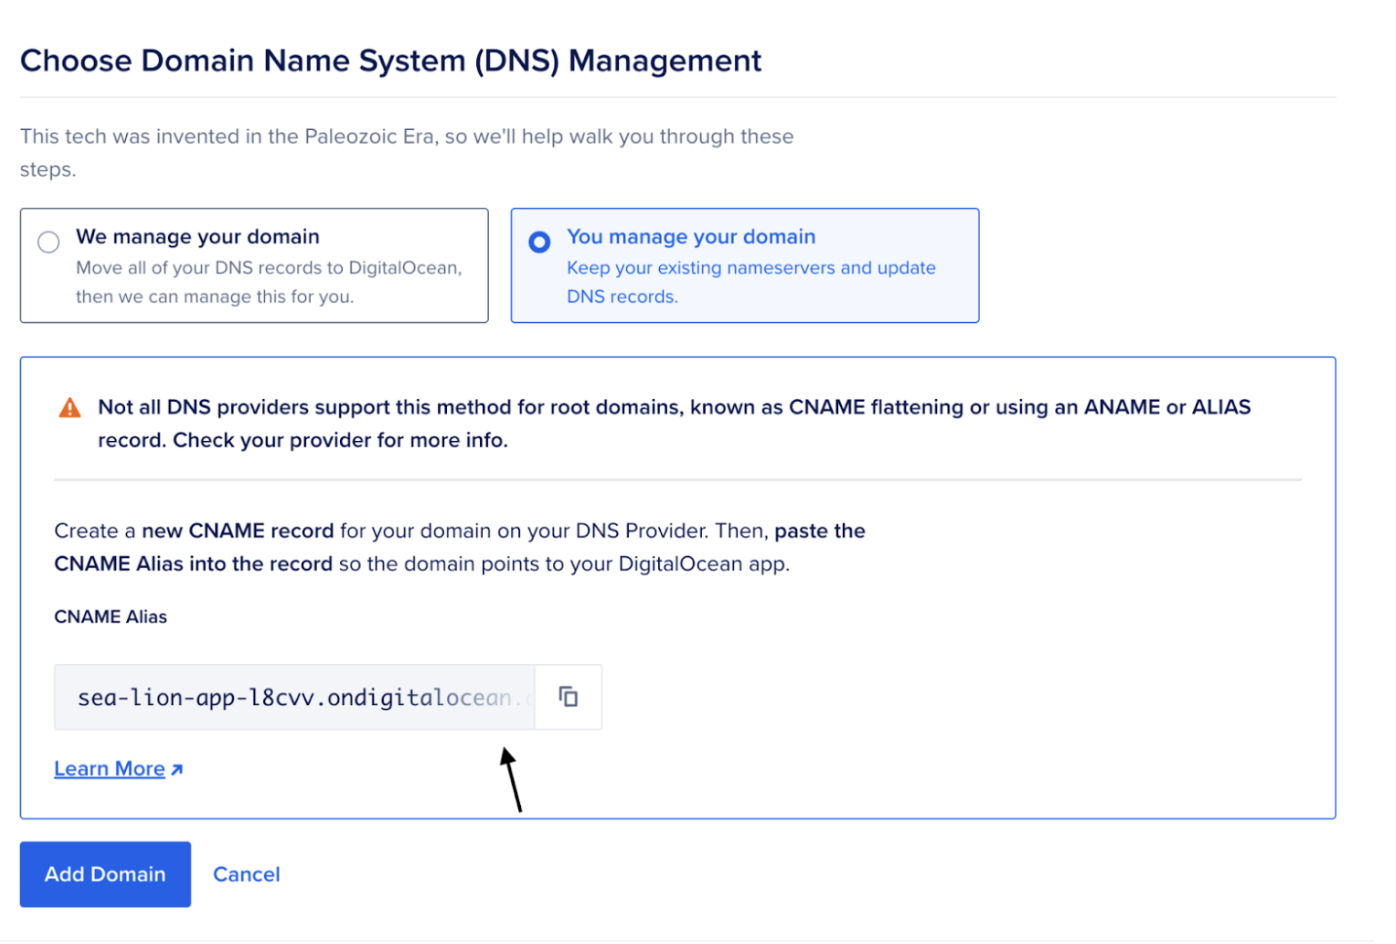
You can either add the custom domain using DigitalOcean’s name servers or using a CNAME provider.
-
To use DigitalOcean’s name servers, copy and paste them (
ns1.digitalocean.com,ns2.digitalocean.com,ns3.digitalocean.com) into your domain registrar’s name server records. Check our tutorial on Point to DigitalOcean Name Servers From Common Domain Registrars for guidance on delegating your domain to DigitalOcean’s name servers from popular registrars.
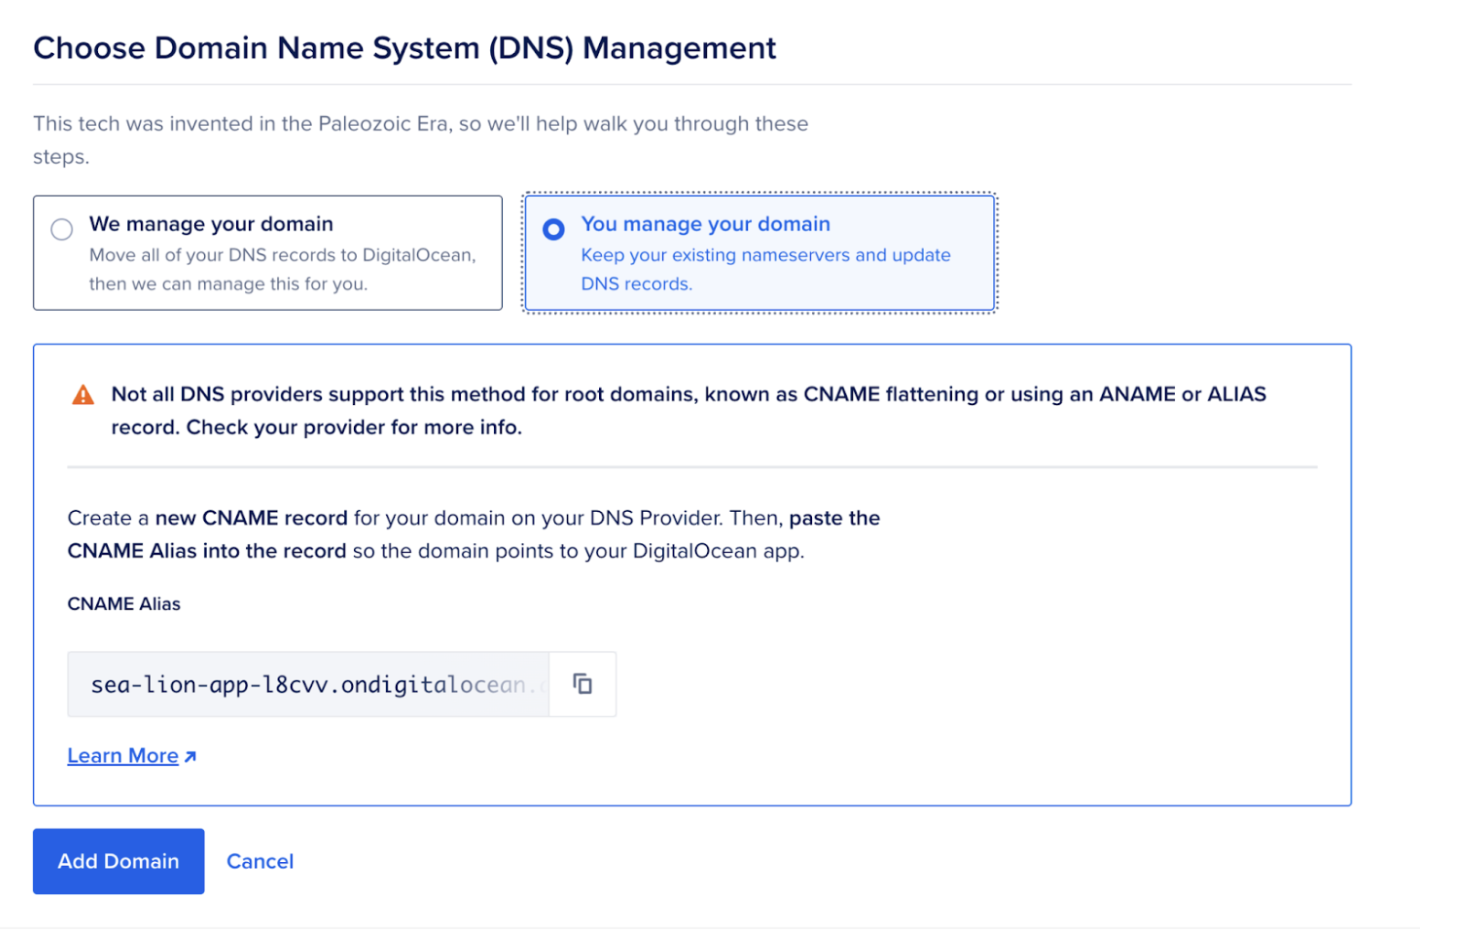
- You can also add a CNAME record to your domain. If your DNS provider is not DigitalOcean, check their documentation for instructions. Use the copy button to copy the
ondigitalocean.appalias and paste it into the CNAME record on your DNS provider to point your custom domain to your App Platform app. Once done, click the Add Domain button.
For more advanced settings related to the domain, refer to our documentation on How to Manage Domains in App Platform.
Adding domains bought on Namecheap
You can follow the above steps to add custom domains purchased on any platform. For this example, let us see how you would configure the settings for a domain bought on Namecheap.
-
Log in to your Namecheap account. Click on Domain List, select the domain you want to add, and then click Manage.
-
Then move to the Advanced DNS tab and click Add new record.
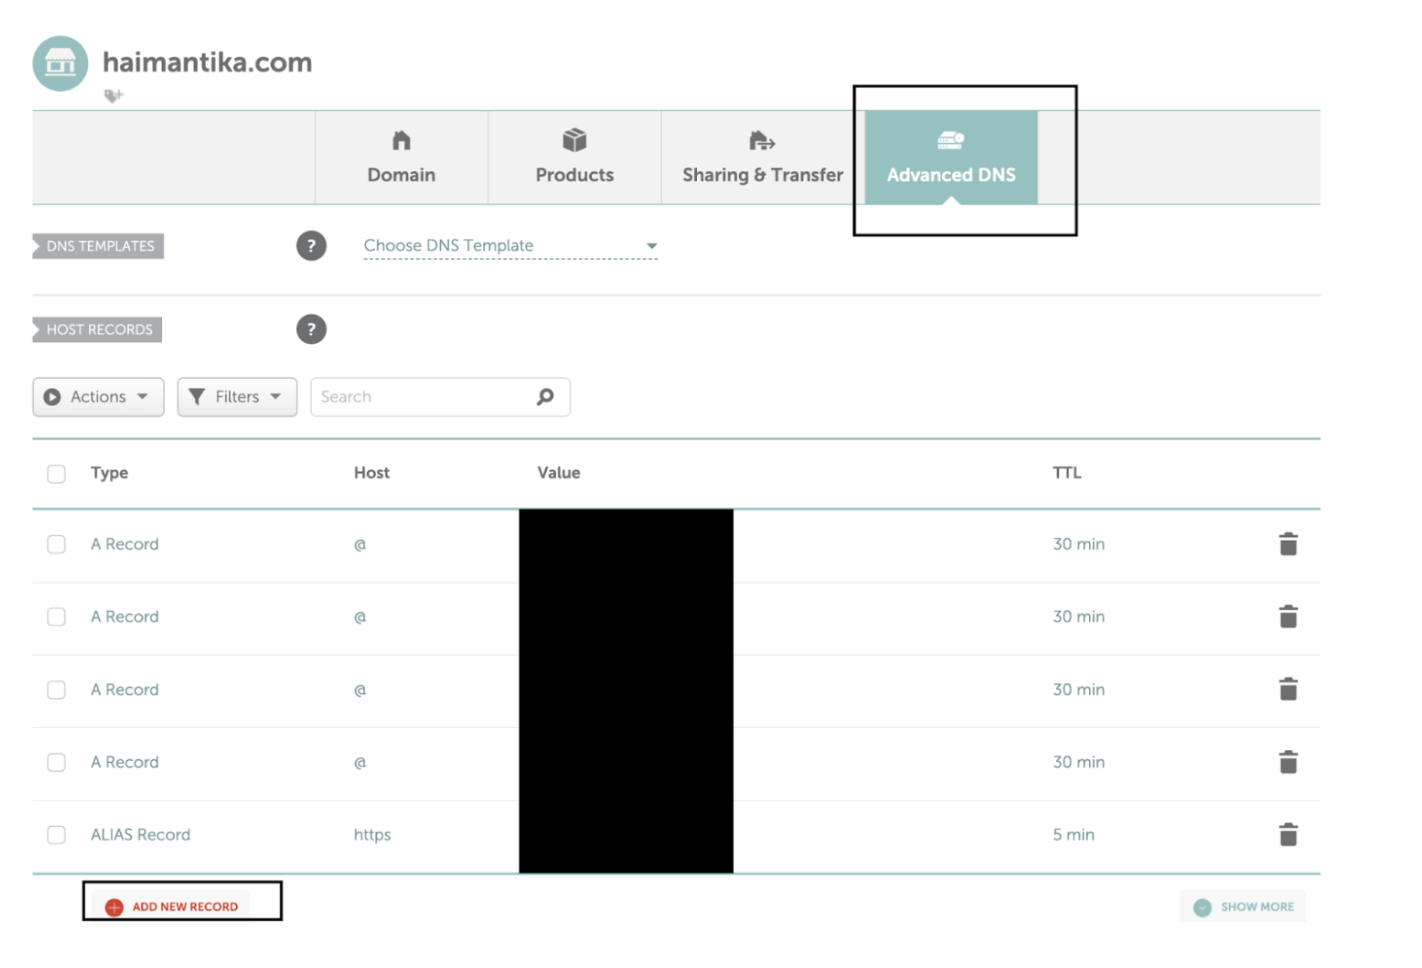
- Then, go to DigitalOcean’s control panel and copy the link from the field shown below.
- Paste it in Namecheap and save your changes.

That’s all! Now, you have your application mapped to your custom domain.
Conclusion
In this article, you learned how to deploy your applications and manage custom domains using DigitalOcean.
Custom domains can help your website rank higher in search engines because they are unique and relevant to your brand. It also makes it easier for people to remember the URL and access your application.
Here are some best practices to follow for a custom domain:
-
Ensure SSL/TLS security, as it encrypts data and improves SEO by providing a secure connection.
-
Monitor domain health regularly to detect issues and maintain optimal performance for users.
-
Create backups to protect against data loss and allow for a quick recovery if your domain or site experiences problems.
Next steps
If you decide to discontinue your app for some reason, make sure to remove the custom domain before deleting the app. To remove it, go to the control panel, click on your app, and then click on Settings. Next, click the Edit link to the right of Domains and the triple-dot (…) menu item, and finally, click on Remove Domain to remove the domain.
Here’s a list of resources that can come in handy:
Source:
https://www.digitalocean.com/community/tutorials/deploy-apps-with-custom-domain