


If you’re looking for a way to test and deploy your CircleCI Docker images, creating a CI/CD pipeline can take you a long way to improve software delivery.
In this tutorial, you’ll learn how you can potentially develop a CI/CD pipeline for your Docker image using CircleCI.
Read on and deploy your Docker images, only if they pass the test!
Prerequisites
This tutorial will be a hands-on demonstration. If you’d like to follow along, be sure you have the following:
- A GitHub account and GitHub repository that is already set up.
- A CircleCI account linked to your GitHub account.
- Docker installed.
- A Linux machine – This tutorial uses Ubuntu 20.04.3 LTS.
Creating a Docker Image of a Python-Based Application
Before jumping to creating a CI/CD pipeline, you’ll first build a Docker image based on a Python application that displays texts on a web browser. You’ll briefly go through how the application is built, write the test cases for the application and then containerize the application.
1. Open your terminal, and run the following command to install Flask and Pytest. Flask is a framework used to build web applications in Python while Pytest is used to write tests Python code.
2. Next, create a project directory with your preferred name, but the project directory is called flask-circleci in this demo. This directory is where you’ll store your resources for this tutorial.
3. Create a file called flask-circleci/main.py and populate the following code.
The code below displays the “Welcome to my Flask App” text on a home page in a browser.
4. Now, create another file called flask-circleci/test_main.py and copy/paste the following code.
The code below creates a test client for your application.
Pytest requires that the name of your test file begins with test_ as demonstrated below.
5. Run the following commands to navigate to your project directory (flask-circleci), run the test for your project.
If the test succeeds, you’ll get 100% progress, as shown below.

6. Next, create a text file (requirements.txt) to document your dependencies in the root directory and populate the text below. This file is essential when building your Docker image so that it works properly.
7. Lastly, create a new file (flask-circleci/Dockerfile), and write the instructions below to the Dockerfile to build your Docker image.
The instructions in the Dockerfile perform the following:
- Create a file in your image.
- Copies all the files in the files in the current directory (flask-circleci).
- Run your code
Creating a CircleCI CI/CD Pipeline
Now you have your Docker image ready, you’ll create a CI/CD pipeline to test your code, and if all tests pass the Docker image and pushed to Docker Hub. Docker Hub is a service like GitHub, but for Docker images, that helps you find and share container images with your team or other developers.
To create the CI/CD pipeline, follow the steps below:
1. Open your favorite web browser and log in to your Docker Hub account.
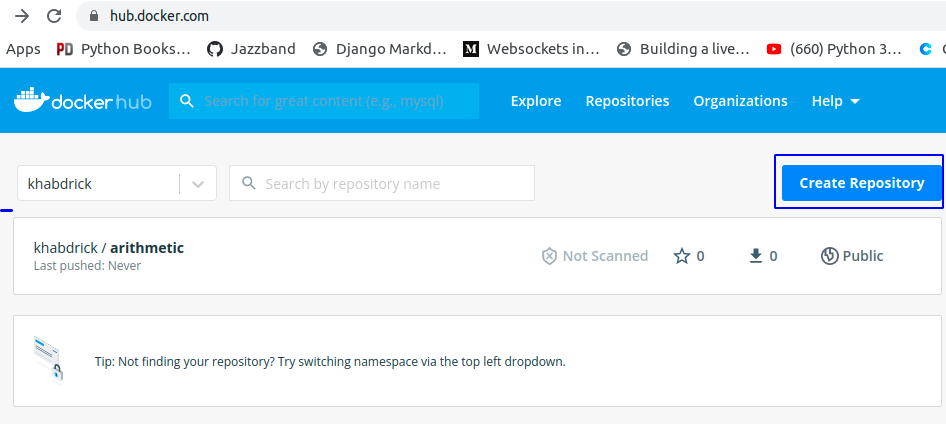
2. On the Docker Hub home page, click on the Create Repository option to create a repository on Docker Hub.
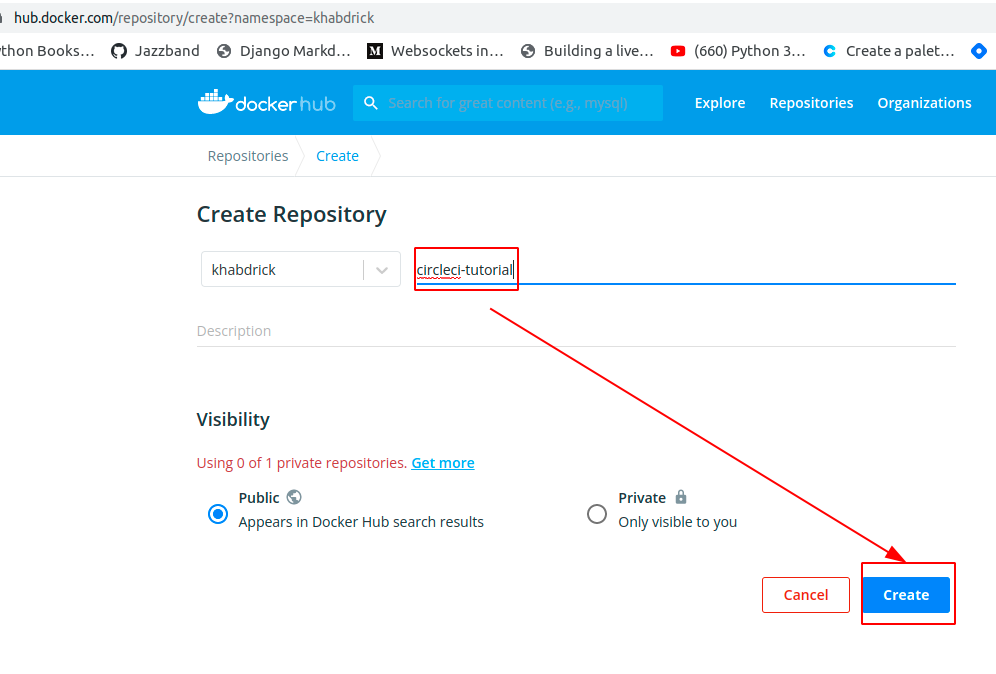
3. Set a unique name for your repository. This tutorial uses a repository called circleci-tutorial, as shown below.
4. Create a new file (flask-circleci/config.yml) at the root of your project, and copy/paste the code below to the config.yml file.
The code below gets a ready-made Python image and uses it to install the dependencies and run the unit tests to build and push your Docker image to your repository Docker Hub.
Typically, for a live project, you’d want to put your username and password protected within CircleCI or maybe in a .env file.
5. Finally, run the following commands on your project’s root to commit and push the code (flask-circleci/config.yml) to your GitHub repository.
Activating the CircleCI CI/CD Pipeline
You’ve just created your CircleCI CI/CD Pipeline, but right now, it’s just sitting there and not doing much. You’ll have to activate your pipeline by setting up a project in your CircleCI account.
1. Log in to your CircleCI account with your GitHub account on your web browser.
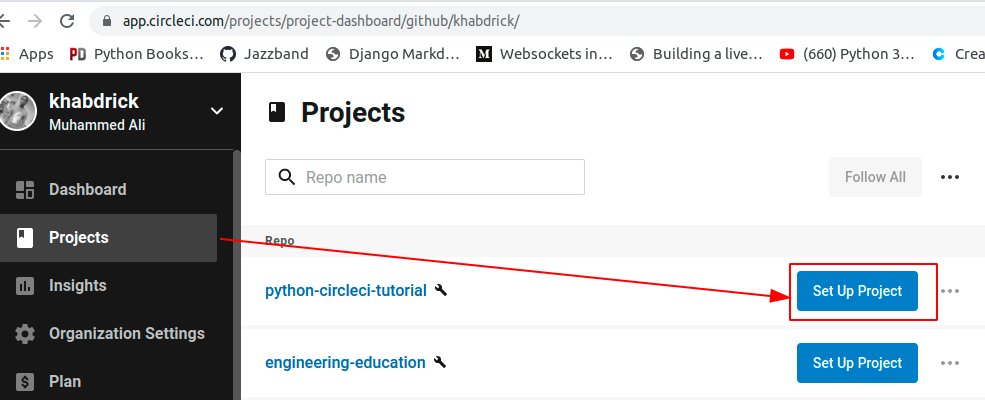
2. Next, click the Projects tab on the left panel, and click the Set Up Project button on the right side of your project to activate the CircleCI pipeline on the project.
Since you logged in to CircleCI with your GitHub account, your projects sync with CircleCI, like in the image below.
3. Navigate back to the Dashboard tab and you’ll see the Success status. The Success status indicates everything ran as expected, and the image has been pushed to your Docker Hub repository.
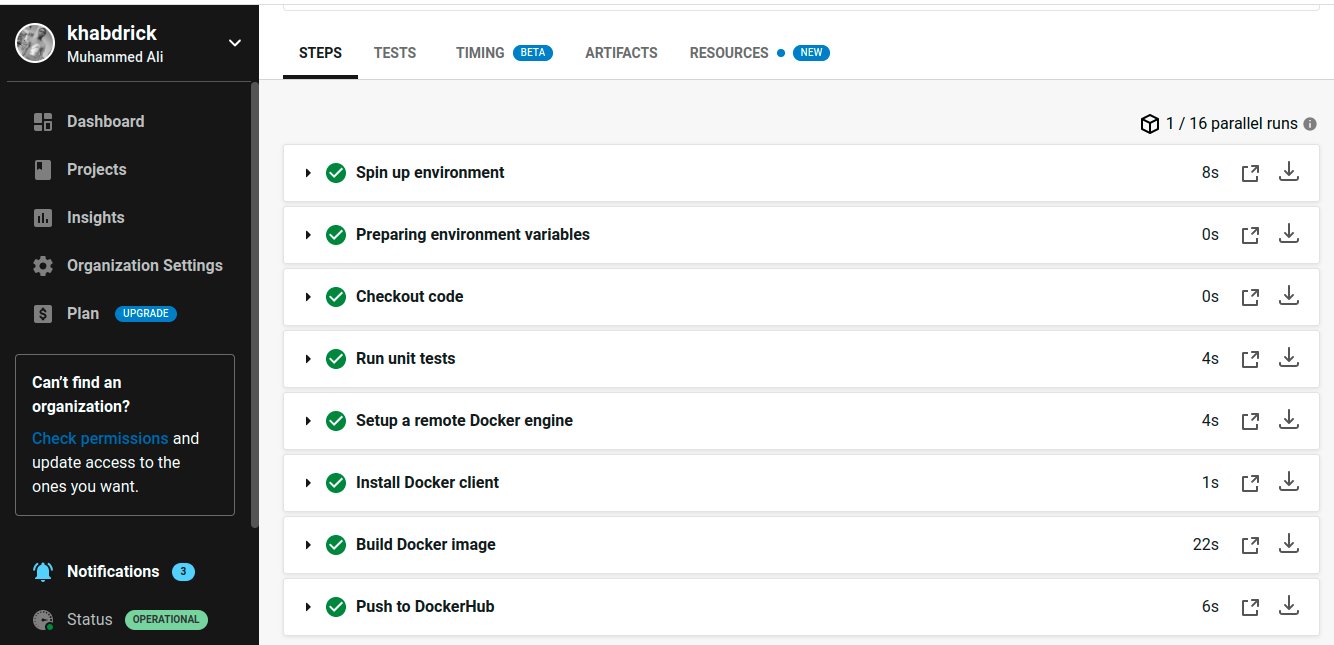
Click on build to see all the steps that ran in the pipeline.
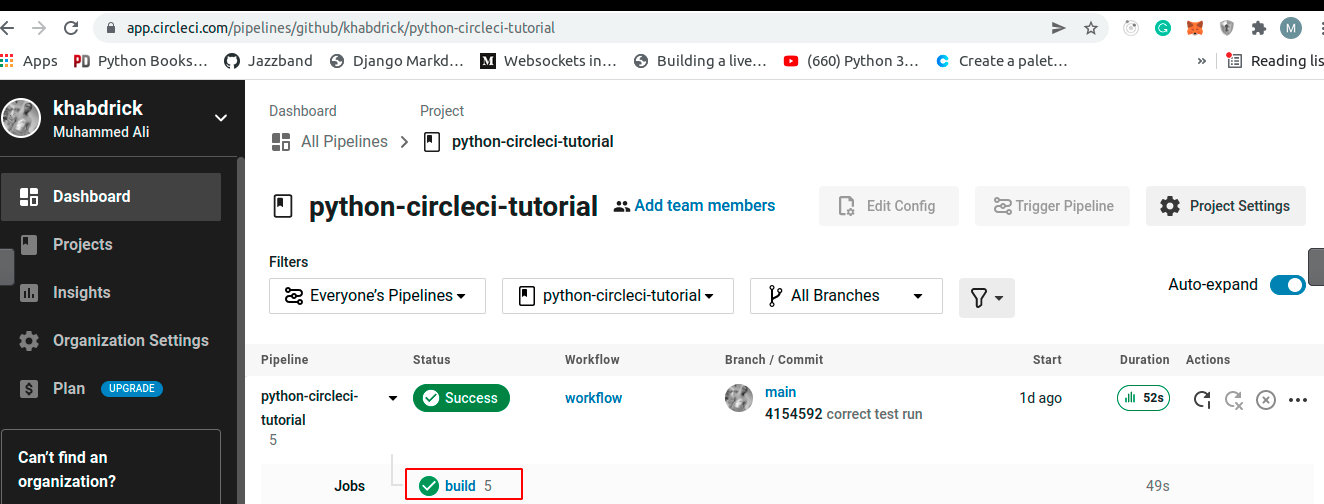
Below, you can see the list of steps CircleCI took to run the pipeline.
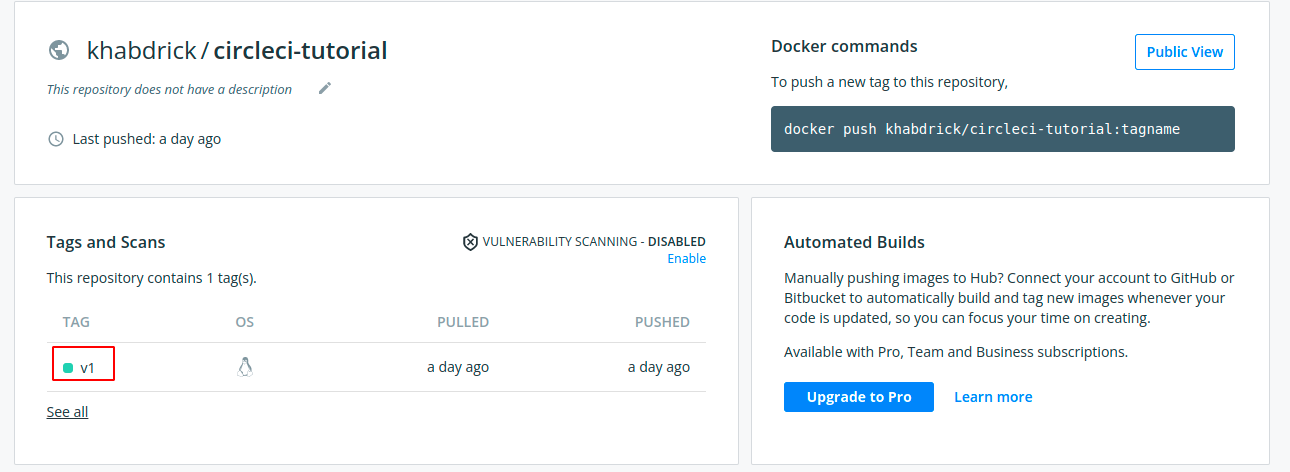
4. Finally, switch back to your Docker Hub repository, and you’ll see the image you pushed to Docker Hub through the CircleCI pipeline.
Pushing Changes to GitHub to Trigger the CircleCI Pipeline
By now, you already have a working CircleCI pipeline. But perhaps you made changes to your project. If so, how would you know the pipeline still works? You can trigger CircleCI by pushing changes to your GitHub repository and see if the test will succeed.
1. On your local machine, replace the code you have in test_main.py with the code below. The code below purposely ensures the test fails because the status code changed from 200 to 400.
2. Next, replace the steps in the config.yml that builds the Docker image and pushes it to Docker Hub with the code below.
In the code below, you’re just changing the version to ensure sure only new changes are pushed to your GitHub repository.
3. Run the following commands on your project’s root to commit and push the code to your GitHub repository.
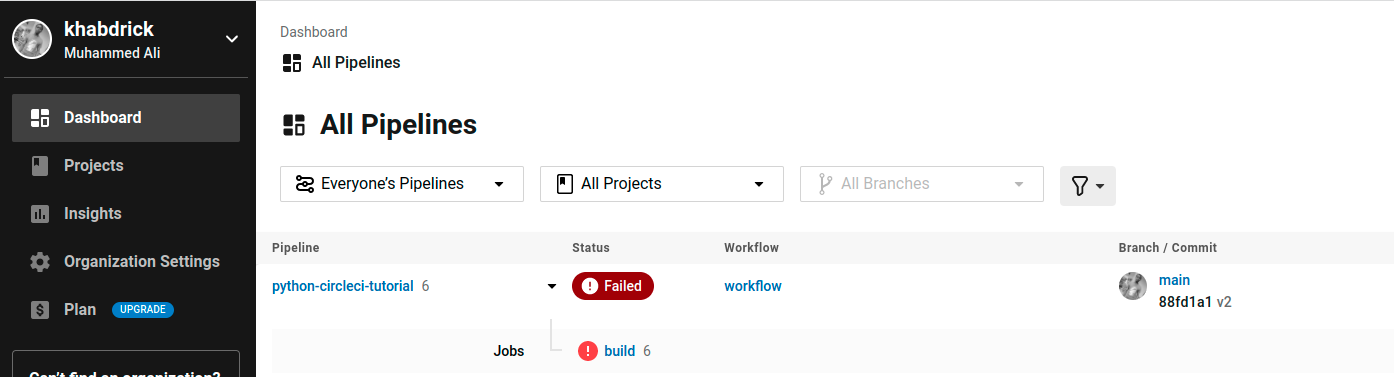
4. Now, navigate to your CircleCI dashboard, and you’ll see that the build Failed, as shown below.
Click on build to see the steps taken to push the changes and confirm what caused the build to fail.

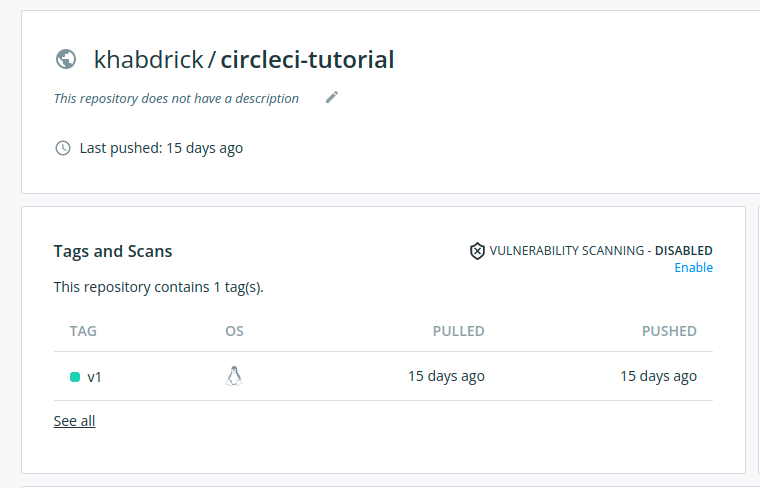
5. Lastly, navigate to your Docker Hub repository and confirm the changes were not pushed.
As you can see in the image below, v2 wasn’t uploaded because the test failed.
Conclusion
Throughout this tutorial, you’ve learned how to write tests, and Dockerize your Python application. You’ve created a CI/CD pipeline with CircleCI that runs the test for your application and pushes your Docker image to Docker Hub.
At this point, you already have a foundational knowledge of developing a CI/CD pipeline with CircleCI. Now, how do you intend to use this newfound knowledge? Perhaps creating a CI/CD pipeline that deploys your Docker image to Heroku?
Source:
https://adamtheautomator.com/circleci-docker-images/