


大多數使用REST的系統間通信組件都將其負載序列化為JSON。截至目前,JSON缺乏一個被廣泛使用的模式驗證標準:JSON Schema尚未普及。標準的模式驗證允許將驗證工作委託給第三方庫並完成。如果沒有這樣的標準,我們就必須在代碼中進行手動驗證。更糟糕的是,我們必須保持驗證代碼與模式同步。
XML則內建了模式驗證:一個XML文檔可以聲明它必須遵守的語法。SOAP,作為基於XML的協議,也從中受益。
其他序列化選項也提供了模式驗證功能,例如Avro、Kryo和Protocol Buffers。有趣的是,gRPC使用Protobuf來實現跨分佈式組件的RPC:
gRPC是一個現代開源的高性能遠程過程調用(RPC)框架,可在任何環境中運行。它可以在數據中心內部以及跨數據中心高效連接服務,並提供可插拔的負載平衡、跟踪、健康檢查和身份驗證支持。它也適用於分佈式計算的最後一英里,用於連接設備、移動應用程序和瀏覽器到後端服務。
此外,Protocol 是一種二進制序列化機制,節省大量頻寬。因此,gRPC 是系統間通信的極佳選擇。但如果所有組件都使用 gRPC 通訊,簡單的客戶端如何調用它們呢?本文將建立一個 gRPC 服務並展示如何從 cURL 調用它。
A Simple gRPC Service
gRPC 文件非常詳盡,以下是摘要:
- – gRPC 是一個遠程過程調用框架。
- – 它支持多種語言。
- – 它依賴於 Protocol Buffers。
Protocol buffers are Google’s language-neutral, platform-neutral, extensible mechanism for serializing structured data – think XML, but smaller, faster, and simpler. You define how you want your data to be structured once, then you can use special generated source code to easily write and read your structured data to and from a variety of data streams and using a variety of languages.
- – 它是CNCF的一部分,目前處於孵化階段。
讓我們設置我們的 gRPC 服務。我們將使用 Java、Kotlin、Spring Boot 和專門的 gRPC Spring Boot 集成項目。項目結構包含兩個項目:一個用於模型,一個用於代碼。首先從模型項目開始。
I didn’t want something complicated. Reusing a simple example is enough: the request sends a string, and the response prefixes it with Hello. We design this model in a dedicated Protobuf schema file:
syntax = "proto3";                                        //1

package ch.frankel.blog.grpc.model;                       //2

option java_multiple_files = true;                        //3
option java_package = "ch.frankel.blog.grpc.model";       //3
option java_outer_classname = "HelloProtos";              //3

service HelloService {                                    //4
    rpc SayHello (HelloRequest) returns (HelloResponse) {
    }
}

message HelloRequest {                                    //5
    string name = 1;                                      //6
}

message HelloResponse {                                   //7
    string message = 1;                                   //6
}-
– Protobuf 定義版本
- – 包
- – Java 特定配置
- – 服務定義
- – 請求定義
- – 字段定義:首先是類型,然後是名稱,最後是順序。
- – 回應定義
我們將使用 Maven 生成 Java 模板代碼:
<project>
  <dependencies>
    <dependency>
      <groupId>io.grpc</groupId>                         <!--1-->
      <artifactId>grpc-stub</artifactId>
      <version>${grpc.version}</version>
    </dependency>
    <dependency>
      <groupId>io.grpc</groupId>                         <!--1-->
      <artifactId>grpc-protobuf</artifactId>
      <version>${grpc.version}</version>
    </dependency>
    <dependency>
      <groupId>jakarta.annotation</groupId>              <!--1-->
      <artifactId>jakarta.annotation-api</artifactId>
      <version>1.3.5</version>
      <optional>true</optional>
    </dependency>
  </dependencies>
  <build>
    <extensions>
      <extension>
        <groupId>kr.motd.maven</groupId>                 <!--2-->
        <artifactId>os-maven-plugin</artifactId>
        <version>1.7.1</version>
      </extension>
    </extensions>
    <plugins>
      <plugin>
        <groupId>org.xolstice.maven.plugins</groupId>    <!--3-->
        <artifactId>protobuf-maven-plugin</artifactId>
        <version>${protobuf-plugin.version}</version>
        <configuration>
          <protocArtifact>com.google.protobuf:protoc:${protobuf.version}:exe:${os.detected.classifier}</protocArtifact>
          <pluginId>grpc-java</pluginId>
          <pluginArtifact>io.grpc:protoc-gen-grpc-java:${grpc.version}:exe:${os.detected.classifier}</pluginArtifact>
        </configuration>
        <executions>
          <execution>
            <goals>
              <goal>compile</goal>
              <goal>compile-custom</goal>
            </goals>
          </execution>
        </executions>
      </plugin>
    </plugins>
  </build>
</project>- – 編譯時依賴
- – 嗅探操作系統信息;用於下一個插件
-
– 從
proto文件生成 Java 代碼。
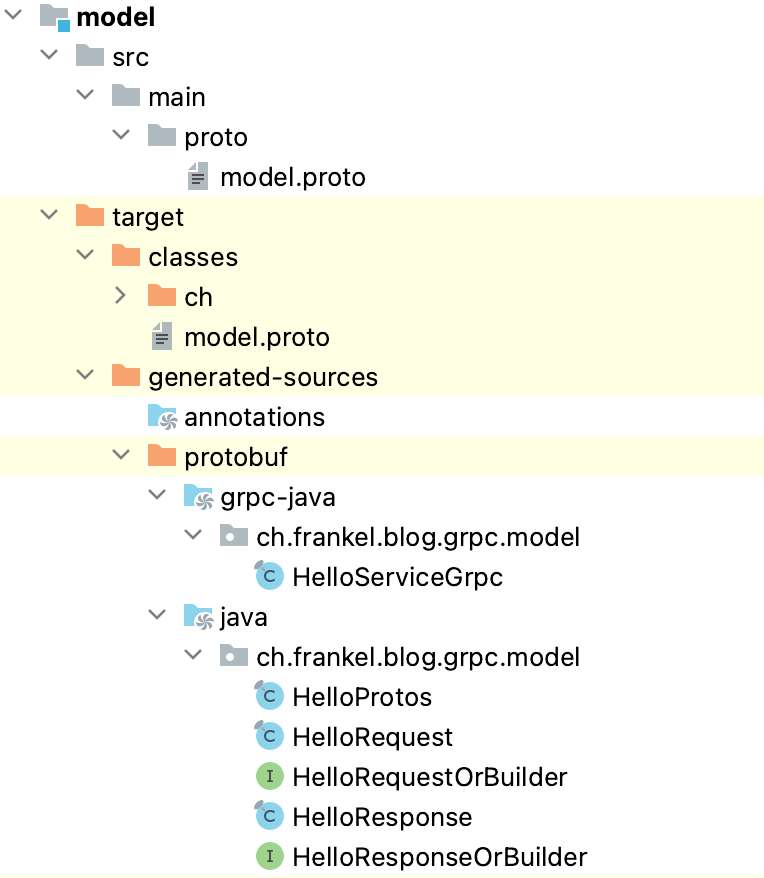
編譯後,結構應該大致如下:
我們可以將類別打包成JAR,並在Web應用程式專案中使用。後者使用Kotlin,僅因為它是我最喜愛的JVM語言。
我們只需一個特定的Spring Boot啟動依賴項來整合gRPC端點與Spring Boot:
<dependency>
  <groupId>net.devh</groupId>
  <artifactId>grpc-server-spring-boot-starter</artifactId>
  <version>2.14.0.RELEASE</version>
</dependency>
關鍵部分如下:
@GrpcService                                                        //1
class HelloService : HelloServiceImplBase() {                       //2
  override fun sayHello(
      request: HelloRequest,                                        //2
      observer: StreamObserver<HelloResponse>                       //3
  ) {
    with(observer) {
      val reply = HelloResponse.newBuilder()                        //2
                               .setMessage("Hello ${request.name}") //4
                               .build()
      onNext(reply)                                                 //5
      onCompleted()                                                 //5
    }
  }
}grpc-server-spring-boot-starter偵測到註解並施展其魔法。- 上述專案中生成的參考類別
- 方法簽名允許一個
StreamObserver參數。該類別來自grpc-stub.jar。 - 獲取請求並前置它以構建回應訊息。
- 播放事件。
我們現在可以啟動Web應用程式,使用./mvnw spring-boot:run。
測試gRPC服務
本文的核心理念是,使用常規工具訪問gRPC服務是不可能的。為了測試,我們仍需一個專用工具。我找到了grpcurl。讓我們安裝它並用它來列出可用的服務:
grpcurl --plaintext localhost:9090 list #1-2- 列出所有可用的gRPC服務,不進行TLS驗證。
- 為避免gRPC與其他通道(如REST)之間的衝突,Spring Boot使用另一個端口。
ch.frankel.blog.grpc.model.HelloService   #1
grpc.health.v1.Health                     #2
grpc.reflection.v1alpha.ServerReflection #2- 我們定義的gRPC服務
- 自定義啟動器提供的兩個額外服務
我們還可以深入探討服務的結構:
grpcurl --plaintext localhost:9090 describe ch.frankel.blog.grpc.model.HelloService
service HelloService {
  rpc SayHello ( .ch.frankel.blog.grpc.model.HelloRequest ) returns ( .ch.frankel.blog.grpc.model.HelloResponse );
}
最後,我們可以帶著數據呼叫服務:
grpcurl --plaintext -d '{"name": "John"}' localhost:9090 ch.frankel.blog.grpc.model.HelloService/SayHello
{
  "message": "Hello John"
}
使用常規工具存取gRPC服務
假設我們有一個常規的JavaScript客戶端應用程式,需要存取gRPC服務。有哪些替代方案呢?
一般的方法是透過grpc-web:
A JavaScript implementation of gRPC for browser clients. For more information, including a quick start, see the gRPC-web documentation.
gRPC-web客戶端透過一個特殊代理連接到gRPC服務;預設情況下,gRPC-web使用Envoy。
未來,我們預期gRPC-web將在Python、Java和Node等語言的特定語言Web框架中得到支援。詳情請參閱路線圖。
– grpc-web
描述中提到一個限制:它僅適用於JavaScript(截至目前)。然而,還有另一個限制。它相當侵入性。您需要獲取proto文件,生成模板代碼,並使您的代碼呼叫它。您必須為每種客戶端類型都這樣做。更糟的是,如果proto文件變更,您需要在每個客戶端中重新生成客戶端代碼。
不過,如果您使用API Gateway,則存在一種替代方案。我將描述如何使用Apache APISIX來實現,但可能其他閘道也能做到同樣的事情。grpc-transcode是一個插件,允許將REST呼叫轉碼為gRPC並反向操作。
第一步是在Apache APISIX中註冊proto文件:
curl http://localhost:9180/apisix/admin/protos/1 -H 'X-API-KEY: edd1c9f034335f136f87ad84b625c8f1' -X PUT -d "{ \"content\": \"$(sed 's/"/\\"/g' ../model/src/main/proto/model.proto)\" }"第二步是使用上述插件創建路由:
curl http://localhost:9180/apisix/admin/routes/1 -H 'X-API-KEY: edd1c9f034335f136f87ad84b625c8f1' -X PUT -d '
{
  "uri": "/helloservice/sayhello",                           #1
  "plugins": {
    "grpc-transcode": {
      "proto_id": "1",                                       #2
      "service": "ch.frankel.blog.grpc.model.HelloService",  #3
      "method": "SayHello"                                   #4
    }
  },
  "upstream": {
    "scheme": "grpc",
    "nodes": {
      "server:9090": 1
    }
  }
}'- 定義一個細粒度的路由。
- 參考先前命令中定義的proto文件。
- gRPC服務
- gRPC方法
至此,任何客戶端都可以向定義的端點發起HTTP請求。Apache APISIX將對調用進行轉碼,將其轉發到定義的服務,獲取響應,並再次進行轉碼。
curl localhost:9080/helloservice/sayhello?name=John
{"message":"Hello John"}相較於grpc-web,API Gateway的方法允許將proto文件與單一部件共享:Gateway本身。
轉碼的好處
此時,我們可以利用API Gateway的功能。假設如果未傳遞name,我們希望有一個默認值,例如World。開發者會樂於在代碼中設置它,但對該值的任何更改都需要完整的構建和部署。如果我們將默認值放在Gateway的路由處理鏈中,更改可以幾乎即時。讓我們相應地更改我們的路由:
curl http://localhost:9180/apisix/admin/routes/1 -H 'X-API-KEY: edd1c9f034335f136f87ad84b625c8f1' -X PUT -d '
{
  "uri": "/helloservice/sayhello",
  "plugins": {
    "grpc-transcode": {
      ...
    },
    "serverless-pre-function": {                    #1
      "phase": "rewrite",                           #2
      "functions" : [
        "return function(conf, ctx)                 #3
          local core = require(\"apisix.core\")
          if not ngx.var.arg_name then
            local uri_args = core.request.get_uri_args(ctx)
            uri_args.name = \"World\"
            ngx.req.set_uri_args(uri_args)
          end
        end"
      ]
    }
  },
  "upstream": {
      ...
  }
}'- 通用多功能插件,當無合適插件時使用
- 重寫請求。
- 神奇的Lua代碼,完成任務
現在,我們可以執行帶有空參數的請求並獲得預期的結果:
curl localhost:9080/helloservice/sayhello?name
{"message":"Hello World"}結論
在本篇文章中,我們簡要介紹了gRPC及其如何促進服務間的通信。我們使用Spring Boot和grpc-server-spring-boot-starter開發了一個簡單的gRPC服務。然而,這也帶來了一個問題:常規客戶端無法訪問該服務。我們不得不使用grpcurl來進行測試。同樣地,基於JavaScript的客戶端或瀏覽器也面臨相同問題。
為了克服這一限制,我們可以利用API Gateway。我演示了如何配置Apache APISIX並使用grpc-transcode插件來達到預期效果。
本文的完整源碼可在GitHub上找到。